Browsing the archives for the baking with kids tag.

Baking With Kids – Sticky Toffee Pudding

Domestic, Kids

This is a hit or miss when it comes to the kids actually eating it at the end, but Miss Wee One #3 really liked making it. Some of our friends in the 10 and over crowd liked it, all the adults who tried it loved it, but none of the littlest ones liked it very much. Except for the syrup. Oh my. It so good, I made extra to give to a friend that loves caramel because it has that caramel taste to it (it’s only one ingredient away from the Amish caramel I make). I haven’t tried yet, but I’d imagine it would be perfect on everything from ice cream to apple slices.

I think the syrup is the main attraction here and it really takes the date cake over the top, but the cake itself is pretty good. It is a spice cake dotted with dates which really make or brake loving this or not. If you’re into them, it’s a win. If you’re not, just leave them out!

Baking With Kids - Sticky Toffee Pudding

Sticky Toffee Pudding via Baking with Kids

Cake:
1 cup pitted, chopped dates
1 1/4 cups boiling water
1 teaspoon baking soda
4 tablespoons unsalted butter, softened
3/4 cup granulated sugar
1/2 teaspoon vanilla extract
2 extra large eggs
1 2/3 cups flour
1 teaspoon baking powder
Syrup:
2/3 cup brown sugar
4 tablespoons butter
1 cup light cream

Preheat to 350, and pour the boiling water over the chopped dates. Add the baking soda and let it sit for a while.

Mix the sugar, butter and vanilla until well combined. Whisk the eggs on their own to break them up and then add them to the sugar/butter mixture one at a time. Make sure it’s well mixed each time.

Baking With Kids - Sticky Toffee Pudding
Here’s the water/dates/baking soda ready to roll.
Baking With Kids - Sticky Toffee Pudding
Sift the baking powder with the flour and add to the egg/butter/sugar mixture, then add the water and date mixture and mix it up!
Bake for about 45 minutes.
Baking With Kids - Sticky Toffee Pudding
Make the syrup while the cake is baking by heating brown sugar, butter and cream until it starts to bubble and crystallize at the edges.

Baking With Kids - Sticky Toffee Pudding
Once the cake is ready, chop it up however you like and then drown it in the syrup. Voila!

Baking With Kids - Sticky Toffee Pudding
No Comments

Baking with Kids – Banana Loaf

Domestic, Kids

We have made this recipe so many times, I’ve lost count. These pictures are from the first time we made it and they make me nostalgic for our old house, though I quickly remember the snow raging outside so much of the time and then I’m thankful for the beach. šŸ˜‰

Where ever we are, there is always a lot of baking going on, and this recipe has been one of the ones that has moved around with us. The only down side to non stop summer is there are no cold winter nights that it makes sense to bake something like this on, but of course we bake it anyway!

Baking with Kids - Banana Loaf

Banana Loaf via Baking with Kids

2 cups flour
1 teaspoon baking soda
pinch salt
1/2 cup packed light brown sugar
1/2 cup granulated sugar
7 tablespoons butter
2 eggs
2 large bananas, mashed
1/2 cup chocolate chips or chunks

It’s a pretty standard banana bread recipe, but it’s so so good!

Preheat the oven to 350, and grease a loaf pan.

Sift the flour, baking soda and salt into a mixing bowl and stir in both sugars. Make a little well in the middle of the mixture. Melt the butter either in a small pot on the stove or in the microwave and pour that and the eggs into the well. Mix it all up and add the bananas. Mix again and then add the chocolate chips or chunks.

Pour into the loaf pan, pop in the oven and bake for about an hour.

Baking with Kids - Banana Loaf

The best thing about this recipe is the kids can so it almost all themselves, especially if you have an older one to help with melting the butter and pouring the batter into the loaf pan. The satisfaction they get from cracking eggs, mixing, stirring and baking is one of those unmatched things. Making something the rest of the family loves is pretty special too! It helps that this loaf is so moist and just sweet enough. It’s not overpowering with the banana flavor either, just perfect – which is probably why we’ve made it so many times!

No Comments

Popovers (& Williams Sonoma / Sur la Table Giveaway Winner)

Domestic, Kids

This week I’m linking up with Organizing Junkie!

First thing on my mind this morning was hitting up random.org to choose a winner for the Williams Sonoma / Sur la Table giveaway, sponsored by Country Crock. We had 5 entries, I numbered each person 1-5 and the random number generator picked…..


Congratulations Julie! Email me back and Country Crock will get your prizes out to you!

So most of you know we are going to Vegas for Thanksgiving this year to celebrate with a dear friend and her children. A dear friend who just happens to be a real, live, Southern Belle! Please note the capitalization. She’s from the south, y’all so our very first American Thanksgiving is going to be a down home American Thanksgiving. We will be spending the whole day cooking and cleaning and then cooking and cleaning and cooking and baking and cleaning – all with 7 children underfoot. I will do some prep here since I’m not sure it’s physically possible to do the entire menu in a single day at her house. We are, both of us painfully, overachievers. Expect epicness next Thursday.

Anyhoo, so since we have so many kids between the two of us and since arts and crafts will only distract them for so long, I’d love for them to jump into the kitchen for a kid-friendly recipe! This comes from Linda Collister’s Baking with Kids (the best kid’s cookbook we’ve ever used). My kids have made this recipe so many times I’ve lost count. Not So Wee One #1 likes these with a little butter, Wee One #2 likes them with jam and Wee One #3 likes them with maple syrup – and they all like them still warm! They’re a hit with grown ups too, especially good with gravy – you know, like with a serious turkey dinner!

Baking with Kids Popovers

Popovers – via Baking with Kids

1 cup whole or half fat milk
1 cup all purpose flour
1/4 teaspoon salt
1 tablespoon wheatgerm or oat bran
3 extra large eggs
2 tablespoons melted butter

Baking with Kids Popovers
Preheat your oven to 425 and add the milk, flour, salt and wheatgerm (or oat bran) to a food processor or blender and process just to mix them.
Baking with Kids Popovers
Now it’s egg breaking time and they’re really serious about it.
Baking with Kids Popovers
Melt the butter and add it and the eggs to the processor and pulse again until it’s well blended together. If your food processor has a spout (or you used a blender), you’re set. Otherwise, pour the batter into a pitcher to make it easier for the kids to pour it into the (lightly greased) muffin cups. Each muffin cup should be about half full.
Baking with Kids Popovers
Now carefully watch them puff up. šŸ™‚ Bake for 25 minutes and then without opening the door turn the oven down to 350 and bake for another 15 minutes.
Baking with Kids Popovers
They are best just a few minutes out of the oven, which is perfect for impatient wee ones, but they are still good later the same day!

Now, since it’s menu Monday after all, here’s what’s up this week around here!

This Week’s Menu (Nov 12 – Nov 18)

Monday – Beef Stew with Cheesy Pull Apart Bread and Boston Cream Whoopie Pies for dessert

Tuesday – Chicken Alfredo with Ceaser Salad and Fudgey Oreo Brownies for dessert

Wednesday – Toasted Ravioli with Parmesan Knots and Sugar Cookie Bars for dessert

Thursday – Chicken Crescent Rolls with Hush Puppies and Triple Chocolate Pound Cake for dessert

Friday – Chicken Florentine Bowtie Pasta with Garlic Cheddar Biscuits and Rolo Cupcakes for dessert

Saturday – Old Fashioned Chili with Bacon Cornbread and Cookie Dough Brownies for dessert

Sunday – Chicken Parmigiana with Scalloped Potato Stacks and Nutmeg Donuts with Berry Icing for dessert

3 Comments

Baking With Kids – Lemon Ricotta Cheesecake

Domestic, Kids

My most eager baker assisted me with this one. Actually, it’s gotten to the point now where I’m the one assisting her, which I totally adore! She gets really into it and unlike the usual ‘dump, stir, lose interest’ category that most kids fall into (including Wee One #1), she really wants to be involved in every part of it. So sweet!!

The weird thing about cooking and baking your way through cookbooks is there will eventually be a recipe no one wants to try. For some reason the word ‘cheesecake’ doesn’t sit right with the kids, and my husband and I are not huge fans of dairy. Well, correction. Dairy isn’t a fan of either of us. Once it was out of the oven though, and the whole house had this wonderful cheesecakey smell going on, the kids caved and each had a piece. And then another. And then more the next day till it was gone.

This was recipe #11 from Baking With Kids!

Crust:
4 tablespoons butter
4.5 ounces plain wheaten crackers – we used graham crackers
1 tablespoon sugar

Topping:
2 tablespoons slivered almonds

Filling:
1lb tub ricotta cheese (about 2 cups)
1 cup sour cream
2 extra large eggs
3/4 cup icing sugar
2 tablespoons sliced almonds, ground
2 medium unwaxed lemons


The recipe has you crushing crackers, you could just use ground graham (or wheaten) crackers.


Melt the butter and mix it in with the crumbs and the sugar.


Mix it till it’s mostly combined.


Once it’s in the well greased springform pan, press the mixture flat.


Now mix the ricotta and sour cream in a big bowl with your mixer (or a spoon).


Crack the eggs into a separate bowl to avoid shells in your cheesecake!


Tip the egss in!


She likes to watch the kitchen power tools very carefully.


Now add the icing sugar and the ground almonds. This is also when we grated the lemons and added both the zest and the juice from the lemons to the mix.


Sooooo creamy. Pour it over the crust!


Normally I’d say ‘sprinkle the slivered almonds on top and away you go’ but this Wee One is very specific about the placement of each almond sliver.


It’s her work of edible art!

Bake at 300F for 1 1/4 hours, then turn off the oven and leave it inside without opening the door for another 1 1/2 hours till the oven cools off. Then take the cheesecake out of the springform and serve it either as it is or with fresh berries!

No Comments

Baking with Kids – Chocolate Cupcakes

Domestic, Kids

The 10th recipe we made from Linda’s Collister’s Baking with Kids cookbook and Wee One #2 totally took over! I was so impressed with her! She has really become a mini domestic goddess in training and it’s so sweet to see!!


pink popcorn for miss america

Chocolate Cupcakes – from Baking With Kids (p. 17)

Cake:
1 1/2 cups four
1 tsp baking powder
pinch of salt
1/4 cup unsweetened cocoa
3/4 cup sugar
7 tbsp unsalted butter, softened
2 extra-large eggs
1/2 cup whole milk
Frosting:
3 1/2 oz bittersweet chocolate
1 tbsp light corn syrup
2 tbsp unsalted butter
baking with kids chocolate cupcakes
Preheat your oven to 350F. Mix together the flour, baking powder, salt, cocoa and sugar.
This little miss is very precise, dontcha know.
baking with kids chocolate cupcakes
Add the butter to the bowl, and crack your eggs into a small bowl first to be sure you don’t get any shells in your cupcakes (this is especially important when your helper is under 10 years old).
Theeeeen dump them into the mixing bowl.
baking with kids chocolate cupcakes
Now add the milk!
Mix until you have a nice, smooth batter.
baking with kids chocolate cupcakes
Divide the batter between 12 muffin cups – either grease the pan or use cupcake liners. Bake for about 20 minutes and voila!
baking with kids chocolate cupcakes
For the frosting, break up whatever chocolate you like, (just make sure there’s about 3 1/2 oz of it), with the syrup and the butter. Melt it all together over a pan of hot water and mix till it’s all melty.
baking with kids chocolate cupcakes
Wee One #2 attacked all 12 cupcakes with frosting and then covered them in jelly beans, life savers and whatever other candies she could get her little hands on. So cute and way too yummy!

No Comments

Baking With Kids – Apple Hedgehogs

Kids


baking with kids apple hedgehogs

Apparently stuffing an apple with raisins or something else like it is a popular treat for kids – kids of a different generation obviously! Not my generation either because I had never heard of it before but when I mentioned it to a handful of people they tell me their grandmothers used to make similar treats for them. As usual, Linda Collister takes the idea one step further and slathers the outside of the apple in meringue and uses almond slivers to give it a hedgehog feeling! So so so cute and the kids had a great time making them. I confess we made these forever ago, if these were recent photos there’d be three of them because Wee One #3 is way more active in the kitchen than she used to be.

These were made on March 27/11 and were the 9th recipe we made from this book!

Apple Hedgehogs – from Baking With Kids (p. 108)

4 small to medium very tart apples
8 ready-to-eat dried apricots
3 egg whites
3/4 cup superfine sugar
4tbsp sliced or slivered almonds
baking with kids apple hedgehogs
First, preheat to 350F and peel your apples. Gather your almond slivers and raisins!
baking with kids apple hedgehogs
Remove the core of the apple, either use a proper apple corer or butcher it until it pops out like this! Next make the meringue by beating the egg whites on high till they’re stiff and add in the sugar.
baking with kids apple hedgehogs
While Wee One #1 made focused on the meringue, Wee One #2 set to work on filling the apples with the raisins. The meringue is maybe not as stiff as if I had made it, but I think it looks perfect by the hands of an 11 year old.
baking with kids apple hedgehogs
Now the stuffed apples are covered with the meringue…. ….and the almond slivers are poked into the meringue!
baking with kids apple hedgehogs
They both took the placement of their almonds very seriously. It was quite a sight really.
baking with kids apple hedgehogs
Naturally, the higher up your hedgehog’s quills point the more likely they are to get a little, ahem, ‘crispy’.
No Comments

Homespun Chocolate Bars, Cake, Cookies and Even a Chicken Salad

Domestic, Healthy, Kids

With just six school days left, there has been a lot of planning for end of year treats for the kids’ classes and their teachers. It’s a lot of fun to plan serious treats for their classes because there are 14 kids in Wee One #1’s class and 6 kids in Wee One #2’s class. Yup. 6 kids. More on those treats and end of school year fun in the next couple of weeks. For now, it’s catchup post time and man there are some really cute and tasty treats posted today!

The ‘homespun chocolate bars’ are 3 Musketeer bars, my Dad’s hands down favorite chocolate bar – I made a homemade version after seeing them on Beantown Baker last fall. Essentially, you make the filling, freeze it and then cut it and coat it in melted chocolate. This idea is only good in theory because the filling is made with ‘frozen whipped topping’ and we all know that stuff doesn’t actually freeze. So it’s beyond tricky to try to get them to hold their shape while either coating them or submerging them in melted chocolate. So naturally, I turned to my trusty chocolate molds to get the job done. It just occurred to me that I should have ordered some chocolate bar molds from Confectionery House when I ordered molds for the end of year treats. Oh well, next time. I think I will hold off on homemade chocolate bars until I have those molds though, they would make the job quick and painless. In my tute, I only posted instructions and photos of the filling in heart shaped molds.


The Wee One’s contribution to this week of playing in the kitchen was the Baking With Kids’ Chocolate Fudge Birthday Cake. I’d like to point out that it wasn’t anyone’s birthday! They passed it off as their sister’s birthday cake but that was weeks before and she had already had a cake. We don’t need an excuse to make a serious chocolate cake do we? What about a serious chocolate cake covered in sprinkles, candies and chocolate shavings? No? That’s what I thought! They had a blast making it and I really stepped back and let the two oldest ones have at it and they did a great job. It was dense but really, really moist and while there’s no denying it was chocolatey, it wasn’t too sweet. Just right for a birthday cake to be shared by little kids and grown ups!


This week’s cookie came from my Great Cookies cookbook – there are more than 200 cookie recipes in this book and much like a lot of my most used books, I’d love the opportunity to bake through this book. I’m trying! I’m not sure how many I’ve made from the book that I’ve posted on my blog so far since I haven’t been officially counting down but I have already made a few and a couple of them have become my most used recipe for certain types of cookies – like this one, the Double Chocolate Chip Cookie. There are a lot of double chocolate chip cookie recipes out there. Martha has a great double chocolate cookie with M&Ms and she has a really great espresso double chocolate chunk cookie (I really love adding coffee to pretty much whatever I can but I never ever ever give it to my kids – they don’t need any help at all with energy or stamina). So back to the recipe for this week’s cookie, this one has melted chocolate as well as cocoa in the dough plus of course the chocolate chips so technically you could call these triple chocolate chip cookies and get away with it!


After that triple shot of chocolate, I’m going to leave you with a healthier take on the traditional chicken salad. It seems chicken salad is another of those love love love or hate hate hate kind of foods. I am madly in love with chicken salad (almost as much as I love tuna salad) so I was equal parts leery and excited when it came time to try out Jessica Seinfield’s version in Deceptively Delicious. Another hit from this book for me. I’m the only one who ate it, because I’m the only one even remotely interested in chicken salad and I really liked it. I could not taste the cauliflower but knowing it’s in there I can see that it added to the creaminess of the salad and the yogurt also helped keep it all together. The celery gave it a little crunch and the eggs lent their familiar taste and texture to make this a really well rounded and tasty chicken salad (especially on ancient grain bread)!


I know that today is technically Work in Progress Wednesday but honestly, finishing a foot, kitchener stitching the toe and starting (and finishing) the ribbing on the second sock are all that’s happened on my Nemesis socks for my dad. I was crafty this week though – I finally made a really cute denim skirt from a very sad pair of jeans that had a serious rip up the side of one leg! I’m also starting work on a cute photo project I don’t want to say too much about until I’m done and ready to show it off. I will however say that I will be back a lot this week to post as much of the fun stuff in my cue as possible so I can get back to posting as I do stuff. This is our first summer in cottage country full time, so we’ve been walking to the beach after school and having bonfires after dinner to make legit s’mores for dessert! I smell a fun and delicious summer ahead!

5 Comments

Menu Monday and Week in Review (Orange Cake, Good Housekeeping Cookies, Cute Hair and Chocolate Chili Cake)

Domestic, Kids, Pretty

What a wonderful week we all had! Right after rolling out the new site and making a couple of posts my Dad came to visit us in the woods! We’ve seen him a bunch since we moved but he hadn’t come up to hang out yet! He made the 1 hour ++ walk into town 3 times – twice with Wee One #2 and once with Wee One #1. He helped with the kids and did almost all of the cooking. I tested a few recipes out on him and we had some of those amazing late night conversations about everything and nothing at the same time. We were all sad that he had to go home this morning, but I am sure my mother and my sister are missing him! When a visitor that special comes around, blogging can wait a few days, right? šŸ˜‰ I had intended to post these recipes/how to last week. An orange cake from Baking With Kids, my favourite chocolate chip cookies from Good Housekeeping, a silly but fun hair tutorial and a chocolate-chili birthday cake I made a few months ago! Ready? Here we go!

The kids are really getting into this – picking the recipes to make themselves. Sometimes they want to bake together and sometimes, like this recipe, one of them wants to try it out while the other one isn’t into to. Wee One #3 is always into it but she’s just 2 so she’s not much help. šŸ˜‰ This time around Wee One #2 really wanted to make the Orange Cake, so away we went. By the time she was done she had a small piece and it was pretty much time for bed. When my husband got snacky late that night he tried a piece, loved it, tried another piece, loved it more and the before he knew it he had eaten most of the cake! Whoops. Instead of being annoyed with him for eating her masterpiece, she said she was happy that her Daddy loved it so much. So cute!!

It was one of the simpler recipes in the book and at 5 years old, she had no trouble putting it all together.

The best part of the recipe for her was pureeing half an orange in the blender. It reminds me a lot of the clementine cake I made for Chinese New Year 2009, where seven clementines were briefly boiled, then chopped a bit and pureed whole. It was an amazing cake and so was this one.


I also posted the best chocolate chip cookie recipe I use on a regular basis. It’s from Good Housekeeping and I’ve been baking it since 2001! It’s simple and fast and you probably already have all of the ingredients in your kitchen right now.


My last foodie mention for this post is a Chocolate Chili Cake I made for my friend Andrew’s birthday this year! It was really good, I had my doubts really but I went with it because Andrew likes spicy foods and he’s always a good sport when it comes to my kitchen adventures. I went with this recipe and it worked out beautifully. This year, we celebrated Andrew and Talea’s birthdays together since they’re only a week apart and I don’t see everyone as much now that we live in the woods. Talea loves brownies way more than cake so I cut a hole in the middle of the cake and popped in a glass bowl full of dense brownies! I’m very pleased to report that both birthday peeps were happy with their treats!


I’ll end on a cute note – I have been playing with my hair more than ever, the more I mess around with it the more I want to mess around with it. I used to be a little nervous about doing something ridic with it because you know, then I’m the crazy lady with the weird hair but I’ve been the crazy lady with weird hair before anyway so why do I fret? My friend Jade always reminds me that it’s not fun without the fashion risks in life and hair certainly falls in that category so away we go. This will be one of the last hair tutes with black hair – that’s right people I’m going blonde. Again. For now though, I have a little tute of a cute half pony.

 
No Comments

Iā€™m baaaaack!!

Crafty, Domestic, Healthy, Kids, Pretty, Small Town

I’m baaaaack!!!

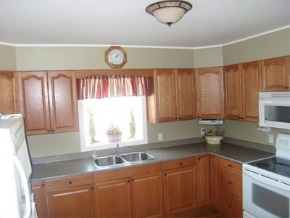
I know I said I’d be back in a week four months ago and as you can see there as been a whole overhaul around here, the blog has expanded to better sort and organize all the content and the really exciting news is in the middle of all of this – we bought a house!! There are a lot of reasons we love the house we bought but for now I’ll give you a sneak peak of our favourite parts – the backyard and of course the kitchen. There’s no way we could buy a house without a serious kitchen.

There will be more pictures as we move in and get settled – which isn’t happening until August anyway. The backyard is huge and has an area already set aside for gardening, and as you may have suspected, will be growing once I get my hands on it. The other thing I adore so much about this house is that it has a pantry – an absolute necessity in my dream kitchen.


The changes to this site have been long in the making and I am so happy to finally be finished and able to show it all off. I’m still going to be posting my weeklies – I love doing them! Just now I’ll be linking to the pages instead of putting the recipe or instructions directly in the blog post – this way I can include more than one if I want to.

Tomorrow, we’ll get back to business as usual, with a few little changes. The weekly line up looks like this now:

Mondays – Menu Mondays from Kate Says Stuff

Tuesdays – Tempt My Tummy Tuesdays, Tuesdays at the Table, Tuesday Night Supper Club and Hearth ‘n Soul

Work in Progress Wednesdays – from Freshly Pieced, Tami’s Amis and Musings from the Fishbowl

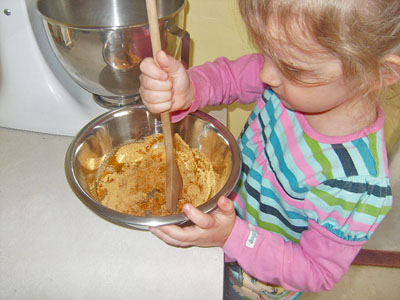
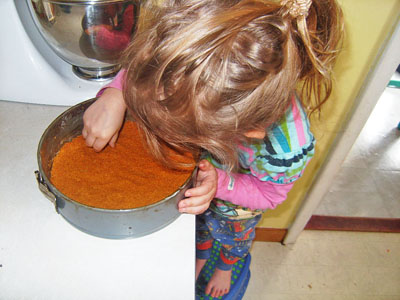
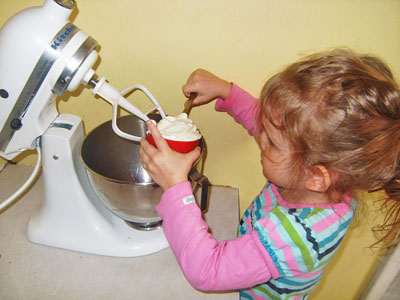
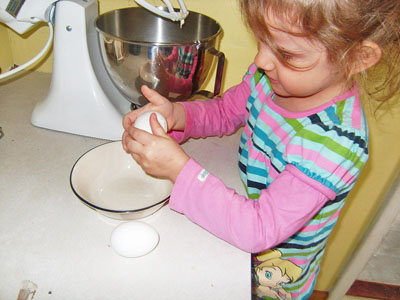
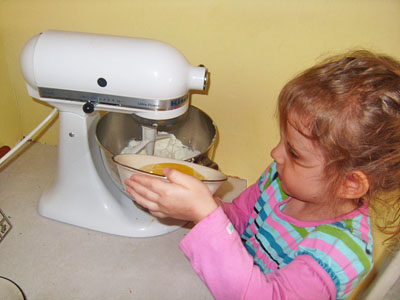
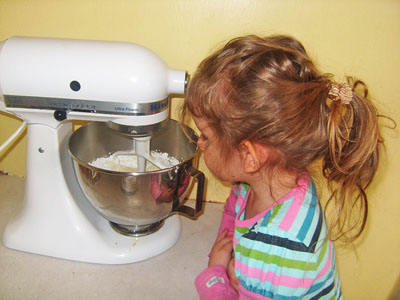
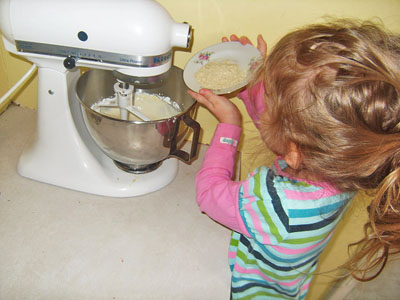
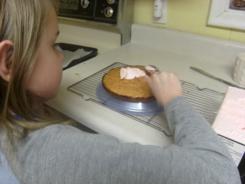
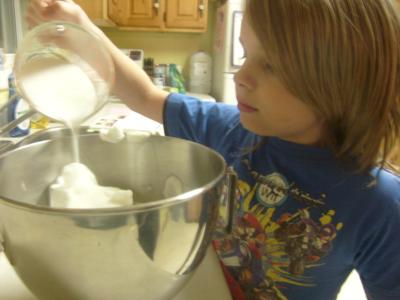
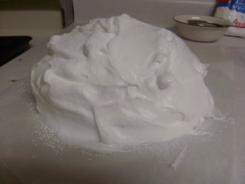
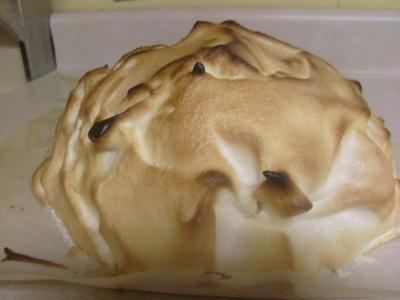
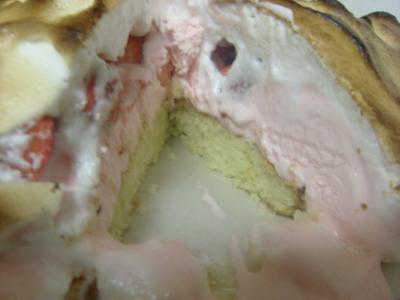
Baking with Kids Thursdays – documenting the kids’ cooking and baking through Baking with Kids

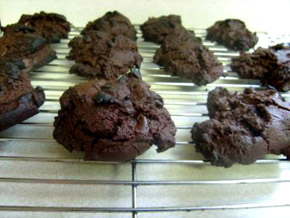
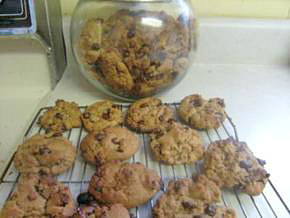
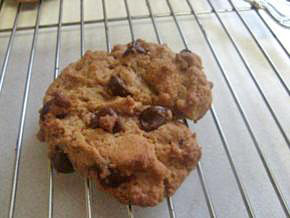
Cookie Fridays – perhaps the best day of the week, check out the gallery

Super Cute Saturdays – if I have time for this, so do you!

Catchall Sundays – rando day, for things that don’t fit anywhere else

I have still been doing my self-inflicted challenges, so I’ll be posting them as often as I can to catch up. Right now, I have a lot of fun stuff to share with you!

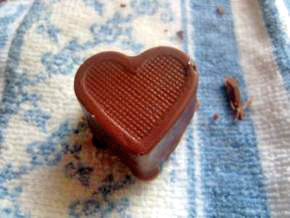
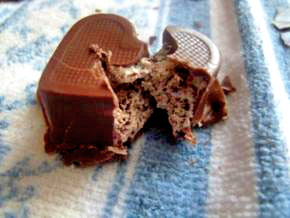
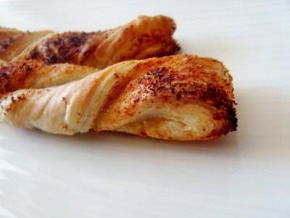
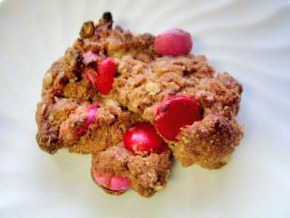
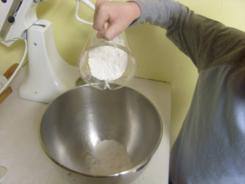
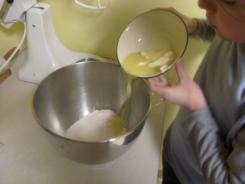
As far as my domestic endevours go, I feel head over heels for Bakerella’s Cupshakes, which essentially is a milkshake crossed with a cupcake. I also made step by step instructions for eclairs, and chocolate fudge. As part of the Baking With Kids challenge, where the kids are baking and cooking their way through Linda Collister’s cookbook, I made a batch of puff pastry for them to use in the giant cheese straws recipe. I also added the 4th cookie of the year, the playfully pink cowgirl cookies to the gallery.

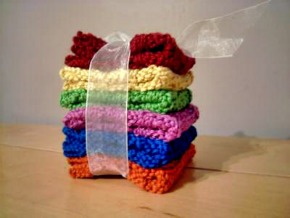
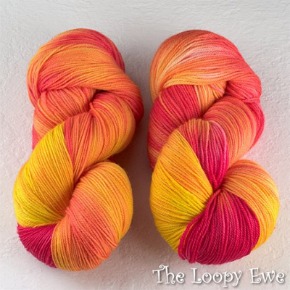
I have gotten my crafty groove back, though so far I’ve only posted about my stack of facecloths. Ahem. I did add two window shopping posts though, one on Charlene’s Supply Closet and one on The Loopy Ewe, two shops I am moderately to severely obsessed with. I’ve also added two interviews (Krissy of Krissyanne Designs and Megan of Radmegan) plus a book review of yet another new obsession – Martha Stewart’s Craft Encyclopedia. I’ve been busy!

There have been some health-concious related kitchen changes around here as well. I may as well just say it now without outing anyone, but two dear friends of mine have gone vegan. Which means two things really. First of course it means I now know way more than I ever wanted to know about being vegan and what rules there are and what different types of vegans there are which then also means I also know a whole lot about all kinds of scary stuff that even my vegan friends are not interested in. What’s that? SUGAR. Wowzers. White sugar is way worse than I thought and people let me tell you, I love me some sweet treats so what to do? I’ve been testing recipes using other kinds of natural sweeteners (because as bad as white sugar is fake sugar is even worse), and they’re working out pretty well. I mention this because while I am still cooking and baking my way through Deceptively Delicious, and while I am aware that adding veggies to pretty much anything is never a bad thing, I hesitate to call these recipes healthy knowing all that I know now. I am going to keep them in the ‘healthy’ category anyway because they are miles healthier than what used to come out of my kitchen. The second thing that happens when good friends go vegan is that I have to learn to cook and bake for them! I can’t have them coming up for the weekend to eat pasta and lettuce, can I?! I have been learning so much – expect some uber healthy additions to the healthy section in the coming weeks.

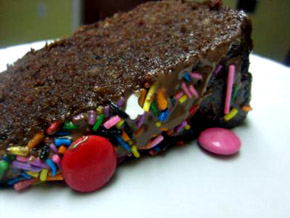
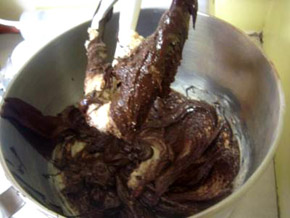
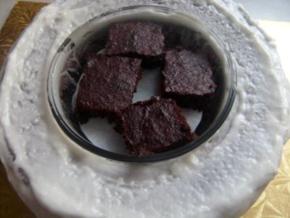
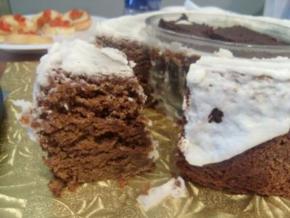
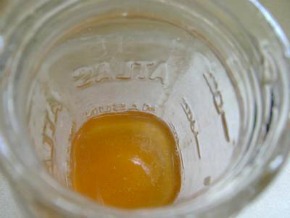
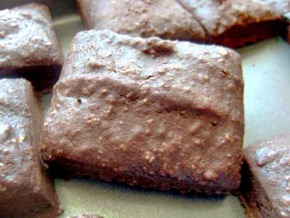
In the meantime though, here’s what I have added to that section to start with – Deceptively Delicious Stew (which adds pureed borccoli to a yummy stew), Dr Oz’s Green Smoothie (this is crazy healthy), Deceptively Delicious Mac & Cheese (with cauliflower puree and two kinds of cheese), Deceptively Delicious Applesauce Muffins (with applesauce duh and carrot puree), Deceptively Delicious Brownies (with pureed carrots and spinach), and an old school homemade Garlic, Honey & Lemon Cough Syrup recipe. Very old school, my Granny would be proud.

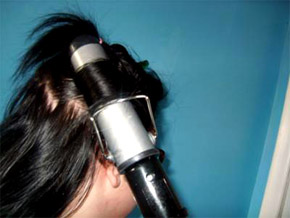
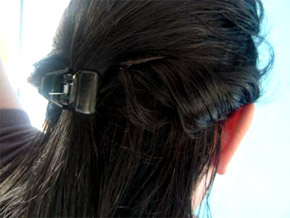
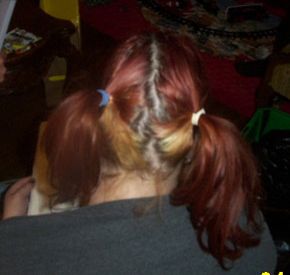
Aaaaad just like I said I would, I dove right into making a ‘pretty’ section. I’ve become more of a girly girl than ever in the last year so it’s been fun to write about it! I added two window shopping pieces, Body Shop and Mod Cloth, plus a 101 on Lotions, my Make Up Bag Must Haves and my first hair tutorial ever – my Puffy Bun, which literally takes 5 minutes – no more than 10 even with all three wee ones running underfoot at once.

Phew. I hope my little hanful of loyal readers are happy with the changes. Let me know what you think guys!!

2 Comments

Baking with Kids – Baked Alaska

Domestic, Kids

Yup, it’s true. My 10 year old made a Baked Alaska – about 95% on his own too. So what’s a Baked Alaska? I thought it was a better known dessert than it actually is. A Baked Alaska is ice cream and fruit on top of sponge cake, covered in meringue and then baked! So when you eat it, the meringue is warm, and the ice cream is still cold. Amazing.

I helped at a very crucial stage in the quick-cover-the-ice-cream-with-meringue stage. He opted to make this after Wee Ones #2 and #3 were in bed, even though he was making it for Wee One #2’s Godparents. We all agreed that as great as she is in the kitchen, baking ice cream may have been made even trickier with a 5 and 2 year old in the kitchen as well.

Baked Alaska – from Baking With Kids (p. 106)

For the Sponge
3/4 cup + 2 tbsp flour
1 tsp baking powder
1/2 cup + 1 tbsp sugar
1/2 cup butter, soft
1/2 tsp vanilla
2 eggs
1 tbsp milk
To finish
1 pint strawberry ice cream
4 eggs whites
1 cup + 2 tbsp sugar
1 1/2 cups chopped strawberries

Mix the flour and baking powder. The stir in the sugar, add the soft butter and vanilla.

Add the eggs, stir and bake in a greased cake pan for about 20 minutes at 350.


Make the meringue by beating the egg whites for about 10 minutes with a mixer.

Pop the cake in the fridge or freezer for about 15 minutes before spooning the strawberry ice cream on.


Top that with the chopped strawberries and meringue. Stir the sugar into the meringue and then spoon on top. Make sure the meringue is totally covering every little bit of the ice cream and cake. Every. Little. Bit.


Then pop the whole thing in the oven at 425 for 4 minutes. Cross your fingers that you didn’t miss a spot or you’ll have a pool if melted ice cream in your oven!

Mission accomplished! Amazing!!!

3 Comments
« Older Posts