Browsing the blog archives for December, 2009.

Fall Baking Round Up (Halloween and Birthdays)

Domestic

Making a different pie every week all year has lead to some pretty funny pies. I strive to rival Martha, and some days I do (hello Valentine’s Day, 2009!), but other days I end up making a chocolate crumb crust, lining the bottom with sliced apples and pouring chocolate pudding on top. Yup. Meet pie #47, Apple Chocolate Pudding Pie. It was delicious, for the record, but the description above is 100% true. My 9 year old could have made this, actually I bet my 4 year old could have made it too (she likes to make instant pudding in the Kitchen Aid)!

Moving along to treats I am more proud of, brain cupcakes made for wee one #1’s school Halloween party! One of my dearest friends, Talea, gave me an icing pen for my birthday this year, because 2010 is the Year of Cakes and Cupcakes! I used it for the first time to make these brains. I was so happy while making them because the pen, though a little fiddly to fill, works like a dream and made the cupcakes look all brainy! Of course, once they were all packaged up and ready to roll the night before the party I started to get self-conscious about them. Did they look brainy enough? Maybe I should have tinted the icing to be pinkish? Maybe I should have added blood? No.

I made these Chocolate Witch Hats from a Martha Stewart recipe. In her recipe is says to paint the cones with chocolate, but the image it conjured of the messy hands killed it for me. All you need; a box of sugar waffle ice cream cones, a tray of chocolate wafer cookies (I made mine from scratch thankyouverymuch), a bowl of broken Kit Kats, and a bowl of melted chocolate.


Dunk the ice cream cone into the melted chocolate, put a few broken Kit Kat pieces inside, and top it with the cookie (using the flat bottom of the cookie as the underside of the lid so it holds to the cone better), you may have to brush the seal with melted chocolate too. Just as many children ate these as adults once we got them into the school. Most of the office staff had one!

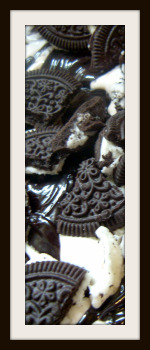
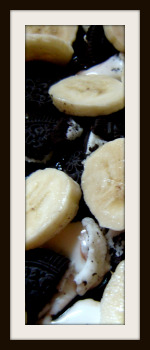
Shortly after all this Halloweening it up in the kitchen, I came across this post on Cake Spy from May on a Cookie Cake Pie, which naturally, got me very excited! I still had some of the cocoa cookie dough in the fridge from the Chocolate Witch Hats I had made, so I went with a chocolate version. I’m not sure what I did wrong. I think I will try this again when I visit with my friend Heather when we go on our Christmas trip. I didn’t do the idea justice, it was ok, but a little dry and not half as exciting as the original idea.

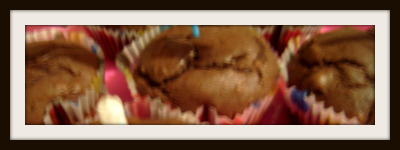
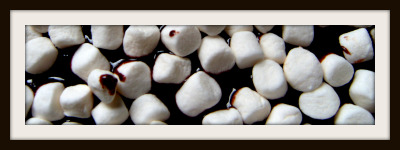
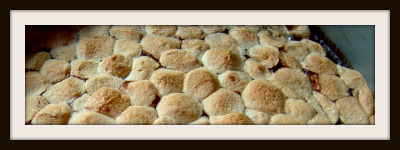
I immediately redeemed myself with these Pumpkin Carrot Muffins, though, so it’s ok. 😉


Standard Lemon Meringue was pie #51, with the standard coffee ring (chopped up to fit on the platter, naturally), and (drum roll please) pretzels.


I made pretzels from scratch! The recipe was alright, but the instructions were sub par so I will try this again and share a how to once I’m better at it!


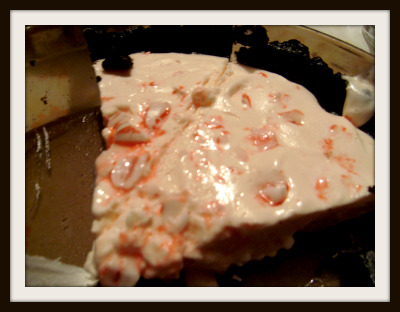
This was exciting for me. Meet pie #52, Mint Chocolate Chip! It was delicious, but it was also so pretty and the sound the meringue made when I cut it was that perfectly crunchy but not hard shell cracking sound. Mmmm. I was impressed with myself, for sure.

I made a standard white flour pie crust (we’ve established that whole wheat flour and chocolate only work nicely in brownies), baked it, then made chocolate pudding with some mint extract, filled the pie crust and popped it back in the oven for another 30 minutes or so. Then I whipped the meringue and added green food coloring, I topped the pie off with that and then put it back in the oven again for another 10 minutes. I added the chopped chocolate once I took it out.

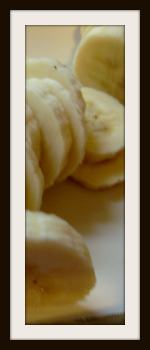
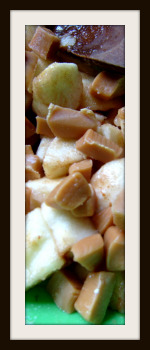
I maybe should have called this the Elvis Pie, since it’s pretty much equal parts banana and peanut butter, I learned when making this pie that while a smashed banana is delicious and invisible in baked goods, the same is not true for actual pieces of banana. They are still delicious, but they’re not pretty.


Finally, this cake is my most favorite recent accomplishment. One of my wee ones has a thing for Dora, as many wee ones do and asked me to make her a cake. So far, on the baking front, I’ve been getting pretty good at making very pretty cakes, but they are decorated differently. My mother was always baking and frosting cakes. By the time I was half way through elementary school, she was making cakes and chocolates from home as a small business. Her style of decorating was piping the entire cake from the Wilton decorating tips and it was so so so nice. I have yet to get that good at piping, so I smooth out the cake and pipe what I think I will do the least damage with. I used the same decorating pen from Talea for the sun and cloud. She loved it, and so did her wee friends!

    Next up is some serious holiday baking!

4 Comments

Ginger Pear Pie, Wee Monsters, Cookies and Months More!

Crafty, Domestic

I have a lot of catching up to do here, but instead of breaking it all up, I’m just going to post a serious roundup of yummy and crafty stuff cranked out of my kitchen!

First up are these brownies, made the same as the cocoa brownies I usually make, except I’ve been using whole wheat flour. I posted the recipe in this post, and didn’t change anything else. I didn’t find that the dough behaved any differently, and no one noticed a change in taste at all. I don’t know how much healthier they actually are, given that there’s a cup of sugar in them, but we can safely say healthier.


Whole wheat blueberry pie!! It has slightly less sugar than it’s white flour counterpart…slightly. Friends of mine who don’t ‘get’ Food Gawker, ask me why I post so many photos of food. Ha! Just look at how beautiful that blueberry mix is, that’s why! 😛


This pie next was amazing. More than one of my Stitch n Bitch ladies has voted this their favorite pie of the year!

Pie #41 – Ginger-Pear Pie with Almond Crust
Crust:
2 cup flour
1 cup ground almonds
1/4 cup sugar
3/4 cup cold butter
1/4 tsp salt
2-3 tbsp ice water
Filling:
5 pears, peeled and sliced
1/2 tsp fresh ground ginger
3 tbsp cornstarch
2 tsp lemon juice
1 tbsp butter
2 tbsp packed brown sugar
Topping:
1/2 tsp ground ginger
1/4 cup chopped almonds
2 tbsp packed brown sugar


Another really self-explanatory recipe! To make the crust, sift the flour, ground almonds, sugar and salt. Add the butter by small chunks, and cut in either with two butter knives or a pastry cutter. Once it’s all oatmealy, use a fork to mush in the ice water. The put it on a floured surface, and roll it out!

The order of the filling likely doesn’t matter, but for what it’s worth this is what I did. I put the sliced pears in a bowl, and added the lemon juice, ginger and and brown sugar. Then I mixed in the (very soft) butter, and last the cornstarch.

Bake it at 375 for about 20 minutes, longer if your crust isn’t holding up yet. Take it out, add the topping, and pop it back in for another 10, just so the brown sugar can work it’s magic.

Below are whole wheat sugar cookies and the beginnings of my Monster Chunks family for Miss Hayley, daughter of a very dear friend!


My wee one #1 has a serious appreciation for the handmade, especially the handknit, which is nice because that’s not a quality many 9 year olds can say they possess. These Basketcase Socks were chosen by him, as was the yarn from my stash. This is his second pair (since he grows a little slower now and can wear them for more than two months)! Also pictured here are a batch of what turned out to be pretty disappointing Butter Tarts. The recipe was not good at all so I wont post it, I will get my Granmother’s recipe and try it again with that. So far, none of her recipes tanked – she’s 87 though so I should hope she’s got the hang of it by now. 😉


This blackberry cake was inspired by my dear friend Gill, who had picked up two bags of very sour frozen blackberries and brought them over for me to salvage them. 2010 has been declared the year of the cake and cupcake, so I thought I’d try out a berry cake since I never have before. It was so good! Bananas, even!
This is even a neat German recipe, called Blackberry Kuchen, which I know just means Blackberry Cake, but it’s not made in the sense I’m used to, read on.

Blackberry Kuchen
Filling:
1 qt blackberries
1/3 cup sugar
1/4 cup flour
Dough:
2 cups flour
1/3 cup sugar
1 tsp baking powder
1/3 cup very soft butter
3 eggs
Streusel:
1/3 cup sugar
1/2 tsp cinnamon
2/3 cup flour
1/2 cup butter

First off, this cake requires you to make three separate mixes. One is the dough for the bottom and sides of your pan, like a case for the cake. The second is the berry filling that goes on top and there’s also a streusel part to this that goes on top of the berries!

Mix the sugar and flour with the berries and set aside. Make the dough by mixing the flour, sugar and baking powder, add butter and eggs. Mix gently with a fork till you can press it down into the pan (bottom and sides). Any cake pan will do, but I did mine in a springform – it was easy and didn’t fall apart.

Then sift the sugar, flour and cinnamon for the streusel. Cut in the butter again with two butter knives until its really crumbly. Now you pour the berry mixture into the dough-lined pan and plop the streusel mix on top randomly. When it bakes (about 30 minutes at 350), the struesel spreads out a bit and bakes where ever it lands. So good!


A few days later I took the kids to visit my mother and she was making batches of peach jam! So naturally, I had to help and get some photos.


My weekly Stitch n Bitch ladies and I are doing a knit a long on Corona, it’s described as ‘a hoodie with a youthful edge’. It’s super cute and form fitting but not too. I am so excited about this sweater.

Brownie Pie with a Chocolate Crust, pie #44. Mmmm. Perfect with vanilla ice cream.

This is about the time this little sweater died. First it was pointed out to me that even though I clearly know how to cable, I had totally forgotten what I was doing and messed it up that far! I am so far into the cable at this point! Arg. So I ripped it back, I ripped it back to the armholes and started again, this time cabling the right way. Again, maybe half this far into it a second time, I gimped out on the cable again. I decided right there that even though I had already sunk invested so many hours in the arms alone, I was only going to give it one more shot. It’s not happening. To be honest, I was pretty quick about putting it out of it’s misery too and it’s all rolled up in three balls now, ready to be made into useful pretty things for Christmas!


That concludes this way-too-long parade of baked goods and finished objects! I’ll wrap up the rest of the leftovers in my next update post on Saturday. Tomorrow I’ve got a new interview to post! 🙂

5 Comments

Window Shopping Wednesday, Part 2

Crafty, Domestic, Pretty, Window Shopping

I have a serious love for all things 50s – the wacky kitchen appliances, the slang and of course – the clothes! Don’t worry, this isn’t a fashion post – I’m doing a 50s themed Window Shopping Wednesday today! There are so many fun 50s themed shops online to get lost in! Today, I’m going to gush about; Kooties Closet, Sugar Pie Chic, Lady Jane Designs, Bumbershoot Supplies, and Our Retro Toybox.

Kooties Corner, some seriously sweet stuff. Store sections include; gift tags, address labels, retro graphic jewelry, pocket mirrors and other vintage goodies! Four things that immediately had me drooling; vintage car gift tags, 50s graphic pin, address labels, and my personal favorite – the mini atomic notebook! So rad!


Sugar Pie Chic is home to some very, very cool vintage inspired aprons and also some pretty embroidered pen and ink birds. I’m a sucker for cute dish cloths, and these aprons are delicious!


It’s not just cute retro kitchen gear that gets me excited! This tote bag and the best hair bow of all time, from Lady Jane Designs make me pretty happy too! Just look at the bow – look at it!! I am in love.


Then there’s the gear needed to make fun retro creations! This is often my favorite kinds of shopping! First up, four goodies from Bumbershoot Supplies!


Here is another Etsy shop that totally blew me over recently, Our Retro Toybox has way too much fun finds to list them all here. I could write an entire post about this place. This flour canister is at the top of my Christmas list and I *really* hope my husband machine buys it for me. Endlessly happy with this on my counter. 😀

This shop has a lot of nice vintage kitchen gear, but it also has sweet toys you may remember playing with as a child (hello original Sesame Street!), old book and more! Here, the best orange juice pitcher I’ve ever seen and a hilariously girly dictionary!


Aside from the amazing aprons and fun craft supplies, there are some other crafters out there who have made some pretty cute gear! Here are some of my favorite finds from last night while looking through aprons and patterns.


2 Comments

It’s All About the Yarn Wreath

Crafty

I am excited about Christmas, but with only trace amounts of snow in Toronto (so far) I’m sort of forcing it. The best way to get in the spirit (aside from unhealthy amounts of Bailey’s in my coffee) is through decorations and baking, right? So I have been trolling the internet (no really?) looking for fun Christmas projects. Of all the neat things I have found, this yarn wreath idea, posted on Craftster tops them all. Yes, I know Starbucks did it last year, but I’m looking forward to doing it myself this year.

I would love to hang this on my front door! It’s so ‘me’ and my Saturday night Stitch n Bitch ladies will love it too! I think the yarn balls were made by wrapping yarn around different sized styrofoam balls and secured with hot glue. I’m going to try to make one with found objects around the house, we’ll see how it goes!! There are enough balls loose from games long forgotten kicking around here for me to put to good use, though I will have to take a trip to the dollar store to get the shiny balls to fill in the gaps and add some twinkle. Twinkle! I could cover the whole thing in glitter!! I’m a little more excited about this wreath than I probably should be. Pfft.

Christmas stuff for the kids classes is a fast approaching issue, these candy cane Rudolphs are a really sweet idea, especially for the kindergarteners! There are two kids in wee one #2’s class that have serious peanut allergies, so these little treats are something we can give and know that the little ones with peanut issues wont have to pass them up!

It’s been said before but Ill go there again, while the husband machine and I are both on the odd side, we are odd in very different ways. If I could, I’d embroider a skull on pretty much anything I could – dish towels, socks, underwear, whatever. He, however, would love the Star Trek emblem emblazoned on everything. I’m down with Star Trek, but clearly not as down as he is. These stockings are a great fit for that vibe, though I think I’ll just make one for him! Maybe I’ll make myself a similar one with a skull instead!

I am head over heels for these guys! I want to make a whole family of them and dress them in different hats and scarves. If I didn’t already have wee one #2’s teacher’s gift on the needles (Fetching), I’d be casting on for these fun characters right now!

The parade of baked goods to join the hilarity I’ve already made is growing. We’ll see how many of these ideas I get to try out. We’re alternating going away around the holidays every year now, and this year we’re away so I don’t know if I’ll be able to play around in the kitchen as much but I know I’ll be able to do some baking before we leave, and at two out of the three places we’re visiting. 🙂 Here are some of the cookies that caught my eye (a bunch of them are from a site I just found with nice recipes!); Santa Hats, Rudolph the Red Nosed Cookie, Pinwheel Cookies, The Elve’s Snickerdoodles, Vanilla Marshmallows, Gingerbread Reindeer, Rocky Road Brownies, Surprise Cookies.

The marshmallows are on the must-do list! I’d love to give them away with homemade hot chocolate mix – with a chocolate dipped spoon! Feel free to steal that idea if you’re willing to do it all! When I make some of those packages up, I’ll post the marshmallow how to and a good recipe for hot chocolate. Maybe packaged in a cute cup. The pinnacle of this I think would be to make the cup yourself, but I’m not into pottery so that’s that. 😛

I’ll end on a few Martha ideas I’ve had on my to do since at least last Christmas! Mitten Clips, Candy Sticks, Snowman Button Cards, and Mini Stockings.

Next week, I’ll have my own versions of some of these ideas and a few others!

1 Comment

Summer Roadtrip and Smores Pie

Crafty, Domestic

It is hysterically late to be writing this post now, but I made some fun treats worth talking about, and my Smore Pie is very photogenic. But we have to back up to a few treats before we went on a road trip to visit the husband machine’s family.

The last pie I made for a Stitch n Bitch before we left was #37, Raspberry Custard Pie, which I think is pretty self-explanatory. 😉

#37 – Raspberry Custard Pie

Crust:
1/4 cup butter, melted
1/-1/4 cups graham cracker crumbs

Topping:
1 pint raspberries
1/4 cup icing sugar
Filling:
1/2 cup sugar
3 tbsp cornstarch
1/2 tsp salt
4 egg yolks
3 cups milk
2 tbsp butter
2 tsp vanilla extract

1. Mix melted butter and graham crumbs, pat into pie pan.

2. Mix the sugar, cornstarch, salt, egg yolks and milk in a saucepan, bring to a boil slowly, over medium heat. Whisk the whole time! If you turn your back for a second you’ve burnt it. It gets thicker as it boils.

3. Remove from heat and immediately mix in the butter and vanilla, let cool slightly.

4. Pour custard into pie crust, arrange raspberries on top. Sprinkle icing sugar on top with a small sieve!

Once we got where we were going, I still wanted to bake, but no one eats sweets. My only opportunity to play around in the kitchen is when I’m making something for the kids and their cousins and long distance friends! First up was a BBQ night at one of the husband machine’s aunts houses (the man has a lot of aunts!), I made pie #38, Banana Ice Cream Pie. It’s the sort of pie children request over and over and over again because it is so ridiculously good!


#38 – Banana Ice Cream Pie

Crust:
1/4 cup butter, melted
1/-1/4 cups chocolate wafer crumbs
Filling:
2 bananas, sliced into circles
1 pint of something chocolately
1 pint of something lighter
1 jar sundae topping

This is less a recipe and more assembly instructions, really! Mix the butter and the crumbs and pat into a pie pan, spread half the sundae topping on the crust, arrange a layer of banana slices on top, then 1/2 the chocolatey ice cream on that, and half the other ice cream on that. Then do it again! I topped mine with leftover cookie crumbs and an Oreo. This pie works best in a deep dish!

Before we left for our trip, I had so busy with other things I wasn’t knitting much but I seriously made up for it while we were gone! I started my Tadpoles before we left, but I ripped through them on the first couple of days! They’re a fantastically belated birthday gift for one of my best friends. Happy Birthday Brigitte! <3


As I was weaving in the ends of Brigitte’s Tadpoles, wee one #1 asked me to knit him a pair of socks and he looked through Ravelry and decided on these cute ones called Air Raid. I made them in 5 days! It was a fun, quick pattern and made for 9 year old feet, so I had that going for me!


While already 5 hours from home, we took a little day trip to visit our good friends / former neighbors, who bought a cute house on a serious chunk of land in the middle of nowhere. The middle of nowhere both frightens and appeals to me, which also frightens me! We had a fantastic day, with a fire and Smores to top it off! I went into town with my friend Melissa to pick up a few things and I found this kit with a BBQ basket, a giant Jersey Milk bar, a pack of graham crackers and a bag of mini marshmallows. Genius!

The very next night we were all invited to a bonfire and more Smore making with old friends! To celebrate, I made #39 Smore pie! Essentially, it’s a graham cracker crumb and butter crust, with a chocolate pudding filling, topped with marshmallows and cookie crumbs. Wen I got it to the bonfire, it hadn’t had a chance to set, so we set it in the host’s fridge and promptly forgot about it. She took it out a couple of days later, after it had finally set up, she ate it! Apparently, it was delicious.


Our second day home from our summer visit up north landed on one of my best friend’s birthdays, so I gathered the usual suspects and we celebrated on the porch with Peanut Butter Chocolate Cupcakes (and Chocolate Cupcakes)! Naturally, that weekend’s Stitch n Bitch was dedicated to her as well, Happy Birthday Gill!

This is one of those pies I saw in the LCBO‘s Food & Drink magazine, marked it and it waited patiently for over a year until I finally baked it. Pie #40, Blueberry Honey Pie. This is just a typical blueberry pie with a couple tablespoons of honey in it, baked in a graham cracker crust. I was really all about the graham cracker crust this summer.


1 Comment

Smell You Later (with pie!)

Domestic

One of my best and oldest friends has left the country – again. The first time she left was for England, then she came back for a few years and now she’s trying Australia on for size. I knew she’d love Australia, and though her Visa is only good for a year I wanted to give her a serious send off! The weekend before her Smell You later party, I made this pretty little pie and we finished up the prep work for the following Saturday!

Keeping in my kick with the chocolate crust, I pulled together this number – Peppermint Pie with a Chocolate Crust. Most of the ladies at the Stitch n Bitch where I served this said it tasted like Christmas. It’s a pretty accurate description, actually, so much so that I think I’ll pull this out at Christmas time from now on.

The Smell You Later party was all about good friends and good food. 🙂 It was a semi-surprise, as in she knew about the fete being thrown in her honor, but didn’t know I was inviting all her favorites – even the ones that don’t usually cross social circles! Fun!!


First up was this Apple Caramel pie! Essentially, you can rig up any apple pie recipe for this. My only suggestions for altering your favorite recipe to include the caramel is to not use Granny Smith apples, up your cinnamon and use all brown (or golden yellow) sugar instead of granulated. Even when the caramel started to ooze out the top, I was still very happy with it! I dusted the top of it with cinnamon and sugar before baking as well.

I also made Marshmallow-Topped Cocoa Brownies from my fail-safe Good Housekeeping scratch brownie recipe, I just sprinkled marshmallows on top, as per wee one #2’s suggestion. They turned out as good as they look!

Raw batter and mini marshmallows…

Baked brownies, melty and browned marshmallows….

Cooled and cut!

My Uncle Glenn loves to cook, and often comes over on Fridays, especially before a large weekend gathering, to play in the kitchen with me. This week he showed me his favorite dish to make for a crowd, Sausage and Peppers. We started with a red onion, chopped it really chunky and sauteed it with some whole garlic cloves and a bit of olive oil, and added the sausages. At the same time, we chopped the peppers, put them on a cookie sheet with a bit of fresh black pepper and some olive oil. By the time the sausages were cooked, the peppers were ready, we added everything to one casserole dish and popped it back in the oven for another 30 minutes or so. Tah-dah!


I know we’ve got a blurry one here and I try to avoid that but it’s the only shot I took of all three of this week’s pies. The Apple-Caramel Pie is on the left, on the right is this Triple Layer Mud Pie from Kraft, and under it, my first successful Frozen Key Lime Pie, recipe courtesy of Martha!

My hands down favorite treat that I made for Lindsay’s Smell You Later party was this tray of pink cake balls, which I think we all know by now I discovered on Bakerella. I made these ones from cherry cake and pink frosting! I ran out of lollipop sticks, but had chocolate to melt, so I made little cake balls with my tablespoon, dropped them in cute cupcake liners and drizzled them in chocolate! So so so good, I swear it doesn’t matter what you do to a cake ball, it’s delicious. Bakerella has so many amazing ideas for decorating cake pops, check it out!


I will end this post with details of the full spread, though the three pies I mentioned above are not pictured here, as they were all in the fridge when I snapped this photo. Going across the back row, from left; pork and chicken meatballs, with a bowl of tangy dipping sauce, pizza bread, loukoumathes (my mother picked up a box of them from Athena Bakery), my cheddar crackers, and raspberry scones. Going across the bottom row, from right to left; apple-cinnamon scones, cherry cake balls, cheesy garlic bread, a rice and broccoli number and the sausage and peppers are just out of the frame. Honestly, there really wasn’t much left over!

1 Comment

Christine of Flapper Girl

Crafty, Domestic, Interviews

Flapper Girl

Hostess aprons! Cupcake iron on patches! Ruffle bum knickers! Coffee cup cozies! Ruffle bum knickers did it for you, didn’t it? Flapper Girl is equal parts sassy, retro and cute! Run by Christine, all items are handmade and are 100% adorable. I had no idea how much I needed a hostess apron, but now that I’m in love with them all (especially this pink and brown number), I have no idea how I’ve entertained every weekend for this long without one! The coffee cozies are so sweet and a pretty way to add more green efforts to everyday life, the bags, hairclips and baking gear are all so rad too!

When did you open Flapper Girl? What was it about that time that made it right to launch?

I opened my Etsy shop in May of 2007. I was really excited about starting this journey of making and selling things I created. I had a few tote bags and aprons and was applying for my first two craft fairs. Since I had a full-time day job at the time, there was no pressure, really. I was just doing what I loved in my spare time. It seemed like the next step.

Where did your love of the 20s flapper girl come from?

There’s just something about 1920s Art Deco design that speaks to me. I think I first fell in love with that. Whether it’s architecture, a beaded dress, a picture frame, or a set of kitchen canisters, if it’s Art Deco, it makes me hold my breath and admire. Then there are my favorite famous flappers of that time: Louise Brooks, Marlene Dietrich, and Theda Bara. I admire all these women for being sexy, powerful, and successful radicals in their field. Moreover, I’ve always admired that the flappers were liberal and rebellious in a time where that sort of behavior and mindset in women was unheard of. They didn’t care that so many people thought they were acting inappropriate and rebellious. They did what they wanted to do, and that was that. I can relate to that. I love finding vintage photographs from the 20s, especially those of flappers. They seem so mischievous. And happy. I connect to that, too.

The fun and girlie but rebellious vibe shines through in all your creations, from your jewelry to your coffee cozies, is it fair to say that reflects your personality?

Yeah, I have a rebellious streak in me. I think it all started when I learned to play the drums at 13. It felt awesome to be doing something I enjoyed, and I felt pretty bad-ass that it was something that wasn’t typical for a teenage girl. There weren’t many female drummers back then. It’s good to see more and more of us take the stage. I played in various punk rock bands throughout high school. Then in 2003, I joined an all-girl rock-n-roll band, The Jolenes. We had a lot of fun playing up and down the west coast.

The office-dwelling corporate life is definitely not for me. I consider that to be rebellious. I was a secretary for many years, and found it to be incredibly oppressive and depressing. I’m one of those people who flourishes making my own schedule, and doing what I love.

Are you domestic? I have to ask because I am so very, and I adore
all of your hostess aprons!

Thank you! I have a love affair with vintage aprons. I’ve been collecting them since I went to my first estate sale with my mom when I was 16. The fancy hostess aprons have always been my favorite kind. I started making my own vintage-inspired tulle hostess aprons because I never wanted to wear my vintage ones, in fear that their old, fragile fibers would come apart. My hostess aprons are built sturdily to stand up beautifully to many, many years of use.

I do have a domestic bone or two in my body. I love to bake, though I don’t bake as much as I used to. Over the past few years, my little family has discovered that we are all intolerant to gluten and dairy, so that has cut into my baking, I’m afraid. I know there are a lot of great gluten-free/dairy-free cookbooks out there, but I have yet to get my feet wet in that arena. This year I got my domesticity on for my daughter’s 8th birthday. She had her first sleepover, and I made each of her guests a simple felt purse that they got to decorate using an assortment of embellishments, including some felt shapes I cut out by hand. I had fun setting up the craft table all Martha Stewart style, with each girl getting her own little tray of supplies, and fancy paper cup of craft glue.

Your coffee cozies are a hit as well, both for their cutenessfactor and for their eco factor. What inspired you to add these to your shop?

The first coffee cozy I ever made was for my husband, actually. It was a Valentine’s Day gift. He still uses it to this day. It has the word HUSTLIN’ embroidered on it. He loved it, and from the response he was getting at the coffee shops whenever he used it, I figured other people would like the cozies too. I realized that choosing words to embroider on coffee cups would be sort of difficult, so I went with cute designs instead. My first pattern was vintage eyewear. Bikes and squirrels soon followed.

I’m really proud of these cozies. I feel good about making something that is keeping unwanted waste out of the landfills. The cozies themselves keep people from using those drab cardboard java jackets that get tossed with the cups. Plus the cozies are made from either eco-fi felt (which is made from recycled plastic bottles), or repurposed felt from second hand stores (mostly the Knittn Kitten) and estate/yard sales. They are truly an eco-friendly item!

Tell me about your home studio. Where do you craft and how do you
keep it organized (or do you not)?

It’s pretty cozy, and hard to keep organized, but I do my best. We live in a wonderful old building that’s on the historic register. As such, we have old plaster walls that aren’t made for hanging stuff on. This means that we can’t install any wall shelving, so I have to get creative in keeping my craft space organized. My vintage pink Morse sewing machine is set up on an antique vanity-turned-desk. It has huge, deep drawers, which I’m thankful for. I also have a few bins and various storage cubes for fabric, and a tall, standing shelving unit with some plastic bins to keep various supplies and projects in. If I’m working on a project that doesn’t require my sewing machine, I find myself working at the kitchen table, or on the couch. I can’t watch TV and create at the same time, so whether I’m sewing, making jewelry, or embroidering, I’m most likely listening to an audiobook on my iPod. I’d like to hug the person who invented audiobooks.

Flapper Girl

No Comments