Browsing the blog archives for January, 2012.

Zee Bars from Peas and Thank You!

Domestic, Healthy, Kids

So I know this will sound like gushing, and we have only ‘bumped into each other online’ a couple of times, but I’m a little in love with Mama Pea of Peas and Thank You. If you read her blog with any regularity at all I have no doubt you are a little in love with her too. Last week, for example, ‘Tonight we all needed a little comic relief (or a horse tranquilizer)…‘, I read that and thought, HOLY CRAP!! THAT’S MY HOUSE! Also? One of her blog tags is ‘pissing and moaning’. Love!!

I know, I’m such a creeper but really I love her extra for these bars, she concocted a recipe for gluten-free vegan chocolate chip granola bars that Wee Ones #1 & #3 love. They’re called Zee Bars because she was lamenting in her post on these little babies about the food marketed specifically to kids and how it’s exactly the same as the food marketed to adults, except they’ve slapped a little chocolate on it and spelled kids with a z. Right?! Dammit, my kids can spell! Anyhoo, I am still cooking and baking my way through her cookbook (I made the Fabulous French Toast today for brunch actually….), and I’m still not going to post any recipes from her book. However, this recipe was posted on her website so it’s fair game.

They’re way easy to make and even easier to eat! All you need is:

1/2 cup oats
1/2 cup oat flour (just run 1/2 cup of oats through your food processor)
1/2 cup vanilla protein powder (or another 1/2 cup oat flour)
1/2 tsp salt
1 tbsp baking powder
1/2 cup + 2 tbsp unsweetened applesauce
1/2 cup + 2 tbsp non-dairy milk (I used almond)
1 tsp vanilla extract
1/4 tsp cinnamon
stevia to taste (or be a cheater like me and use 1/4 cup brown sugar) I have stevia, but no one likes it!
1/4 cup chocolate chips (I also cheat with this and use 1/2 cup)

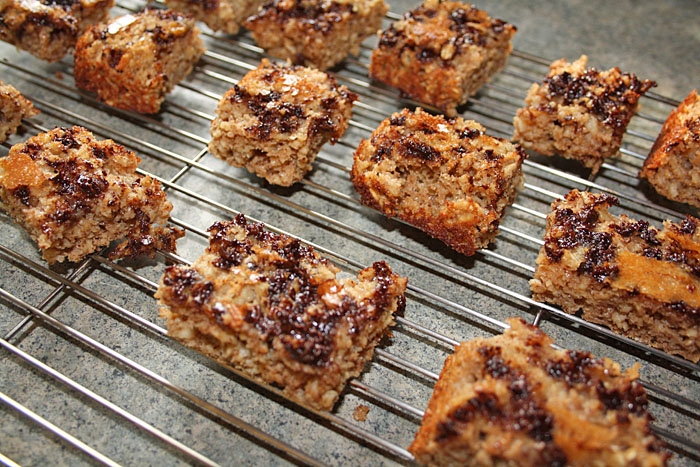
If you throw on a little drizzle after the bars are cool you’ll also need:

3 tbsp chocolate chips
1 tsp coconut oil


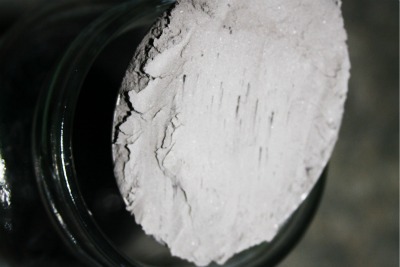
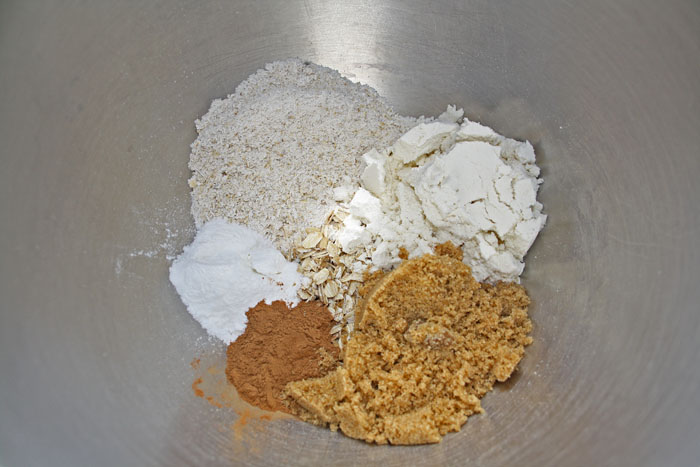
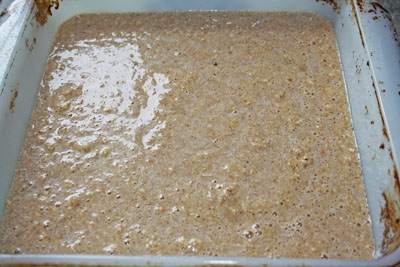
So first, preheat your oven to 350F and spray your 8×8-ish pan. Theeeeeen, mix the oats, oat flour, protein powder, salt, baking powder, cinnamon and your brown sugar if you’re using it.


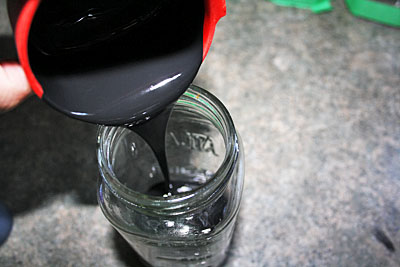
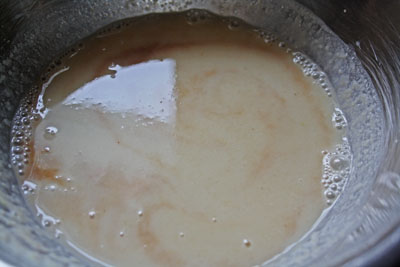
Mix up the applesauce, vanilla and almond (or whatever) milk.


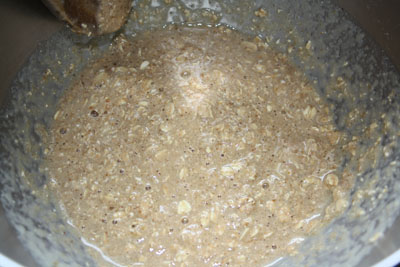
Now mix your wet into your dry.


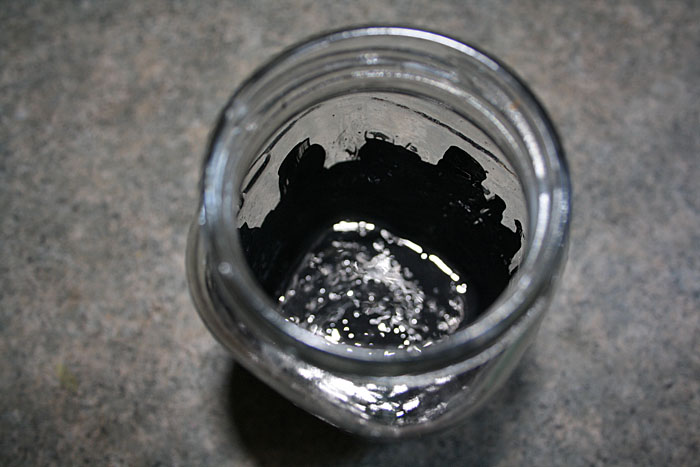
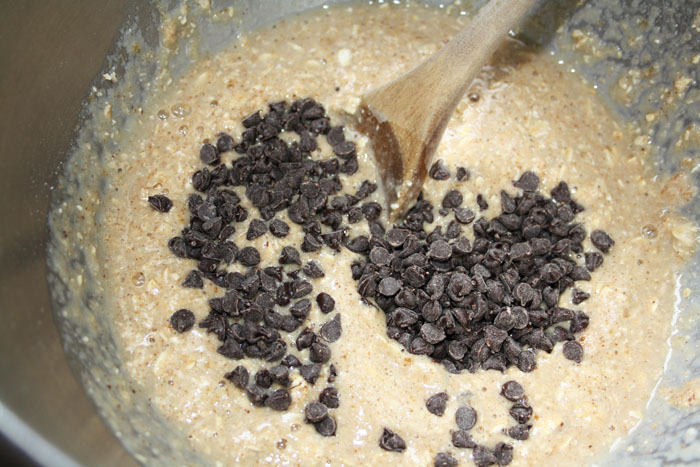
Fold in the chocolate chips.


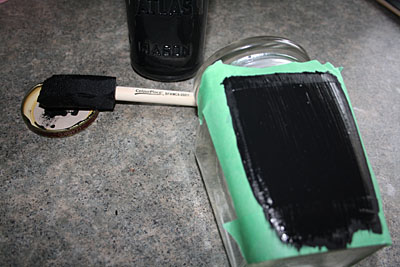
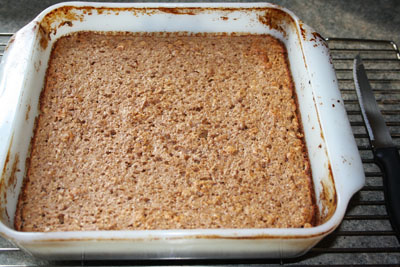
Bake for 20-25 minutes.


Mama Pea describes it as ‘pulling away from the pan’, when you know it’s done.

So so so good. I could knock back a tray of these in an evening – no problem!

No Comments

Baking with Kids – Chocolate Cupcakes

Domestic, Kids

The 10th recipe we made from Linda’s Collister’s Baking with Kids cookbook and Wee One #2 totally took over! I was so impressed with her! She has really become a mini domestic goddess in training and it’s so sweet to see!!


pink popcorn for miss america

Chocolate Cupcakes – from Baking With Kids (p. 17)

Cake:
1 1/2 cups four
1 tsp baking powder
pinch of salt
1/4 cup unsweetened cocoa
3/4 cup sugar
7 tbsp unsalted butter, softened
2 extra-large eggs
1/2 cup whole milk
Frosting:
3 1/2 oz bittersweet chocolate
1 tbsp light corn syrup
2 tbsp unsalted butter
baking with kids chocolate cupcakes
Preheat your oven to 350F. Mix together the flour, baking powder, salt, cocoa and sugar.
This little miss is very precise, dontcha know.
baking with kids chocolate cupcakes
Add the butter to the bowl, and crack your eggs into a small bowl first to be sure you don’t get any shells in your cupcakes (this is especially important when your helper is under 10 years old).
Theeeeen dump them into the mixing bowl.
baking with kids chocolate cupcakes
Now add the milk!
Mix until you have a nice, smooth batter.
baking with kids chocolate cupcakes
Divide the batter between 12 muffin cups – either grease the pan or use cupcake liners. Bake for about 20 minutes and voila!
baking with kids chocolate cupcakes
For the frosting, break up whatever chocolate you like, (just make sure there’s about 3 1/2 oz of it), with the syrup and the butter. Melt it all together over a pan of hot water and mix till it’s all melty.
baking with kids chocolate cupcakes
Wee One #2 attacked all 12 cupcakes with frosting and then covered them in jelly beans, life savers and whatever other candies she could get her little hands on. So cute and way too yummy!

No Comments

Pink Popcorn – for Miss America!

Domestic, Kids

Watching Miss America was always a yearly thing for me but it wasn’t an ‘event’ until one of my besties confessed a few years ago that she loves pageants – of course out came the champagne and plastic crowns! Since living in the woods for Miss America this year (& last year), I’ve made it an event with Wee One #2, who adores all things pink and girlie and glittery and pretty and omg she’s such a little diva I love it.

We usually have a big spread and make a whole night of it, but she was practicing her embroidery and I had been helping Wee One #1 with homework for a good part of the day – so we settled on popcorn but of course only pink popcorn would do for such a girlie occasion!

I’ve made loads of different caramel corn and I swear this recipe tastes just like the junk at the mall – the junk at the mall that you LOVE!! DON’T LIE TO ME! Ahem. I plan to try this recipe out with drink crystal flavors and different colors!


pink popcorn for miss america

Old Fashioned Pink Popcorn – from Cooking Classy

2/3 cup unpopped popcorn kernals
2 cups sugar
2/3 cup half & half
1 tbsp light corn syrup
1/4 tsp salt
1 tsp vanilla
6 drops red food coloring / dollop food coloring paste
pink popcorn for miss america
Pop your popcorn and set aside. In a saucepan, whisk together the sugar, half & half, corn syrup and salt.
Cook this until it bubbles and looks all scary and you’re sure you’ve done something wrong. Use a candy thermometer to be sure your mixture gets to 232F.
pink popcorn for miss america
This is when you take it off the heat and stir in the vanilla and food coloring. If you’re experimenting with other colors and flavors, switch them up now!
Mix the color in or the popcorn will be streaky.
pink popcorn for miss america
Pour your neon goo over the popcorn. Mmm. Neon goo.
This works best of you divide all your popped popcorn in half first for easier mixing.
pink popcorn for miss america
Spread out the shiny, sticky popcorn onto parchment paper and let it dry (if you can stop yourself from picking at it).
pink popcorn for miss america
This stuff is addicting, so I’m glad I made it for a crowd!

2 Comments

Baking With Kids – Apple Hedgehogs

Kids


baking with kids apple hedgehogs

Apparently stuffing an apple with raisins or something else like it is a popular treat for kids – kids of a different generation obviously! Not my generation either because I had never heard of it before but when I mentioned it to a handful of people they tell me their grandmothers used to make similar treats for them. As usual, Linda Collister takes the idea one step further and slathers the outside of the apple in meringue and uses almond slivers to give it a hedgehog feeling! So so so cute and the kids had a great time making them. I confess we made these forever ago, if these were recent photos there’d be three of them because Wee One #3 is way more active in the kitchen than she used to be.

These were made on March 27/11 and were the 9th recipe we made from this book!

Apple Hedgehogs – from Baking With Kids (p. 108)

4 small to medium very tart apples
8 ready-to-eat dried apricots
3 egg whites
3/4 cup superfine sugar
4tbsp sliced or slivered almonds
baking with kids apple hedgehogs
First, preheat to 350F and peel your apples. Gather your almond slivers and raisins!
baking with kids apple hedgehogs
Remove the core of the apple, either use a proper apple corer or butcher it until it pops out like this! Next make the meringue by beating the egg whites on high till they’re stiff and add in the sugar.
baking with kids apple hedgehogs
While Wee One #1 made focused on the meringue, Wee One #2 set to work on filling the apples with the raisins. The meringue is maybe not as stiff as if I had made it, but I think it looks perfect by the hands of an 11 year old.
baking with kids apple hedgehogs
Now the stuffed apples are covered with the meringue…. ….and the almond slivers are poked into the meringue!
baking with kids apple hedgehogs
They both took the placement of their almonds very seriously. It was quite a sight really.
baking with kids apple hedgehogs
Naturally, the higher up your hedgehog’s quills point the more likely they are to get a little, ahem, ‘crispy’.
No Comments

Peas and Thank You’s Blackberry Basil Smash Smoothie

Healthy

So I mentioned last week that this year, I’m cooking and baking my way though Peas and Thank You‘s cookbook (you can grab the Kindle edition for 7 and change here). Usually I don’t start with the very first recipe but after my workout this morning I needed a smoothie and I had been wanting to try this one as soon as I read it.

I love this book so much, I’m not going to post any recipes from it. Yeah that’s right, I want you to buy it. I will however, give you the gist and tease you with photos of all the yummy creations I make from it. ‘Mama Pea’ as she refers to herself, is a fun and witty writer, her cookbook has about as many funny stories as recipes and I love it even more for that. The story behind this smoothie involves a whole lotta good natured teasing of her husband’s love for Tommy Bahama. Hi-larious.

This smoothie combines three things I love but have never put together; blackberries, ginger and basil. When I mentioned this to my dear friend Gill she thought it sounded like a winner, when I mentioned it to another dear friend who shall remain nameless I got ‘who knew??’ <- that's 2 question marks, people. So it's a flavor combo that might not sound amazing - but believe me, it totally is. I ment to have one small cup - I had two and then I insisted Wee One #3 finish off the rest of the batch to keep me from drinking it all. She liked it too! It's exactly the right kind of refreshing feeling I need post workout when I'm all flushed and pink and staggering off to the shower.

peas and thank you blackberry basil smash smoothie

peas and thank you blackberry basil smash smoothie

peas and thank you blackberry basil smash smoothie

peas and thank you blackberry basil smash smoothie

peas and thank you blackberry basil smash smoothie

This is a winner and will definitely be used in full rotation in my kitchen!

1 Comment

Nigella Lawson’s Peanut Butter Squares

Domestic

These are so good it’s alarming. Yeah I know, it’s not a huge surprise that something Miss Nigella cooked up would turn out so good, but man these are so close to a peanut butter cup – without actually being a peanut butter cup, you know? I’ve been trying to find recipes for all our most loved treats so I can whip them up without a zillion added chemicals in them and this is defiantly a favorite we can all agree on. So good with coffee or hot chocolate – or really, whatever.

I used regular brown sugar instead of the muscovado because I honestly didn’t think it would make much of a difference. I’ve read since then that using muscovado sugar can make a huge difference – so clearly, I have no idea. I will make them again with the muscovado and report! Also, I didn’t convert measurements to cups because it could totally be argued that it’s not exactly the same.


nigella lawson peanut butter squares

Peanut-Butter Squares – from How to Be a Domestic Goddess p. 223

Base:
50g dark muscovado sugar
200g icing suger
50g unsalted butter
200g smooth peanut butter
Topping:
200g milk chocolate
100g plain chocolate
1 tablespoon unsalted butter
nigella lawson peanut butter squares

I’m always so pleased with myself when I weight out all my ingredients without having to play around to balance it out! Lucky!

nigella lawson peanut butter squares
Mix all of the base ingredients until well combined.
It’ll be a little crumbly, just press it into a 8 x 8 (or whatever, really) pan.
nigella lawson peanut butter squares
Weigh out your chocolate!
Now melt it, along with the butter till it’s all creamy and lovely.

nigella lawson peanut butter squares
Pour the melted chocolate over the peanut butter base. Smooth it out, or make little swirlys or whatever you like with the chocolate layer.
nigella lawson peanut butter squares
Let the chocolate set up in the fridge for a while before you take it out and cut it into pieces. I suggest 48 pieces because, as Nigella warns in the book ‘more-ish as it undeniably is, it is also very rich’. So amazing. If you are fortunate enough to be able to bring peanut-stuff to your work or school (or your kids’ school), bring these. Everyone loves them and they disappear fast!
No Comments

Homemade Chalkboard Paint and Cute Jars

Crafty

As with so many of the neat little ideas I’ve been trying out lately, this one came to me via Pinterest. This is the original, inspirational pin, but the link is now broken. The gist of the post was the extremely simple recipe (one sec) and the idea of using a color other than black for the paint. I went with black because I was looking for a traditional chalkboard feel, but the blog I read it on went with pink! So cute!!

The idea of painting the jars to make labels came to me from Better Homes and Gardens, but in their example, they use a vinyl chalkboard sticker.

This project was way fun because I have pretty much always wanted to mess around with chalkboard paint and I’ve never had the opportunity to. All you need to start chalkboard painting ALL THE THINGS is:

-2 tablespoons non sanding grout (you can get the white stuff to make it easier to tint the paint to other colors, or black if you’re going with black)
-1 cup paint
-a mason jar or something to mix in
-a stick of some kind to mix with
-a sponge brush
-cute jars or boxes or canvas or whatever to paint on

I didn’t stress about leveling out my tablespoons.

I was pretty precise about the paint though.

I still can’t believe all these years – that’s all there is to it. Now I’ve got a cup of black chalkboard paint in a mason jar to paint whatever I feel like pretty much whatever I want whatever my husband hadn’t deemed off limits.

I bought some cute jars to make as gifts for my husband’s dear cousin Jenn and her husband, Adam. So first, I taped off a box with painter’s tape to make sure I had a clean edge.

Then I painted it – about 5 coats. Every time I went into the kitchen I’d check on them and if they were dry, I’d lay another coat on.

The next day, I took off the painter’s tape and held my breath a little. I was nervous I’d catch a paint blob or something and wreck it but it came off perfectly!

I didn’t know this till I read the (now sadly dead) blog post, but in order for chalkboard paint to ‘work’ you have to rub chalk over the surface, and wipe it off. Then presto, it’s ready to roll.

I want to make a zillion more and then I want to paint chalkboard onto, um, everything. And really, since you only need 2 tablespoons of grout and it’s only sold in boxes much, much more than 2 tablespoons, you can make batch after batch and potentially paint a pretty large area. Fun!!

1 Comment

Potato Chip Cookies

Domestic, Kids

I’ve been silent for a week because I’ve been trying to figure out what to do about the whole ‘am I a site with a blog, or am I a blog with a site to organize my posts?’ dilemma. I have come to decide that this is in fact a blog, and I will be using the headers up there as a way to organize all the content. So today for example, I’m going to post about Potato Chip Cookies, and after the post is up, I will link to it on the ‘domestic’ page with a little thumbnail for the recipe. Simple. Clean. Organized. Insert contented sigh here. This means though that for a little while I will probably be posting twice a day, because I have so many amazing recipes and crafty tutorials and makeup fun to share!

Potato Chip Cookies are what happen when you tell your 6 year old it’s her turn to pick the cookie recipe. She sat down at my laptop, cracked her knuckles, and Googled this. Not bad. They sound awful and there certaintly are not gourmet, but they’re awful at all. Since I’ve made these, I have discovered potato chip cookies with pecans from My Baking Addiction! It came down to this one from Emeril or Baking Bites. We went with Baking Bites.

Officially, we made these on March 13/11 and they were the 12th cookie of 2011 – Cookie Year.
  

potato chip cookies
Potato Chip CookiesBaking Bites

2 cups all purpose flour
1 tsp baking soda
1/4 tsp salt

1 cup butter, room temperature
1 cup sugar
1 large egg
1 – 1 1/4 cups crushed potato chips

potato chip cookies
potato chip cookies
Preheat your oven to 350F, line your baking sheet with parchmet paper. Cream together the cream and sugar. Add the egg. Mix flour, baking soda and salt, then tip into the butter mixture.
potato chip cookies
potato chip cookies
Crunch up potato chips.
Stir in potato chips.
potato chip cookies
potato chip cookies
Drop one inch balls onto baking sheet and bake for 12-15 minutes. Voila!
potato chip cookies
You can drizzle chocolate over them or drop them in chocolate.

1 Comment

Blogs I Adore

Crafty, Domestic, Healthy, Pretty

Christmas vacation is officially over, so I have to officially go to bed at a decent hour. Ugh. All this ‘in bed before midnight’ stuff really cramps my style. Ha. The school bus carts off the wee ones just before 8:30, and the bus stop itself is about a 10 minute walk from our house. Anyhoo, I have been busy with the site this week and am now settling into actually adding useful content.

The site sidebar is a little different now, I love me some lists (as if that isn’t fairly obvious by now) so naturally I figured what better to fill the one thing that seen on every single page on the site! There are about a zillion links to fun and useful (and frequently updated) blogs and websites on my links page but my actual favourite blogs are over there in the sidebar —> I listed them alphabetically! No favourites among the favourites!

Freshly Pieced is written by Lee, a very talented (and adorable) quilter. She hosts a weekly ‘Work in Progress’ link up day for all kinds of handmade treasures! I post my in progress knits to this link up.

The LaMay Bakery is my friend Sammie’s blog, chronically life as an army wife with her wee one and her husband. She. Is. So. Sweet.

Mutant Supermodel and I live strangely parallel and often opposite lives! We are about the same age, have the same number of kids all in very close age ranges to each other and we both have a love for fiber (I’m a knitter, she’s a crocheter) – and while I’m coming into my 12th year of marriage, she is freshly (and happily) divorced. Her blog has a wonderful collection of resources for single mothers – and great posts in general from getting over a breakup to managing money.

Peas and Thank You is a veggie mom who made the transition from a pretty standard diet of meat and Diet Cokes. What I love most about her blog is that she is just so normal. She’s even a lover of bad television! I’m smitten. She’s the author of the cookbook I’m working through this year!

The Purl Bee is an endless source of inspiration for sewing, knitting, and crochet. Plus her blog is just so pretty!

Romi is a dear friend whose writing never fails to crack me up! This year has been very exciting for her because she has published two books and written a screenplay. The Book of Awful came first and then The Year of the Chick!

Snarkable is written (or I guess I should say will be written) by one of my bestest friends in the whole wide world. I have little doubt that it’ll be deliciously snarky and witty and will likely make your eyes water.

I can’t get enough of What I Wore. Jessica has been taking photos of what she wears pretty close to every day since 2007. She’s a designer and a pro blogger and is very sweet about answering questions from helping with an outfit to advice on working in the fashion industry. I droll over her daily photos. Love!

I also added a set of smaller goals to the sidebar as well that I’ll go on and on about tomorrow! How do you go about resolutions? I made 7 big ones and have 10 smaller ones. Thoughts?

3 Comments

Living From Scratch

Healthy

I swear, I’m not about to get preachy, but I’ve been doing a lot of documentary watching lately, followed by a little too much reading and the result is a combination of alarming awareness and also a sense of amazing power. Awareness that there are so many chemicals in the food we eat every day, and power that we don’t have to be victims to granola bars! You know?

I’m using granola bars as an example because with three kids, we can go through a lot of them! Originally, I tried making my own granola bars because I thought it would be cheaper to make them (not always), but the first time I made them it dawned on me just how few ingredients there are in an actual granola bar and how long the ingredient list is on the side of the box of store bought bars.

In a homemade granola bar, all you put in it is butter, brown sugar, honey, plain granola (I made my own with oats, honey, brown sugar and vanilla), rice cereal, and chocolate chips. Of course to really make your own, you’d have to also make your own rice cereal and chocolate chips and both of those are totally doable!

In a store bought granola bar there are 26 ingredients and include things like soybean oil, glycerin, soy lecithin, bht, and on and on and on.

So granola bars are one thing but what’s next?! I mean pancakes from scratch are no problem but does that mean I’m baking a loaf of bread every day? What about jam? What about the sugar in homemade jam? Nevermind, I just looked that one up, it’s not so awful if you use unrefined sugar.

It goes beyond food too, it’s also about the chemicals in our cleaning products, in our skin care products, in our makeup! I mean I know it’s also about the chemicals in the air all around us and all kinds of other really scary, but I’m talking right now about things we can physically and independently do something about. Right now.

There is a lot to learn and I know I’m leaving with yet another quickie post, but I was working on the design of the site/blog more today – the good news is, I’m pretty much done – and wanted to check in with what was on my mind.

Do you do scratch cooking? What about make up? Cleaning products?

No Comments
« Older Posts