Browsing the blog archives for January, 2011.

Biscuit Joconde Imprime/Entremet – Daring Bakers Jan 2011

Domestic, Kids, Pretty

In this post, I’m participating in The Daring Kitchen!

The January 2011 Daring Bakers’ challenge was hosted by Astheroshe of the blog accro. She chose to challenge everyone to make a Biscuit Joconde Imprime to wrap around an Entremets dessert.

Here we go, another French dish from the Daring Kitchen. However, unlike the Cassoulet I made a few weeks ago that didn’t look too complicated once served but actually took 3 days to make, this little treat looks like I slaved over it forever but really it came together super quick. I did hit a totally unrelated-to-the-hard-part snag when I ran out of chocolate pudding ingredients. I just could not bare to use plain instant pudding in this lovely creation, and chocolate pudding is what the wee ones requested inside it. Anyhoo, it’s done now. Two days late.

So the challenge was to make what I think is best described as a cake-like wrap for a mousse or pudding or something like that. I know I’m dumbing it down horribly, but that’s essentially what it is. The fancy part, and of course there is a fancy part this is a Daring Kitchen challenge after all, is that there is a layer of decorations baked right into the cake. I have seen them in bakeries, but I have never tried one. Turns out, it is very similar to the jelly-roll type cake we used last summer when the Daring Bakers made swirly ice cream cake. Oh. My. Goodness. I went to find the link for you to see what I was talking about and I didn’t post it!! In my defense this challenge came on the heels of my Granny’s passing and I didn’t really do much of anything but bake and eat and bake and bake and cry and eat. Ahem.

Moving on. First you need to make the batter for the ‘sponge’, as the recipe calls it.

Joconde Sponge – via Daring Kitchen

3/4 cup almond meal
1/2 cup plus 2 tablespoons icing sugar
1/4 cup cake flour
3 large eggs
3 large egg whites
2 1/2 teaspoons sugar
2 tbsp butter, melted

So first you whip your egg whites and sugar until they’re meringuey, set aside.
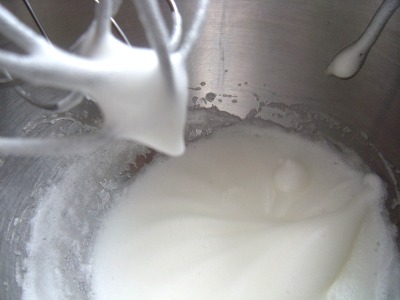
Now sift the almond meal, icing sugar and cake flour (original recipe notes that you can do this in your dirty meringue bowl, so I did). With the mixer on medium, add the eggs individually, then mix until smooth. Fold in a third of the meringuey mixture, then fold in the rest. Finally, fold in the melted butter.


 

Done! Set this aside. You’ll need it soon enough!

Now, you need to make the decorative part.

Patterned Joconde-DΓ©cor Paste – via Daring Kitchen

14 tbsp butter, softened
1 1/2 cups plus 1 1/2 tablespoons icing sugar
7 large egg whites
1 3/4 cake flour
Food coloring gel, paste or liquid

Oh boy. That’s right people! 14 tablespoons of butter (of course I used Becel, but still) and 7 egg whites! 7. Sigh. You know I only went through with this to make Julia Child proud. Duh.

Ok, so first cream the butter and the sugar till nice and fluffy. Then add your gigantic pile of egg whites. Mix. Fold in the flour and voila. You’re ready to tint it. I went with three colours. I asked Wee One #2 for her opinion on colours and just as I expected, she suggested Pink, Purple and Blue. Away we go!
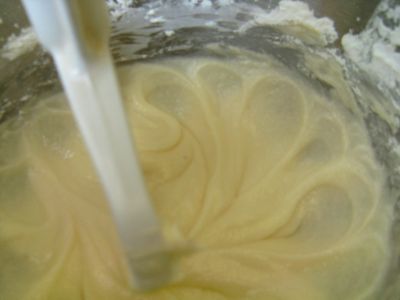
So I divided the paste into three cups, tinted them and filled my pastry bags (I used 2 #2 tips and 1 #3). Line a baking sheet with parchment paper and pipe on decorations to your heart’s content.


Then, pop the baking sheet in the freezer for about 20 minutes. I’m not entirely sure why the recipe has us making the joconde sponge batter first when it could easily be done at this point in the game – but I did as I was told!


 

Once your piped decorations are frozen, pour the sponge on top of it! I know, it’s weird. Just do it.

Bake at 475. Yup. 475 for 15 minutes. Or a little less. My edges burnt horribly!


 

So now, you’ve got this spongey cake with beautiful decorations baked right into it – now what?
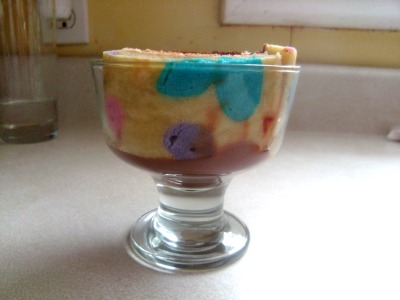
This is where I strayed from the instructions because there was talk of using a PVC pipe (really, there was) or a springform pan with the base removed. So what did I do? I used clear glass dessert dishes! That way I could show off my adorable little hearts and polka dots while holding the chocolate pudding I intended to put inside!

I didn’t even get to taste one because the wee ones gobbled them up – which totally works for me!

2 Comments

Baking with Kids – Baked Alaska

Domestic, Kids

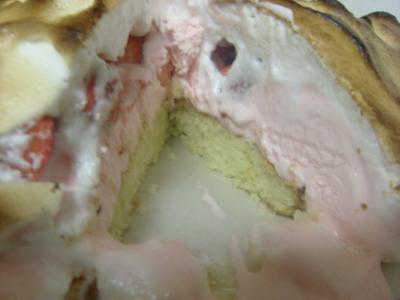
Yup, it’s true. My 10 year old made a Baked Alaska – about 95% on his own too. So what’s a Baked Alaska? I thought it was a better known dessert than it actually is. A Baked Alaska is ice cream and fruit on top of sponge cake, covered in meringue and then baked! So when you eat it, the meringue is warm, and the ice cream is still cold. Amazing.

I helped at a very crucial stage in the quick-cover-the-ice-cream-with-meringue stage. He opted to make this after Wee Ones #2 and #3 were in bed, even though he was making it for Wee One #2’s Godparents. We all agreed that as great as she is in the kitchen, baking ice cream may have been made even trickier with a 5 and 2 year old in the kitchen as well.

Baked Alaska – from Baking With Kids (p. 106)

For the Sponge
3/4 cup + 2 tbsp flour
1 tsp baking powder
1/2 cup + 1 tbsp sugar
1/2 cup butter, soft
1/2 tsp vanilla
2 eggs
1 tbsp milk
To finish
1 pint strawberry ice cream
4 eggs whites
1 cup + 2 tbsp sugar
1 1/2 cups chopped strawberries

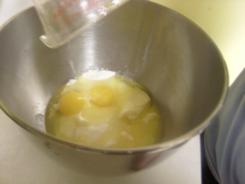
Mix the flour and baking powder. The stir in the sugar, add the soft butter and vanilla.

Add the eggs, stir and bake in a greased cake pan for about 20 minutes at 350.


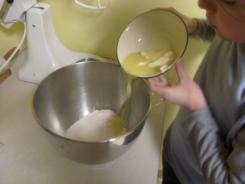
Make the meringue by beating the egg whites for about 10 minutes with a mixer.

Pop the cake in the fridge or freezer for about 15 minutes before spooning the strawberry ice cream on.


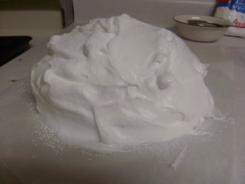
Top that with the chopped strawberries and meringue. Stir the sugar into the meringue and then spoon on top. Make sure the meringue is totally covering every little bit of the ice cream and cake. Every. Little. Bit.


Then pop the whole thing in the oven at 425 for 4 minutes. Cross your fingers that you didn’t miss a spot or you’ll have a pool if melted ice cream in your oven!

Mission accomplished! Amazing!!!

3 Comments

Work in Progress Wednesday #5

Crafty

In this post, I’m participating in three WIP Wednesdays; Freshly Pieced, Tami’s Amis and Musings from the Fishbowl.

This is my 5th Work in Progress Wednesday and while we all know I post other weeklies (Marriage Monday has been going on since last summer), this weekly specifically really calls attention to what you managed to (not) get done in a week. I mean, yes I have three kids that I enjoy spending a lot of time with, and yes my husband has turned me into such a serious neat freak I can’t knit or sew or…well anything, until the house is clean, and yes, I cook everyday and bake almost everyday, but I’m not really thinking about any of that when Wednesday rolls around and I am posting about a single 3/4 done sock – that I started LAST Wednesday.

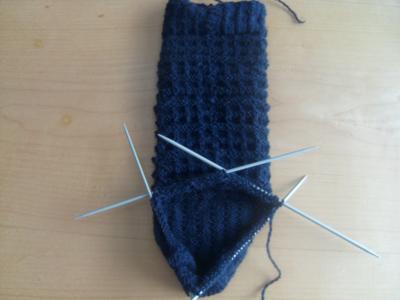
Anyhoo, let’s show some love to these socks, for my Uncle Peter’s birthday, called Jules. They’re actually a pretty quick knit. Pretty much all of this knitting was done over three short sessions while watching Law and Order at night. πŸ˜‰

This is a close up of the waffley pattern in the leg of the sock. I think they’ll be extra warm because they look like thermal underwear!

So! I’ve carved out a piece of my nightly schedule to get more done around here, craft-wise. If I don’t, Wee One #1’s curtains will never be sewn and I will not get this amazing blanket done by July. I haven’t even touched it again yet because there are birthday socks in the way!

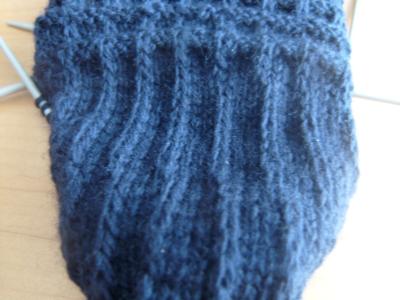
This is the heel of the sock. I adore socks with a slightly patterned heel. Especially if it’s not painful to knit!

My goal this week is to have at least finished these socks, if not finished these socks and started on the next ones. I need some pressure lol. I’m always a fast knitter in December!

WIP Wednesday at Freshly Pieced
11 Comments

Deceptively Delicious Ranch Dip

Domestic, Healthy

In this post, I’m participating in Tempt My Tummy Tuesdays, Tuesdays at the Table, Tuesday Night Supper Club, and Hearth ‘n Soul.

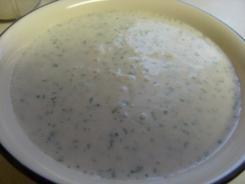
The 5th recipe I made from Jessica Seinfeld’s Deceptively Delicious was Ranch Dressing that I served with fish.

I’m a huge ranch dressing fan. I love it on salads naturally, but I also love it as a dip – for pretty much everything. The only bummer about this recipe, if it’s even a bummer, is that it makes quite a bit but only lasts a few days. I gave some away to my husband’s cousin and his girlfriend and the rest I used as a dip with fish, then on a salad and finally on the third day when Wee One #2’s Godparent’s came for their annual visit we used the last of it as pizza crust dip!

Ranch Dressing (with navy beans) – from Deceptively Delicious (p. 123)

1 cup lowfat buttermilk
1 cup canned navy beans*
1 tbsp low fat sour cream
1 clove garlic, chopped
1 tbsp grated Parmesan
1 tbsp dried parsley flakes
1/2 tsp salt
1/4 tsp pepper
1/8 tsp chili powder

*great northern beans are listed as an either/or suggestion

First drain, rinse and mash the beans. Set aside.

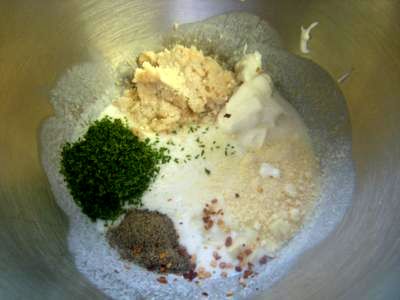
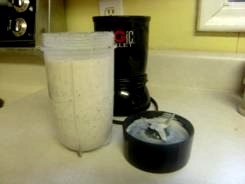
Mix the buttermilk, beans, sour cream, garlic, Parmesan and seasonings in a magic bullet or something similar. Blend till smooth!

Use right away and store what’s left in an air tight container for up to 3 days – eat it quick!


Some notes, the dressing is thin enough as a sauce to drizzle over chicken or fish if you like it with those. Otherwise, next time I will add more navy beans to make it thicker and more dressing-like.

,
8 Comments

Marriage Monday (with chicken pot pie)

Churchy, Domestic, Kids, Marriage

In this blog post I am participating in Marriage Mondays, and on Wednesday I’ll add this link to Living Well Wednesdays

It’s Marriage Monday again! Last week, my Good Morning Girls group was talking about something Courtney had said in a recent blog post. Essentially, that if you bump a cup full of water, water will come out (duh lol) but that it’s the same with our hearts! If you have a heart full of frustration (or anger or resentment etc), that’s what will come out when you hit a bump! So if we work every day to fill our hearts with love and joy, that’s what will come out! I’ve been thinking about that a lot this week and it makes so much sense!

We are all human so it’s easy to do things that annoy the people around us, and it’s easy to let ourselves be annoyed. This morning, it is -37 with the wind chill and though I know I saw him wear it home on Friday, Wee One #1 could not find his hat as he was getting ready for the school bus – this bumped my cup. If I was already frustrated, (perhaps with him constantly losing tupperware at school), frustration would have spilled out and he would have taken off for the bus with a cloud over him and a chilly head. Instead I told him that he needed to keep track of his things, especially necessary things like that, and I gave him a spare hat! Had I reacted angrily or meanly, I may have ruined his day and likely mine too because I’d spend the rest of it feeling guilty!

My husband and I went to bed at 3:30 this morning because dear, dear friends we only get to spend time with once a year were here. When we went to bed he said he’d like to get up at 7:30 when I do – it is 10 and he is still sleeping. This doesn’t really bump my cup at the moment, but when he gets up in a few hours annoyed that I was unable to get him out of bed when he asked me to, I will not respond with anger or resentment for being the one that gets up early. I’ll make him and coffee and tell him playfully not to be so grumpy. When his Eeyore cloud passes I’ll be very happy that I didn’t incite an argument just because he can’t get by on as little sleep as I can.

I have tired to live like this since I noticed myself not paying attention to my reactions a couple of years ago and of course every day I can get better and better at it. I’m human so I’ll never totally get it right, but as long as everyone around me knows that I am trying, and if I get it right more often than not, it’s a win!

My husband works from home – we are incredibly blessed to be able to say that!! That means we are together pretty well all day, everyday. We each have things in our days that do not involve the other so we’re not as connected at the hip as that may sound, but being around each other this much could be horrible if we were not mindful of what’s in our cups!!

I’m ending Marriage Mondays now with my husband’s favorite recipe form the previous week. Last week it was Chicken Pot Pie!

This version of Chicken Pot Pie is the short of shortcut my Granny would take and then never tell anyone about. She was up making muffins almost every day at 5am for her family, so she could take as many shortcuts as she needed to in my book!

Shortcut Chicken Pot Pies
Makes 6 individual 6″ pies

2 1/2 cups mixed frozen veggies
2 cups (or more) chopped cooked and seasoned chicken
2 cups thickened chicken stock or cream of chicken soup
2 cup Bisquick
1 cup milk
2 egg

Preheat your oven to 400. Thicken your chicken stock by taking a little and mixing it with about 1 tbsp or so of cornstarch, then add that back into the rest of the chicken stock. The original recipe calls for cream of chicken soup, I’ve also seen it done with a can of gravy (!) but my husband likes it best with thickened chicken stock. πŸ™‚

Mix 1 cup of the Bisquick, 1/2 cup of the milk and 1 egg together and pour that into the bottom of your pie pans (of course you could also just use a big pie pan), and bake for about 15 minutes.


Meanwhile, stir the veggies, chicken and thickened chicken stock (or soup or gravy) together. Once the bottom crusts are ready, pour this mixture over them. I made little fork indentations in the bottom crusts because they puff up a bit. The mix the rest of the Bisquick, milk and remaining egg and pour over top the veggie and chicken mixture.


Cook this for another 25-35 minutes, till puffy and golden on top and voila! Amazingly simple chicken pot pie without rolling any pie crust at all!


The original recipe just puts the veggies and chicken mix directly into the pan(s) with no bottom crust, so you only use half the Bisquick, milk and eggs but then you sacrifice having a bottom crust so it’s less a pie and more a savory cobbler situation.


2 Comments

Super Cute Saturdays #1

Pretty, Reviews

I’ve done a pretty decent job of covering all of my ‘so very ___’ bases on this blog so far. Marriage Mondays are generally my so very churchy days (and once in a while if it’s an intimacy related post I can squeeze in a so very naughty gem), Work in Progress Wednesdays obviously are my so very crafty days, cooking and baking through Deceptively Delicious has been an easy way of sneaking in some of my so very healthy ideas, clearly the rest of my posts are so very domestic and I know that my so very nerdy tendencies shine through fairly often. All that’s really been missing is so very pretty! So here goes – with the first installment of Super Cute Saturdays!

I wasn’t sure where to start at first because of course, this area of my life has so many blogging possibilities. I could do makeup tutorials! Product reviews! Share little tips and tricks!! Then I thought, since my ‘go to’ manual for getting cute is Carmindy’s Crazy Busy Beautiful, I will use that as a reference guide. Fun!! So this post will be a slightly disorganized intro!

 
(left photo is Urban Decay shadow in kiddie pool, right is Urban Decay in Skimp and Romp – and Revlon lashes. Both photos have Too Faced Lash Injection mascara)

Let’s jump in with eyeshadow, because it’s just more fun than the basics of skincare and sunscreen (which you really, really should wear every single day even in the rain and especially in the snow). There are some things about shadow I’ve just learned in the last year or so since meeting Carmindy and becoming more than just a little obsessed with her book.

One of my dear friends, who is actually Wee One #3’s Godmother, Miss Lindsay, is a very talented makeup artist and she’s told me for years that if you want your shadow to stay on all day, you have to use a primer. I really didn’t think it mattered that much in my little world, now of course I realize that it matters more to me than to others because it’s not like I always have time for touch ups with three wee ones underfoot! A couple of months ago, I bought primer for the first time – Urban Decay Eyeshadow Primer Potion. It’s beyond amazing. It’s $18 for a tube smaller than a mascara BUT you only need a dab and it actually works. Really, truly. I generally get up around 7, and do my makeup within minutes of falling out of bed. Between kids and cooking and cleaning and blogging, I generally don’t have a chance to touch up till just before supper, which is 5. That’s 10 hours and it stays put – and even then I just powder my face I don’t mess with my shadow at all. When I finally take it off around 11 or so when I get in the shower it’s starting to feather a bit but that’s after 17 hours of wearing it. When I do my shadow without a primer, it’s feathering at lunch. No lie.

I also learned that you can make a base with a little extra foundation and powder on your lids and brow bones and that does work, though not as well as the primer potion I picked up from Urban Decay.

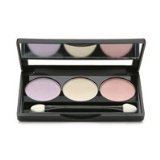
Of course, playing with colours is the best part of playing with makeup! For a long time I stuck to the three shadow sets, the little kits that have a highlight, lid and contour shade. For a long time I stuck with just that, and mostly in two colours. I’d get the green trio and the purple trio. This one from Clinique is a good example of a trio of three shades in the same colour family.

If you’re not used to wearing shadows and you’re not sure what colours to try, a shimmery brown eye shadow works for all skin tones, eye colours and ages!

Eventually, I embraced the seventeen year old in me and started mixing it up myself with three shades of gold, or mixing a purple with a green (I know that sounds like a bad carnival ride but it’s adorable). These two kits, one from NYX and one from Almay, are kits with colours that go well together but are not just different shades of the same colour.

A few quick little notes that have made playing with makeup more fun. 1) Keep a makeup sponge with a little foundation on it on hand when you’re using super glittery or shimmery or otherwise loose eyeshadow. So when the shadow inevitably lands on you cheeks and the area under your eye, you can smooth it away like a little magic eraser. 2) When you look exhausted and there’s no time to properly do your makeup, a few dots of white eyeliner blended with your finger in your tear duct area coupled with just a little super light highlighter on your brow bone wakes up your face – considerably. 3) Vaseline is a great eye makeup remover!

Next up? Lashes. But when you wear them everyday like I do, you have to call them laaaaaashes. πŸ˜‰


(I used Tarte Lock & Roll in bronze here with Urban Decay plush lashes)

1 Comment

Pillow Cookies – Cookie #3

Domestic

I’m skipping the oatmeal cookie post (cookie #4 for 2011) because oatmeal, however amazing they may be are really not worthy of their own post. My husband may argue that, as he looooves them and requests them on the regular, but we all make oatmeal cookies, don’t we?

As with most genius baking ideas I come across online, I found the idea for pillow cookies over at Bakerella. She found them in the bakery of Fresh Market and this version was her reproduction. Hers are huge and way way bigger than the inspirational cookies that she ate. I went with much smaller ones, probably closer to the ones she bought, simply because my wee ones and husband will eat them and eat them, so they’ll last a little longer if they’re smaller!


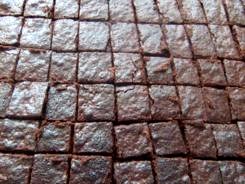
First whip up a batch of brownies and cut them pretty small. I went with 1/2″ squares (ish) and Bakerella went with 1 squares. Then, as they’re cooling, make a batch of chocolate chip cookie dough (use mini chips). Do you need recipes for these elementary school baked goods?

The brownies could not be simpler; melt 1/2 cup butter in a saucepan, once it’s melted add 1 cup of sugar and stir till it’s totally dissolved. Then mix in 2 eggs, one at a time and 1 tsp of vanilla. Now dump in 1/2 cup flour, 1/2 cup cocoa, 1/4 tsp salt, 1/2 tsp baking powder. It’ll be pretty gloopy, but just mix it in till it’s all one gloopy mass and away you go. Pop them in for about 10-15 at 350.

The cookies are also painfully easy. Mix 1 cup butter and the 1 1/2 cups packed brown sugar till creamy. Then add 2 large eggs, 1 large egg yolk, and 1 tablespoon of vanilla. Yes, a tablespoon not a teaspoon. Mix 2 1/2 cups flour, 2 tsps baking powder, 1/2 tsp salt, and 1/2 tsp baking soda. The add that to the rest of the mix. Now stir in a whole 12oz bag of mini chocolate chips. Chill the dough for about an hour.

Now, the fun begins! Make a generous ball of cookie dough. Smoosh a thumbprint into it.


Plunk a brownie into the indentation you just made. Now roll the rest of the cookie ball around the brownie, add a little more dough if you need to. Now giggle. You just hid a brownie in a cookie.


Repeat over and over. Don’t try to put more than 6 on your tray at a time (assuming it’s an average size tray) because they run together like woah.

It was really hard to wait for the kids to get home after school to try one, but I usually have the first tea time treat with them. It was painful but I waited!

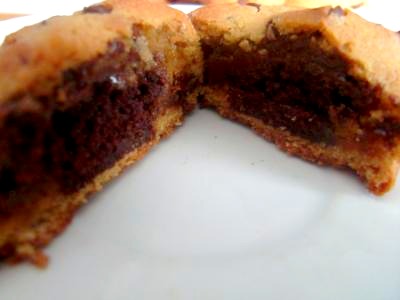
I could not, however, wait to open one up and see what it looked like inside, so I sliced this one – then my husband walked by and ate it! Can you blame him?!

9 Comments

Deceptively Delicious Spaghetti and Meatballs

Domestic, Healthy

This is the fourth recipe in my little kitchen adventure of cooking and baking my way through Jessica Seinfield’s Deceptively Delicious.

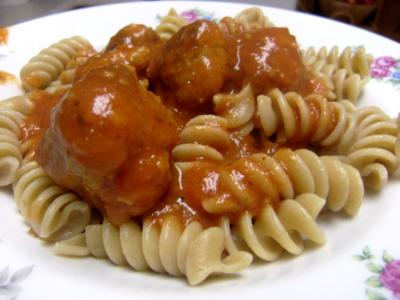
This recipe was a winner for the kids and myself, but my husband was not at all a fan of the chicken meatballs. He also commented that the pasta sauce tasted like the dipping sauce at Swiss Chalet (that’s a painfully Canadian reference, it just tastes sort of tangy). So this was an epic fail as far as my husband was concerned but the kids happily ate the pasta and the meatballs, so the next time I make this will be a lunch for the wee ones.

Spaghetti & Meatballs (with butternut squash and carrots) – from Deceptively Delicious (p. 120)

1/2 lb lean ground turkey (or chicken)
1 cup breadcrumbs
1/2 cup butternut squash puree
1 clove garlic, minced
1 tsp salt
1/4 cup + 1/8 tsp black pepper
cooking spray
2 tsp olive oil
1 (26-oz) can whole peeled tomatoes with their juice, pureed
1/2 cup water
1/4cup carrot puree
1/4 tsp garlic powder
pinch cayenne pepper
1 bay leaf
1 lb whole wheat pasta

When I made this I already had some butternut squash puree in the fridge, but I didn’t have any carrot puree so I whipped some up on the spot by steaming in a little water in a frying pan for about 15 minutes, till they were really tender.


Then I tossed the carrot pieces, along with the teeny bit of water that was left in the pan with them into the blender and voila. Once that was out of the way I could get going with the actual recipe.

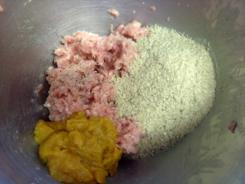
Mix the ground turkey or chicken with thebreadcrumbs, butternut squash puree, garlic, 1/2 tsp of the salt, and 1/4 tsp of the black pepper till they’re totally mixed, you will have to use your hands a bit! Which is fine because you’ll be using your hands to shape the meatballs anyway! Make them about 1″ and put them on a parchment paper lined baking sheet.


Coat a frying pan with non stick cooking spray, add the olive oil and brown the meatballs for about 5 minutes. I’m paranoid about chicken though so I cooked them for twice as long.

Then I pureed the tomatoes with their juice, and plunked over the meatballs with the water, carrot puree I just made.


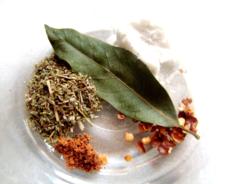
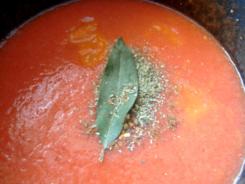
Next add the garlic powder, cayenne, bay leaf and the rest of the salt and pepper. Simmer over low heat for about 20 minutes, or till the meatballs are cooked all the way through. Take out the bay leaf.


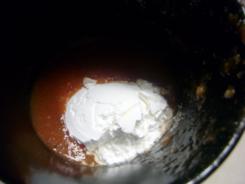
I found the sauce as is to be really loose and watery at this point. It tasted great but wasn’t really thick enough for pasta, you know? So I added cornstarch. A rookie mistake is to just plunk a tablespoon or so of cornstarch directly into the sauce and try to whisk it in. That will give you serious clumps – everytime. Instead, take a little of the sauce, add the cornstarch to it and whisk it in the cup or small bowl. Then when that little bit is totally mixed in with no clumps, pour it into the rest of the sauce and whisk that in.


Then? Perfection. I turned it off but left it on the burner for a little heat while I boiled water, made the pasta and set the table. Rotini is a favourite around here so that’s what I went with. Nothing could save this dish for my red meat loving husband, but as I said the rest of us loved it so I will likely make it again for lunch.

1 Comment

Work in Progress Wednesday #4

Crafty

In this post, I’m participating in three WIP Wednesdays; Freshly Pieced, Tami’s Amis and Musings from the Fishbowl.

I’m really loving this whole WIP Wednesday thing. It’s been a month now that I’ve been participating in these three link ups and it’s been a fun and motivating way to keep up with my ideas.

Work in Progress Wednesday is supposed to be just that, works in progress! However, since this is generally the only day I post about my projects, I’m posting my finished objects too! You’ll live, right? Great!

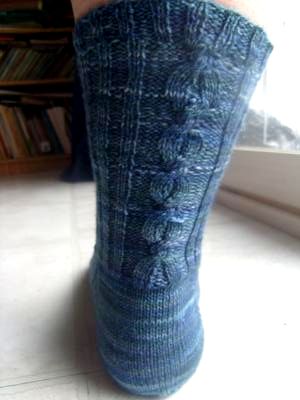
My No Tears Socks (pattern on Posh Yarn) are finally finished!!! Just in time too! Wee One #2’s Godparents will be here this weekend. I think he’ll really like the cable and that it’s not too fussy for a man’s sock but it’s not so boring either because he appreciates the work that goes into a nice sock. πŸ™‚ We’re all really excited to see them and I’m excited to show you what we’ve cooking and baking for their visit. Fun!!


Since I just finished his sock last night, I’ve only just cast on today for my new sock, Knit Picks’ Palette in Navy.


My new Knit Picks order came in at the end of last week and I’m so excited to dive into it. Wanna see? Of course you do!!

I piled it onto the kid’s easel to show it off! This pile (3 balls of Knit Picks Palette in Navy for the socks I just mentioned are not pictured) will be knitted into; 3 pairs of socks, 1 hat, 12 facecloths, and a pair of mittens! I can hardly wait to get them all knitted up.

There is one other work in progress I don’t have good photos of! Hopefully by July, it’ll look like this! My sister made one for our parents and I looooove it. I’m making it as a wedding turned happy first anniversary gift! Mine is coming together in a green apple colour. Its made in triangles, you need 49 squares to make a decent blanket, and there are four triangles per square (duh) – so yes that’s 196 triangles! Whaaaaat?! My first triangle took a whole day (it’s pathetic I know, but I’ve got three wee ones running around and a kitchen calling my name lol), and my first triangle had a glaring error in it. Awful, glaring, beacon of light style error. I trucked on with the next triangle and made the same error – always towards the end where the bigger leaves are. Originally, I thought of just making smaller triangles, up to the point where I wasn’t messing up, but then my dear friend Talea (who I can’t link to because she is ‘between blogs’ right now) pointed out that the smaller triangles wont make a perfect square (sigh) and I’d need approximately eleventy million more triangles to complete the blanket (double sigh).

Sooooo, after I’ve finished a few months of birthday knitting, I’m going to attack this blanket head on and find the error in the pattern (maybe I wrote it down wrong??). If I want it finished for the middle of July (let’s set a July 15 deadline), and it takes me a day per triangle, that’s July 15 minus 196 days is 19 days ago. Hmm. Hahaha, so maybe I’ll make a smaller blanket! I will do some math and try to bend the time-space continuum and get back to you next Wednesday!

I know they’ll love it though, and my husband spent a lot of time with this cousin growing up and I’m especially fond of her parents so we do spend a lot of time together. πŸ™‚

I’m still waiting on the skully fabric to make curtains for Wee One #1, and since his room is currently green and white with a weird brown border I have no doubt those curtains are going to set off a desire to paint the room. We’ve been here for 4 and a half months and while everything has a place and our routines are pretty firm in this new life, other things (like decor) are still coming together!

WIP Wednesday at Freshly Pieced
7 Comments

Baking with Kids – Scones

Domestic, Kids

In this post, I’m participating in Tempt My Tummy Tuesdays, Tuesdays at the Table, Tuesday Night Supper Club, and Hearth ‘n Soul.

This is the third recipe the kids have made themselves and this one turned out the best yet! They’re really getting into it and embracing the concept of testing out every recipe in the book. It’s nice to see them working together and I’ve been impressed with their kitchen skills so far. Thumbs up for the So Very Domestic wee ones! πŸ˜‰

Scones – from Baking With Kids (p. 13)

2 cups flour
4 tsp baking powder
pinch of salt
1/4 cup sugar
4 tbsp butter
1 egg
about 1/2 cup milk


First mix the flour, baking powder, salt and sugar. Then cut up the butter into small pieces and plunk them in. Use your hands to crumble the butter into the flour mixture until it looks like small crumbs.


Now, crack your egg into a measuring cup and add just enough milk to make 2/3 cup total. Then make a well in your dry mixture and add almost all of your milk + egg liquid.


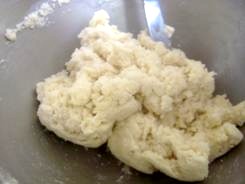
Use a butter knife to mix the liquid in, until it becomes a soft dough. If you need to, add more of your liquid bit by bit.


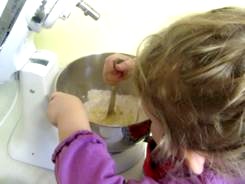
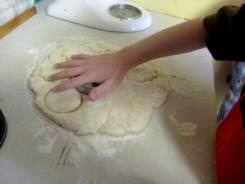
Once it looks right, plunk it on a lightly floured counter and knead it. Here, even Wee One #3 got into it! So cute!!!


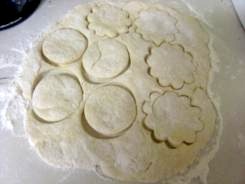
After both kids had a turn really kneading it, they pounded it down a bit and flattened it out so cut their scones from the dough. Wee One #1 chose a standard circle cutter, and naturally, Wee One #2 chose a ‘princess flower’.


Into the oven they went for 11 minutes at 425! Tah-daaaah!

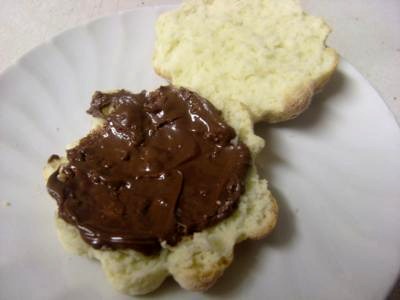
They honestly were as good as they looked. Wee One #1 tried one with butter, then once he knew he loved it he had another with Nutella! Wee One #2 stuck with her raspberry jam, and the littlest one had a small piece of each!

Fun and simple recipe for kids. Again, all I did was turn the oven on and off and put in and take out the cookie sheet!

,
6 Comments
« Older Posts