Browsing the blog archives for December, 2013.

Christmas 2013 Rewind

Domestic, Kids

Oh my goodness, this Christmas season really seemed to fly by faster than others have! I think it’s that this year we are involved in more activities than ever before. Several years ago, when we lived in the middle of nowhere, I felt like I had a pretty good grip on being fully present and that helps to make time feel a lot slower! I’m going to have to think about that and try to work out a way to be fully present when there is so much going on. Challenge accepted!

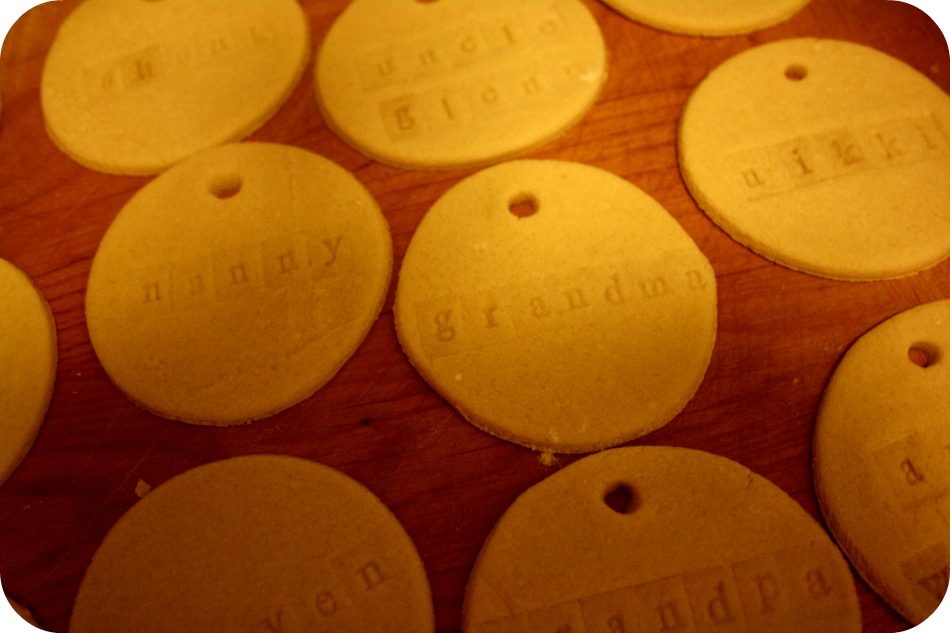
This holiday season I made a knitted advent calendar and it was so fun to do the activities with the kids. Some of the activities were seriously time consuming like making homemade marshmallows and some activities were especially messy like making window clings, but they were all a blast. The whole reason we do so many countdown activities with the kids is to spend time together, add to the magic of the season and stretch out the anticipation!

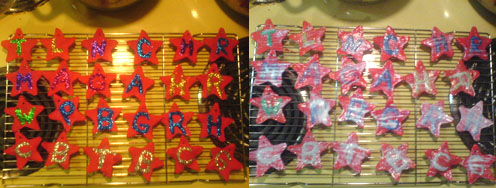
We celebrate Eastern Orthodox Christmas as well, though the focus on our ‘little Christmas’ is to make things for each other and to bake traditional Greek Christmas treats. I’ll post some of the other Christmas treats we have made between now and then (January 6) because they were all so good! This year we made peppermint fudge, Oreo truffles, a holiday version of cowgirl cookies, checkerboard cookies, English toffee, two kinds of peanut brittle (the accidental kind was voted the best), red and green velvet Ferrero Rocher cupcakes, chocolate dipped pie crust stars, and date cakes baked in tin cans with caramel sauce. Our oldest had a Jiu Jitsu tournament where he placed second, and a promotion ceremony where he moved on to his next belt! Our second had a weekend of dance workshops to prepare for her competitions next month, she danced for a fundraiser and her dance company had a Christmas party. The littlest and I were just trying to make sure everyone was where they needed to be and that we managed to have a healthy dinner on the table every night. She’s playing around in the kitchen a lot more lately and loves when she makes something she can share with her friends.

Oreo truffles peppermint fudge
checkerboard cookies peanut brittle

My husband and my sister both got me the bulk of my kitchen wish list, and I could not possible be more thankful or more excited! Aside from the glass bowls and the stainless steel measuring cups and spice rack (thank you so much guys), I got cookbooks from my two absolute faves – Bobby Flay and Ree Drummond. I am really excited to cook and bake my way through these books. I think I will start with some of The Pioneer Woman’s finger foods for New Years Eve and work on some cute mocktails. Today though, today is for knitting and relaxing and maaaaaaybe making some lemon curd, because why not?

Merry Christmas!!

No Comments

Knitted Advent Countdown

Crafty, Kids

I’m late to the game on this one, but it was just too cute and too fun to wait till next year!

While stocking up on yarn in November for my annual knitting marathon (every evening in November and December) at Knit Picks, I came across this pattern for Smitten, a Holiday Garland and, naturally, I bought everything I needed for it that very second. So so so cute!

From http://www.ravelry.com/patterns/library/smitten-a-holiday-garland

Rounds 1-8: *K1, P1 repeat from * to end of round (8 rounds of ribbing)
Switch to stockinette and begin the body of the mitten
Round 9: K3, M1R, K6, M1R, K6, M1L, K6, M1L, K3 (28 sts)
Round 10: Knit
Round 11: K12, M1R, K4, M1L, K12
Rounds 12-15: Knit (4 rounds)
Round 16: K12, M1R, K6, M1L, K12
Rounds 17-19: Knit (3 rounds)
Round 20: K12, M1R, K8, M1L, K12
Rounds 21-22 Knit (2 rounds)
Round 23: K12 and move them onto needle 1, K10, move the remaining 2 stitches on needle 2
onto needle 3 for safe keeping (12-10-12)
Work back and forth on the 10 stitches on needle 2 to make the thumb.
Row 1 (WS): Purl
Row 2: Knit
Row 3: P2TOG 5 times
Break yarn, leaving a 6″ tail.
Draw the tail through the live stitches of the thumb, pull up and secure.
The tail will be used to sew up the side of the thumb when finishing.
Continue Round 23 by attaching the yarn at the beginning of needle three and knitting all of
the stitches on it.
Rearrange stitches evenly on three needles and mark start of round if needed. (8-8-8)
Round 24-30: Knit (7 rounds)
Round 31: SSK twice, K6, K2TOG, SSK, K6, K2TOG twice (18 sts)
Round 32: Knit
Round 33: *K2TOG repeat from * to end of round (9 sts)
Break yarn, draw tail through the remaining stitches, pull up and secure. Hide tail inside.
Using the tail on the thumb, sew up the side of the thumb. Yarn can be knotted with the cast on
tail (mid-round 23) at the thumb joint to secure. Hide the yarn ends inside.
Fold the end of the i-cord to the mitten cuff and sew in place with the cast-on tail to form a loop
for hanging. Weave in (or hide) all yarn ends.

I knitted them up over the course of a few nights at the end of November. You just knit 24 tiny mittens, feel free to use whatever colors go with the room you’re putting this in or just whatever makes you happy. I used six different colors, so I made four of each. I used Knit Picks worsted weight yarn Swish in Serrano (holly red), Rouge (pink), Honey (yellow), Gulfstream (bright blue), Dublin (green) and Amethyst Heather (purple). Each mitten has it’s own little i-cord knitted into the cuff to hang! Then you knit a long i-cord to hang them all from, I also used Split Rings to mark the countdown.

Knitted Advent Countdown
Knitted Advent Countdown Knitted Advent Countdown

Instead of putting candy or toys inside (we have a few advent calendars, our kids are big on counting down and we didn’t want to add any more trinkets or candy to our lives), my husband and I dreamed up 24 fun activities and opened these cute little characters in Photoshop and got to work. We printed them, cut them out, rolled them and tied them with red curling ribbon. Then we stuffed each mitten with an activity! The kids have such a blast picking out the activity for the day and since we know what they are, we can make sure we are prepared for them!

Knitted Advent Countdown

When we’re done, I’ll post pictures of all the activities we did! Here is the list:
1 – write letters to Santa
2 – make paper snowflakes
3 – make paper chain dolls
4 – bake bread
5 – make cinnamon ornaments
6 – read Christmas stories
7 – Christmas movie marathon
8 – make homemade marshmallows
9 – paint Christmasy pictures
10 – make hot chocolate balls
11 – have an M&M race (more on this later)
12 – make Borax snowflakes
13 – decorate a gingerbread house
14 – play minute it win it games
15 – make snow globes
16 – make botttlecap snowmen
17 – make gifts for each other
18 – make window clings
19 – make gingerbread and star garland
20 – try a new recipe
21 – make a huge blanket fort in the living room
22 – watch The Polar Express and drink hot chocolate
23 – play reindeer games
24 – read The Night Before Christmas

2 Comments

Salt Dough Gift Tags and Ornaments

Crafty

Salt dough is great for making super cute personalized gift tags or you can make ornaments and decorate them however you want! I have made this recipe into so many different shapes for both gift tags and ornaments. Our girls made really elaborate, sparkley, seriously blinged out ornaments to send to their grandparents and aunties back home and I will post those later this month. I made some bright red gift tags a couple of years ago for the kid’s friends at school. There were a lot of steps to it, but most of the time was in waiting for the paint or mod podge to dry. I made the dough, cut out a zillion stars and painted one side red. Waited for them to dry. Then painted the other side red. Waited for that to dry. Then I used a paintbrush to paint on the initial of the recipient in glue and covered it in glitter. Waited for the glue to dry. Covered that side in mod podge. Waited for that to dry. Then I mod podged the back and once that finally dried I tied some red yarn through the hole to hang them from. So cute! Seeing them again makes me want to make more!


This year for gift tags I’m going more rustic because of a really cute alphabet stamp set I found on Etsy. I bought them specifically to use with food so while these gift tags don’t really count as food, they have never had any ink on them so there is no residue. If you choose to use stamps for letters try to wash off any ink that may be stuck inside them first.

Salt Dough

1 cup flour
1/2 cup salt
1/2 cup water

This is incredibly easy and while I always start with this general recipe, I also always add more flour. Preheat the oven first, to 250. Just mix the flour, salt and water with the hook attachment on your mixer or by hand for a few minutes and then turn it out onto a floured surface and keep kneading it until it’s elasticy. You will likely need to add more flour to make it smooth. It will be sticky, don’t panic, just keep kneading in more flour until it’s almost like play doh. Now you can roll it out and cut out whatever shapes you like. If you’re going to use stamps or something to make indentations in the dough, do it before you bake. Don’t bake glitter or other embellishments because they will end up melty and gross, not at all cute. Also, make sure you poke a hole in the tops of these babies before you bake them! A plastic straw is the perfect size.


Bake for about 2 hours and then let them cook before you paint, glitter, mod podge or whatever.

There are so many ways to dress these up and so many other kinds of dough you can make for different kinds of ornaments. We are going to do some crafty kitchen experiments this weekend to see what kinds of dough work the best.

1 Comment

Peppermint Meringues

Domestic

Here we go, let the countdown to Christmas officially begin! We have 23 sleeps to go and my little family is packing a whole lot of Christmas insanity into this month. Our elf on the shelf has been bringing us treats and making messes since last Tuesday, in our family the elf shows up the day after we put up our tree and we’ve been putting up the tree on the same day for about 14 years now so it’s a neat addition to a family tradition.

These little meringues are so simple and so good! I love how pretty and festive they look with minimal effort, and I really love how many little stars you can make in few hours! They look so pretty on cookie platters and they dress up assorted cookie tins too! I wish I knew where I got this recipe from, but I clipped it from a magazine years ago and have no idea which one. I am fairly sure it is from one of those holiday cookbook magazines by the checkout at the grocery store, probably either Good Housekeeping or Better Homes and Gardens.

Peppermint Meringues

3 egg whites
1/4 teaspoon cream of tartar
1/4 teaspoon peppermint extract
1/8 teaspoon salt
3/4 cup sugar
red paste food coloring

Peppermint Meringues Peppermint Meringues

The meringue itself is fairly standard. Just beat your egg whites and cream of tartar until it magically transforms from goo into this big, billowy, fluffy cloud.

Peppermint Meringues Peppermint Meringues

Next, prepare your pastry bag with a Wilton star tip and, using a fine paint brush, paint on four stripes of red food coloring before you spoon your meringue mixture into the bag. Then add the meringue and pipe sweet little stars on a baking sheet lined with parchment paper. Bake at 200 for about an hour and a half.

Peppermint Meringues
No Comments