Browsing the blog archives for October, 2010.

Cake Buns, Burger Brownies, Sugar Cookie Fries and Finger Painting!

Crafty, Domestic, Kids

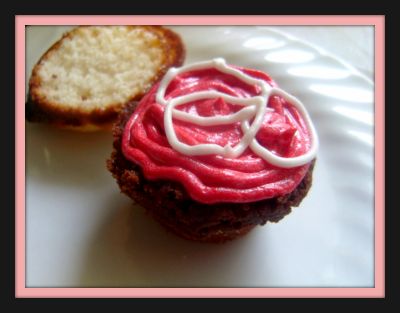
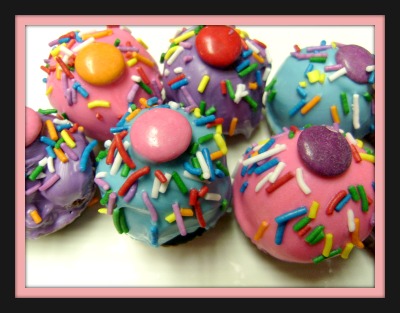
I originally saw these little cuties on Bakerella, of course. I’m a little obsessed, can you tell? Then, just as with everything else that happens on the internet, they started popping up everywhere. I neeeeded to make these. This week has been a blur of black and orange, a frenzy of Halloween activity that I have loved every moment of! I will post some of the Halloween treats I’ve made this week tomorrow (along with my entry for the Craftster Fall Cooking Challenge). So with all the ghoulish cooking and baking going on around here, cute little brownie burgers were a nice change of pace in the kitchen. I made an extra tray and let the kids have at it with way more buttercream frosting than any three children should have access to. πŸ˜‰


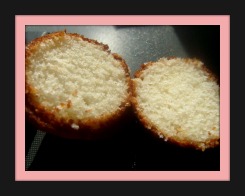
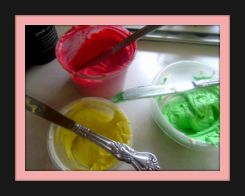
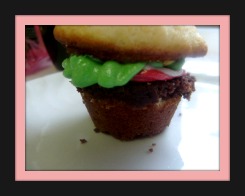
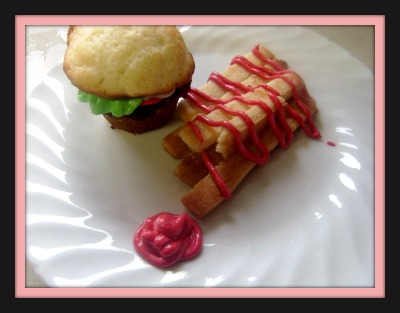
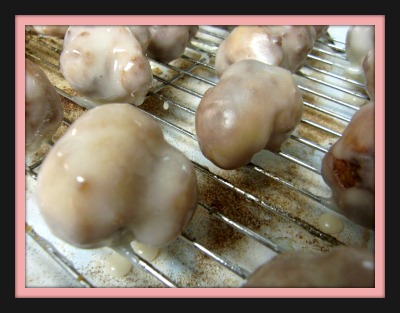
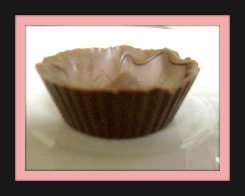
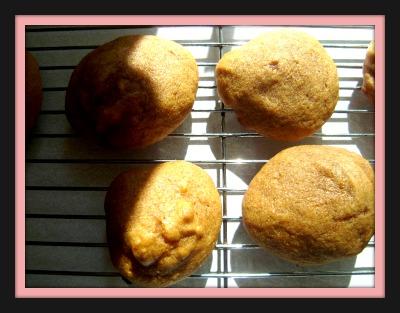
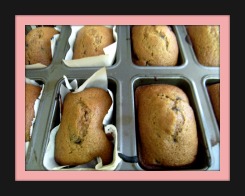
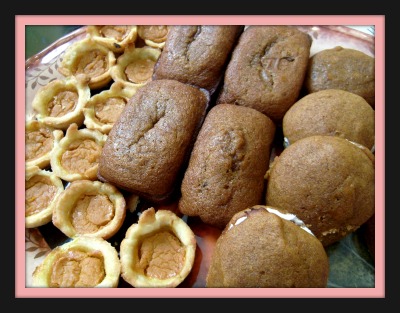
It’s pretty straightforward, and I’m including recipes! I made my standard vanilla cake in a mini cupcake pan for the buns, then I cut the tops off! Don’t overfill the cups too much because you don’t want too much of a muffin top! I then made classic buttercream and tinted it red for ketchup, green for lettuce, yellow for mustard and left some white for onions. Get creative with it! If you typically put hot peppers on your burgers, tint some orange too!

Standard Vanilla Cake – from Elliot Bakes a Cake

2 eggs
3/4 cup butter, softened
1 1/2 cups sugar
1 cup milk
1 teaspoon vanilla
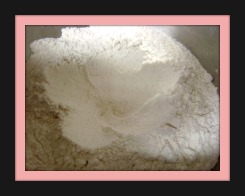
2 1/4 cups flour
3 1/2 teaspoons baking powder (yes 3)
1/2 teaspoon salt

Separate the eggs into two small bowls. Mix the flour, baking powder and salt in a large bowl.

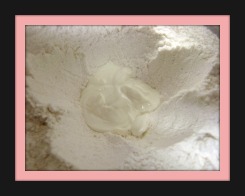
Cream the butter, add the sugar. Stir until smooth. Beat the egg yolks and add them to the butter and sugar. Add the milk and vanilla next and stir.

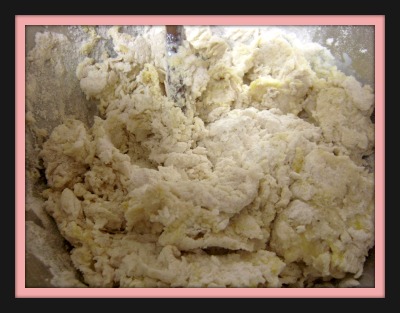
Then add the flour mix, a little at a time. Mix till smooth. Beat the egg whites till stiff peaks form, then fold into the batter.

If you’re using it for these mini cupcakes, assume they’ll be fast, like 15 minutes or less. If you’re making bigger cupcakes or a cake, add more time.

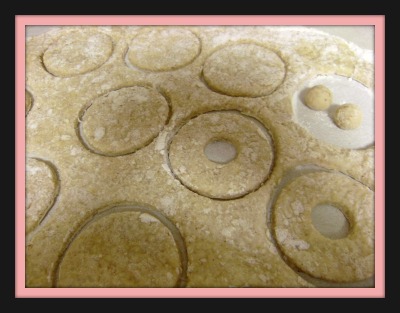
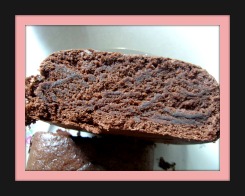
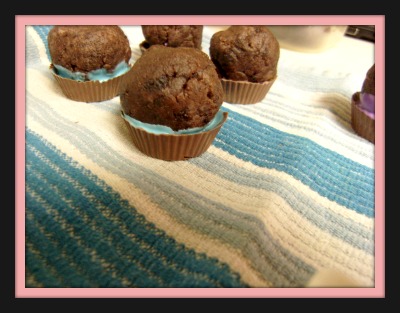
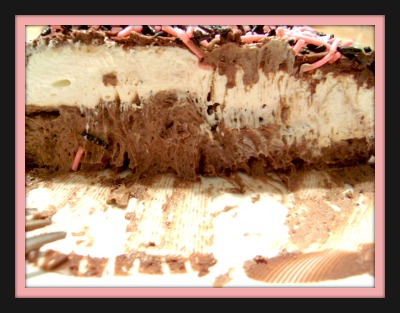
The brownies were my standard cocoa brownies (found here with chocolate chips added to them). I found that since they are so moist, I had to pop them in the freezer for a bit for them to be easier to cut – I still have yet to pick up a small circle cutter so I used a shot glass.


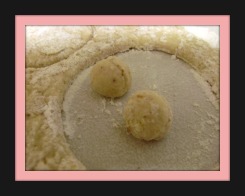
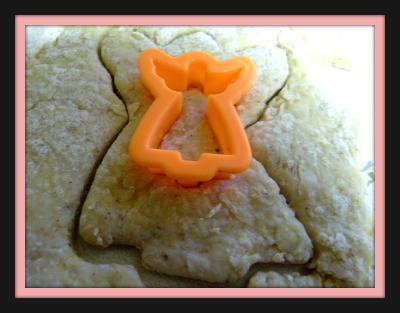
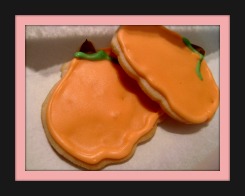
The sugar cookies here are the same I made last month for the Daring Baker challenge. So simple and so fast!!

Basic Sugar Cookies

1/2 cup + 6 tablespoons unsalted butter, at room temperature
3 cups + 3 tablespoons all purpose flour
1 cup caster sugar
1 large egg, lightly beaten
1 tsp vanilla extract

Cream butter, sugar and vanilla. DO NOT OVERMIX. Beat in egg till well combined and not a second longer. πŸ˜›

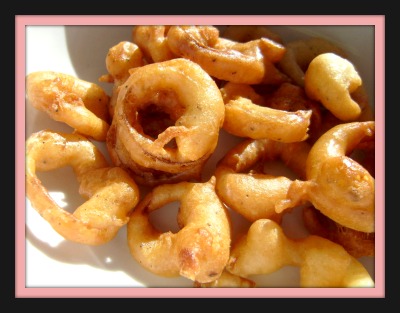
Add flour and mix till a sticky dough forms. Kneed into a ball and divide into 2 or 3 balls. Roll out each ball between two sheets of parchment paper for about half an hour. Preheat to 350, then take it out, peel off the first layer or parchment paper and slice it into strips like french fries!

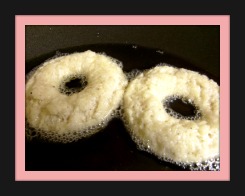
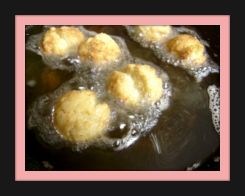
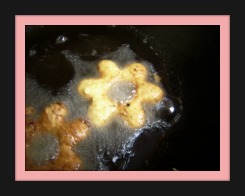
These babies cook fast, especially if you made thin fries! Check on them after 5 minutes but they may take up to 8 or 10 minutes.

And now, let’s sidebar into kiddie art, shall we?

Later that afternoon, wee one #2 wanted to into the new finger paints my husband picked up, and with wee one #3 sleeping, away we went!

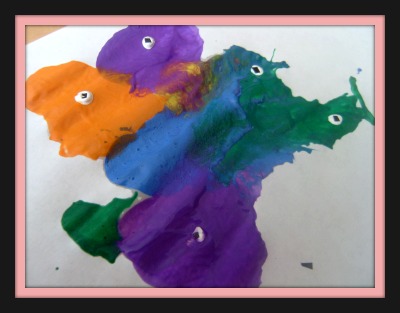
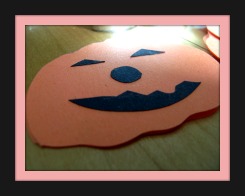
This first one was made with blow painting, which is just plopping a bit on watery paint on the paper and blowing it around with a straw to make different shapes. We added eyes because she told me it’s a friendly monster.

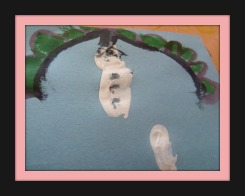
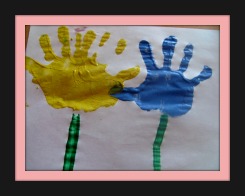
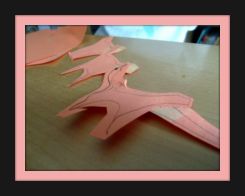
Then we did some thumbprint snowmen on the left and handprint flowers on the right. The hand prints were the most fun because they were the messiest, of course!!


1 Comment

Doughnuts from Scratch – Daring Bakers Challenge Oct 2010

Domestic

In this post, I’m participating in The Daring Kitchen, Tempt My Tummy Tuesday, Tuesday Night Supper Club, Hearth ‘n Soul, Tuesdays at the Table and Delicious Dishes at It’s a Blog Party

The October 2010 Daring Bakers challenge was hosted by Lori of Butter Me Up. Lori chose to challenge DBers to make doughnuts. She used several sources for her recipes including Alton Brown, Nancy Silverton, Kate Neumann and Epicurious.

This challenge was so fun I don’t even know where to begin. Think about entering a coffee shop, and the row upon rows upon rows of doughnut behind the counter. With the recipes from this month’s challenge, you can literally make all of them! I may be 300lbs the next time anyone sees me!

These doughnuts are the final birthday party item I didn’t post about yesterday! Surprise!

There yeast doughnuts, old fashioned buttermilk cake doughnuts, bomboloni (German style with a fruity filling) and pumpkin. I went with the old fashioned buttermilk cake doughnuts and no lie, they taste exactly like the Tiny Tom carnival doughnuts!

So first, here’s the recipe I used!

Old-Fashioned Buttermilk Cake Doughnuts:
Sour Cream 1/4 cup
All Purpose Flour 3 1/4 cup
White Granulated Sugar 3/4 cup
Baking Soda 1/2 teaspoon
Baking Powder 1 teaspoon
Kosher (Flaked) Salt 1 teaspoon (If using table salt, only use 1/2 teaspoon)
Nutmeg, grated 1 1/2 teaspoon
Active Dry Yeast 1 1/8 teaspoon
Buttermilk 3/4 cup + 2 Tablespoon
Egg, 1 large
Egg Yolk 2 large
Pure Vanilla Extract 1 Tablespoon
Powdered (Icing) Sugar 1/4 cup (used for decorating and is optional)


First heat the sour cream in a stainless steel bowl set over a pot of simmering water. Then turn your oil on. πŸ˜‰

Over a large mixing bowl, sift together the flour, sugar, baking soda, baking powder, salt, nutmeg; make a large well in the center. Place the yeast in the well; pour the sour cream over it. Allow it to soften (if using packed fresh yeast), about 1 minute.

Pour the buttermilk, whole egg, egg yolks, and vanilla extract into the well. Using one hand, gradually draw in the dry ingredients. The mixture should be fairly smooth before you draw in more flour. Mix until it is completely incorporated. The dough will be very sticky. Wash and dry your hands and dust them with flour.

If I’m honest here, I’d admit that I love mixing food by hand. Loooove it.

Now comes the really fun part!! Shaping them! For the traditionally shaped doughnuts, I used a drinking glass and a very teeny shot glass, though I am aware there are actual doughnut cutters out there! Now that I know how to make them, I have those cutters on my wish list.

Be sure to seriously flour up your counter and work fast!


They really don’t take long at all, maybe 30 seconds a side, and really the second side is a little less. They’re super fun to make and, as usual, I was in the kitchen, dancing around and listening to my music louder than I probably should when all the kids are in bed and I was almost done the whole batch before I knew it.


Once my husband came in the room and saw what I was doing, he raided the cookie cutter cabinet (yes I have a cabinet full of cookie cutters), and cut out angel and heart shaped doughnuts. He is hilarious. We ended up making another batch and made all silly shapes! The kids loved them the next day – I wonder if it’s weird that their parents stayed up and made funny doughnuts while they were sleeping? Ha!


Ok, back to our regular doughnuts. Since they were really hot and we were working fast (because the recipe told us to!) we hadn’t tried them yet. So as soon as the doughnut holes were ready we had one. Oh. My. Goodness. When we realized that they tasted exactly like the Tiny Tom mini doughnuts, we immediately bathed them in cinnamon and sugar and nom nom nomed half a tray of them.

Eventually, we restrained ourselves long enough to whip up a sour cream glaze (!!) for the remaining doughnut holes. Man, they were good!

Sour Cream Glaze – found on an index card in my kitchen
3/4 cup icing sugar
2 tablespoons sour cream
1/4 teaspoon vanilla extract
1/2 teaspoon water


Just stir the sugar and sour cream in a small pot over low heat till it’s melted and almost smooth. Remove from heat and stir in the vanilla an water. Voila!

The glaze is really shiny and almost see through on the first coat. Once it’s a little dry and duller, you can dip it a second time – or more if you prefer. I found that two coats gave it that perfect coffee shop shell, you know? Watch out for cavities!

I can hardly wait for next month’s Daring Baker challenge!! Stay tuned!

17 Comments

Happy Birthday to Me!

Domestic, Marriage, Small Town

Last weekend, four of my dearest friends made the two hour journey (one of them had a 5 hour journey) to my house in the woods to help me celebrate my birthday.

Backing up a bit, when I was preparing for my ladies (and Andrew) to come up for the weekend, I naturally went on a baking spree, and so I needed birthday items, like sprinkles and candy melts. I literally asked for a handful of 3 colours of candy melts, 3 colours of sprinkles and about 1/2 lb of milk chocolate. My husband drove into town to get the gear I needed and came back with what can only be described as an avalanche of sprinkles and candy melts and other amazing things I didn’t even ask for. That’s love people, that’s love.


I had asked for the candy melts and sprinkles to make cupcake pops. I’ve made cake balls many, many times before but these are so much more festive! I used the Bakerella Cupcake Bites Made Easy post as my guide. They really are so easy, all you need is some chocolate, a candy cup mold (like the bottom of a Reese’s Peanut Butter cup), candy melts in different colours, some sprinkles in different colours and Smarties. Ready?

First, of course, make your cake. I used the Stir and Bake Chocolate Cake I posted a couple of weeks ago. While the cake is baking, make your chocolate cups. Just melt the chocolate over a double boiler (a lot of people use the microwave with great success), and pour it into the mold. Be sure to coat the sides well!

Once the cake has baked and cooled, cut off any crispy edges so you’re just left with the soft cakey part and then smush it up!

Leave the chocolate to dry on the counter for a bit, and once it’s lost it’s shiny gloss, pop it in the fridge for a few hours.

Now add a few dollops of buttercream or cream cheese icing and mix it up. The ratio is different depending on what recipes you use for the cake and for the icing. We’ve been over the whole store bought things before. I know it’s so much easier to use a boxed cake mix and a tub of frosting but my Granny has drilled in to me that I should just do it from scratch. I swear it doesn’t take that much longer at all!


Once you’ve got the right consistency, roll your mixture into cake balls and put those in the fridge as well. Make sure you roll them big enough (or small enough depending on your mold) to sit comfortably in your chocolate cups!

When your chocolate cups are ready, and you’ve popped them out of their molds, melt some of your candy melts down to use as glue to hold the cake balls in the chocolate cups.

Bakerella squished the cake balls right into the melted chocolate in the mold before it even went in the fridge. Which is genius. I, however, did not do that so I had to glue them in. Next time, I will do that.

Now holding the cupcake pop by the chocolate cup, dip it in the candy melts and add your sprinkles and Smartie to it while it’s still wet! These are a lot of fun to make because you can literally use whatever sort of toppings you want depending on the occasion!


The purple ones are a replica of the ones in Bakerella’s tutorial, the blue ones just also felt really festive. The pink ones were a little birthday treat to me because my favourite colour combo is black and pink (obviously). These are hands down the best birthday treat I’ve made.

I made extras and let the kids decorate a bunch on their own. They were really creative with it and made a wonderful mess in the kitchen!

Keeping with the theme of treats I love that look a lot harder to make than they really are, I also made Leek Rings. They really should be eaten fresh, so I made them as I knew everyone was coming over. I went with leeks instead of onions because we all prefer them, and they’re just a little different than what you’d expect. So people were arriving as I was making these, and no lie, they were eating them right out of the collinder! Very few of the leek rings even made it to a plate.


Very simple to make!! You can cut your leeks (or onions) thin and have a lot or cut them thicker to make a bigger snack out of them. If you cut them as thin as I did, you can just pop them in your mouth in one or two bites. Which may not be a good thing!

Leek Rings
1 cup cornstarch
1 cup flour
2 1/2 teaspoons baking powder
1 teaspoon salt
1 egg
1 cup cold water
2 tablespoons oil
2 teaspoons steak seasoning (!!)

Heat up a wok (or frying pan or whatever) 1/2 full of canola oil, use a fork to dip the

leek/onion in the batter, shake it off a bit and pluink it in the oil. Let it cook for just a few seconds if you want it a golden brown, then flip it, cook it for another few seconds and move it to a paper towel-lined collinder. If you like them crispier, just leave them in longer – but not too long, these babies cook fast!

I could eat and eat and eat these. They were so good it’s a little alarming. I would gain so much weight if I made these all the time, but boy do I ever want to make these all the time! I will save them as treats for when I have visitors (which isn’t that often out here in the woods)!

One more treat and I’ll let you get on with your day. This was my birthday cake. I was having some serious oven issues and my sister looooves cheesecake, so I whipped up this Chocolate Elegance Cake from Kraft. Amazing, and again, so simple!!


Chocolate Elegance Cake – from Kraft

1 1/2 packages cream cheese, softened
1/2 cup sugar
2 1/2 cups Cool Whip
6 ounces chocolate chips
1 package jello chocolate instant pudding (4 servings)
1/2 cup milk

This cake is made upside down in a loaf pan, set in the fridge, covered in chocolate and set in the fridge again. Then your friends come over and eat it all!

Beat the cream cheese and the sugar till blended, then stir in 1 1/2 cups of the Cool Whip. Spread 2 cups of this mixture onto the bottom of a 8 x 4 loaf pan lined with plastic wrap.

Melt 3 ounces of the chocolate chips, and add to the rest of the cream cheese mixture along with the pudding mix and milk. Beat till blended and spread over the first layer in the pan. Pop this in the fridge for about 4 hours.

Once the cake as set, melt the rest of the chocolate (3 ounces) and Cool Whip (1 cup) together, let it cool a bit. Now invert your cake onto the platter you’re using and take off the plastic wrap. Spread the glaze you just made over the cake and immediately top with either sprinkles or nuts or whatever you like. Put it back in the fridge for another half hour or so, till the glaze is set.

This cake was amazing, and I later thought about tinting the first layer to a bright colour, or making several layers like that one and tinting them all different colours!

I made one more treat for my birthday party, but I can’t tell you about it yet because it’s a Daring Baker’s challenge and we’re not unleashing it until tomorrow. Trust me though, it’s good! Once you read how to do it, you’ll be wondering why you don’t make it yourself all the time!!

3 Comments

Making Your Home a Haven, Part #4

Churchy, Domestic, Kids, Marriage

In this post, I am participating in Making Your Home a Haven, and Marriage Mondays.

I am love, love, loving this challenge series! It occurred to me today that I will likely be begging Courtney to start another one when this one winds down! <3

So with my candle going and with softer music playing in the house (most of the time), I kept my mindfulness of being peaceful and kind to everyone in my home. Recapping last week, I tried to attack the mental clutter. Knitting, baking and cooking have helped a lot with that, as weird as that may sound because I have to focus my attention to the stitches or the ingredients and I can’t let my mind wander. While this is a decent quick fix it does not get to the root of the issue, so that every time I am not knitting or playing in the kitchen I am horribly distracted by hundreds of tiny thoughts that add up to a whole lot of mental clutter. So all week now, when I’ve noticed that it’s creeping in – these completely irrelevant thoughts, I’ve just turned them over to God and refused to make a big deal out of it. That’s not said lightly and yes it is difficult, but this week has been easier since I’ve been shelfing all the internal chatter. So far, so good.

As for the clutter in the house, we’ve been over this. I am very thankful to say there isn’t any, but of course that’s because I clean every day and not everyone has time for that. I wasn’t always this neat and I can honestly say that the overall feeling in a home when everything is put in it’s place is so much calmer and laid back than when there are piles everywhere and everyone is running late and where is that permission slip?!.

This week now we turn our attention to physical tenderness in our quests to make our homes havens for our families. This is an important but sometimes neglected part of being a close family to a lot of people. We’re big on snuggled in our family, but I can sense that it gets harder to keep that up the older they get. My oldest is 10, and he’s always got a hug for me when he gets off the bus after school or when he’s on his way to bed – but will it be like that when he’s 15? I have my doubts lol. For now though, we generally watch movies together on Friday nights and sunggle up under a huge blanket on the big couch in the living room. We also do a whole lot of blanket forts, and that usually results in some close together time too.

I will be mindful of it though, and encourage a serious pillowfest in the living room. I give back rubs to my littlest and to my husband. This week I will be sure to also give some to wee ones #1 and #2, and ask them how they feel about this challenge. I always move the pillar candle form the kitchen counter to the table for supper and they have all seemed to enjoy that. When I was a kid we ate a formal supper in the dining room every night, with candles, linen placemats and napkins – the whole nine. My mother is a very classy lady, one day I’ll get there!

3 Comments

Thanksgiving Baking

Domestic

Thanksgiving has always equated to pumpkins, which I think is pretty traditional and fair. This is the first year in a very long time that I’ve been away from my folks for the prep of Thanksgiving. We made the drive down to their place for actual Thanksgiving supper, but this year I wasn’t there for baking the desserts. I may have gone overboard with the Thanksgiving baking at my house, but is there really ever such a thing?

First up, I asked Twitter what I should bake and Jen from Hollyhouse Studio suggested I try out the Pumpkin Whoopie Pies with Maple Cream Cheese Frosting from Brown Eyed Baker. Excellent idea. If you’re not following them on Twitter yet, get to it. If you are, then take Jen’s advice if she gives you any, and bake as much of Michelle’s goodies as you can. <3 I didn't have everything I needed for the filling, so I whipped up some classic buttercream frosting to fill them with instead. Whipping cream spiked with cinnamon or nutmeg would have also been pretty amazing. Before this month is over, I will likely have another pumpkin extravaganza and try these with the proper filling. The whoopie pies themselves were wonderful! Not sticky at all, just spongey enough too. When we brought these to Toronto my father inhaled them. πŸ™‚

I have no idea where I found this next recipe. It was in a sheet protector in my kitchen recipe binder, which just means I must have really wanted to try it out if it made it’s way to the kitchen binder.

Chocolate Chip Pumpkin Mini Loaves
3 cups granulated sugar
15 oz pumpkin puree
1 cup vegetable oil
2/3 cup water
4 eggs

3 1/2 cups flour
1 tablespoon cinnamon
2 teaspoons baking soda
1 1/2 teaspoons salt
1 cup chocolate chips

1. Preheat oven to 350. Use either three loaf pans or a pan and a half like the one I used.

2. Sift together flour, cinnamon, baking soda and salt.

3. Beat sugar, pumpkin puree, oil, water and eggs till smooth. Blend in the flour mixture and fold in chocolate chips

4. Fill each pan 1/2 to 3/4 full.

5. Bake for about 35 minutes if using loaf pans, 20 if using mini pans.


These. Oh these ones. My pride and joy. My mini pumpkin tarts. The idea was shamelessly stolen from inspired by Bakerella’s Pumpkin Pie Bites. I love her blog dearly, but I cannot bring myself to use pre-made pie crust. My Granny would be reanimated from the grave and haunt me for the rest of my life. So, I used my 78 year old pie crust recipe. Do you want me to share it with you now? Promise you’ll be good to it? Don’t roll it out too much and for crying out loud, once it’s in the pan leave it be. Okay? Alright then, here you go. It’s really as simple as possible – it is from 1932 after all.

‘Plain Pastry’ from The Art of Cooking and Serving

2 cups flour
2/3 cup butter
3/4 teaspoon salt
cold water

Mix and sift four and salt. Cut in butter with a knife. Add only water enough to hold the ingredients together. Do not knead. Divide dough in 2 parts and roll out thin on a slightly floured board. Line a pie pan with one half the pastry. Pinch pastry with the fingers to make a fancy edge and prick bottom and sides with a fork. Bake in a very hot oven (460) 10 to 15 minutes. For a 2 crust pie, line pie pan with pastry, put in a filling, cover with top crust and bake as directed for pies. If less rich pastry is desired, use only 1/2 cup butter.

I will bake my way through this cookbook as a challenge to myself in the new year. I still have to finish ‘cake year’. πŸ˜‰

The filling for these little cuties is your standard ‘evaporated milk + egg + pumpkin pie filling’.

I gave them an egg wash, of course. Pies and tarts must have a glossy crust, right? I made the pumpkin pie the same as the mini tarts, and the crust is the same as well. I swear by this crust. It is prefect every time.


My full Thanksgiving treat spread, on the beautiful fall harvest platter Gilly gave me a few years ago – thanks Gill!!

1 Comment

Oreo Turkeys and Pumpkin Sugar Cookies

Domestic, Kids

Canadian Thanksgiving has already come and gone, but I know that American friends still have about a month to pull together some cute treats! As you are painfully aware by now, I adore cute food. I mean, I like snazzy grown up food as well, but I have a really soft spot for small, cute food (just wait till you see what I made for my birthday party last week)! I had seen these in various forms all over the place. But these ones are my hands down fave and I more or less used these as my guide.


First off, use the Double Stuff Oreos Cookies and Cups pulled apart regular Oreos and mashed them together to create ‘Redneck Double Stuff’ (best name ever), so it’s possible to make them without, but to make enough for a classroom or large group, I’d imagine you’d need twice as many.

The first few steps are very, very simple. Poke 5 pieces of candy corn in a semi-circle around the top of the Oreo for feathers, then break pretzel sticks in half (technically, you need them to be a little less than half, but you can pawn the middles off on your kids – ha), and poke them in the bottom, like little turkey legs.

There are about a zillion ways to make the head. I have seen chocolate covered mini marshmallows, mini peanut butter cups, Malteasers, Skor balls (and of those chocolate bar in ball form would work). Me? I used brown royal icing, because I had a bunch left over and hate to waste. Depending on what you used as a head, the eyes and nose can be so many different things as well! I used more royal icing, white for the eyes of course and orange for the beak. I painstakingly put on green and blue sprinkles with tweezers to make the pupils. They added serious personality!

It has been said before, but I’ll say it again – cute food is so much cuter on a stick!

Naturally I had to wrap them for transport to school, and I’m not a part of the whole ‘getting to school’ process now that we live in the woods. So I used candy bags and orange ribbon for the kids to cart them off in shoe boxes on the school bus!

As cute as these Oreo turkeys were, they were not exactly the sort of thing to send for the teachers, but I still wanted their treats to be cute because while everyone knows that I’m doing most of the work, wee one #1 is an excellent measure-er and wee one #2 is a great dumper-inner. So the treats are coming from the kids too! I decided on these pumpkins because they’re festive for Thanksgiving, fall, and October all at once and they’re cute but not so cute they’re clearly meant for children.


I packed the cookies in parchment paper, tied them with orange curling ribbon and tucked them in the kids shoe boxes with their turkeys.

They were very excited to be bringing their treats to school. It’s the first holiday of the school year at a new school so I was a little nervous but everyone loved them!


The kids were feeling the Halloween spirit when they got home from school, and set to work on making little Halloween cards to send to their friends back in Toronto. I jumped on the wagon and made a bunch for my friends too and let the kids decorate them! That’s a whole other post!

No Comments

Window Shopping Wednesday, Part 8

Domestic, Pretty, Window Shopping

I have fallen head over heels for recycled glasses. I came across an Etsy shop called BootleHood and am even more in love. These Dr Pepper bottles-turned-glasses are swoon-worthy. I looooove them.


These recycled wine glasses are beautiful too. As much as I love the prints on the other glasses that make it obvious they are recycled, these ones are proof you can made recycled goods look better than new. They’re lovely and clean so they’d work in a modern kitchen, but pretty much all glass wear will work in any kitchen theme.

Now, proof that new, modern pieces like the recycled glasses above can co-exist happily with fun vintage finds! These ashtrays (or candy dishes), found at Stock in Trade are vintage but well kept and they would be perfect alongside any of these glasses! These dishes were meant for game night, yes?

Another item from the same shop, hi-lighting the same idea, vintage and modern, happily ever after. I would run off with this pot. I’d make sauces in it all day.

Naturally, I can’t have a kitchen edition of Window Shopping Wednesday without aprons!! In keeping with the modern meets vintage theme of this week’s installment, here are three much-loved aprons from Mia Sorella Aprons. All three would work in either a modren or retro kitchen.


I am, no surprise, especially in love with this one.

Gear up for a post tomorrow about what I made for the kids’ school for Thanksgiving!

No Comments

Stuffed Grape Leaves (Dolmathes) – Daring Cook Challenge Oct 2010

Domestic

Our October 2010 hostess, Lori of Lori’s Lipsmacking Goodness, has challenged The Daring Cooks to stuff grape leaves. Lori chose a recipe from Aromas of Aleppo and a recipe from The New Book of Middle Eastern Food.

I am four days late to posting this because I threw myself an early birthday and five of my dearest made the road trip out to see me for the weekend! <3 I will post about that another day. This was my second Daring Kitchen challenge, and my first Daring Cook! I was excited when I first read the challenge because I’m Greek and would love to make Dolmathes. However, we just moved to the woods and there are no grape leaves here. Anywhere. My husband went on a mission and drove to two other towns (bless!!) with no luck. So I caved and went with cabbage leaves, an acceptable alternative listed in the challenge. The recipe called for 2 21oz jars of grape leaves, so I went with two heads of cabbage.

The recipe from the challenge turned out so well! So let’s back up a little and go through the recipe.

1 pound ground beef
1/3 cup short grain rice, soaked for 30 minutes
1 teaspoon allspice
2 tablespoons vegetable oil
1 teaspoon cinnamon
1 teaspoon Kosher salt (or 1/2 teaspoon table salt)
1/4 teaspoon white pepper
1 onion chopped (optional)
1 cup pine nuts (optional)

The filling is the easy part, as I’m sure you can imagine. Soak your rice as you mix up all the other ingredients. You’ll also need to blanch your leaves (regardless of what kind you’re using) for a few seconds before you use them (to soften them up enough to roll with). Do this just before you need them.

Rolling Dolmathes is nothing new to me, actually if I ever have the opportunity to host a challenge, it’ll be Spanakopita (my hands down fave Greek appetizer and it includes a lot of rolling and wrapping). Growing up in a half-Greek, half cabbage-roll loving family, we made a lot of these. However, I had never made this exact recipe before and I had never done it on my own, so this was a lot of fun for me!


Place about 2 tesapoons, or maybe a little more, in the bottom center of the leaf. In the case of cabbage, you’re going to want to cut away the hard part of the stem at the bottom. You can see in the first photo where I put the filling and in the second one, how close to the filling I came when I cut the stem out.

Then take the little flaps, roll them over the filling, (one at a time if you need to), and then tuck them under the filling. You’ll likely have a little pouching out like mine. πŸ˜›


Now just roll this little log towards the rest of the leaf, tucking the sides in as you go. Voila, it looks like a weird little wrap sandwich! Finally, you just make the final roll and tuck the top of the leaf over the whole little package and you’re done rolling!

Just like with origami, there is a whole lot of room for variation and technique – and also like with origami, some of your little packages may totally fall apart and need to be re rolled.

/p>

Next you line a pan with them and ‘sweat’ them for about 5 minutes with a little oil, lemon juice and water. Then you can cook them over a low heat in whatever kind of sauce you like. In the supplied recipe, there is seasoning made and apricots are placed with the rolls in the pan. When I made them, I used a tomato sauce with a little bit of oregano. I am not a fan of cabbage rolls to be honest, but everyone here that night loved them! I made myself (and my sister who is also not that into it) what my parents called ‘stuffed nothings’ when I was a kid, which is just the same recipe with a bit more rice! A dollop of sour cream on that and we were set!

I am really loving these Daring Kitchen challenges. I’ve already baked up and photographed my Daring Baker challenge for this month – it will be posted on the 27th! So fun!

1 Comment

Making Your Home a Haven, Part #3

Churchy, Domestic, Kids, Marriage

In this post, I am participating in Making Your Home a Haven, and Marriage Mondays.

So far in this challenge, we’ve started a routine of lighting a large candle every day in the hub of our home to help us to be mindful of creating a peaceful environment and to say a little prayer for peace when we see it. We’ve started listening to softer music in our homes to set the mood to our homes as welcoming and inviting. I have honestly noticed a difference – and our house is usually really laid back and approachable as it is.

This week’s challenge is to clean up the clutter. I know I mentioned this already recently, but when we moved last month, we eliminated all of our clutter. No really. However, there are three areas that need to be better organized. My accessories collection (I have an unhealthy obsession with sparkly, clinking and/or plastic jewelry and headbands), my craft supplies (this is way more under control that my headbands lol) and my husband’s office.

Spiritually though we are to be looking an our internal clutter. I was going to run around my house and show off my tidy bookshelves and my organized laundry room and pantry with all the labels facing out in neat rows like the grocery store – but that’s not my struggle. I can keep my home free from clutter – I have a serious issue with internal clutter. That’s what I have to work on this week.

When I’m putting wee one #3 down for a nap, and I’m sitting there knitting away, quietly at peace with myself, the internal clutter starts. I start thinking I should have done my fitness DVD twice that day because I had time and I was just lazy, or that I should move yardwork day from Friday afternoon to Saturday afternoon so the kids can be playing out there while I’m working. Sometimes, it’s even other people’s clutter, like my husband’s cousin’s relationship issues or problems my friends are having in their jobs or marriages re-sorting to do lists in my head that are actually written down somewhere else. It’s mental clutter because it doesn’t matter if I did my fitness DVD once or twice once it’s done. If I’m thinking of switching yardwork days I should just do it and be done with it, it doesn’t require hours of mulling over. Neither, of course, do problems other people are going through! Seems like a little issue till I realize that I haven’t accomplished much in an afternoon because I’ve been fretting over my sister’s relationship issues or my best friend’s fight with her boss. It’s not that I shouldn’t ever think of these things, it’s that I should not let them rattle around in my head when I should be focusing on what I’m doing, being in the moment, to stop myself from snapping at those around me – those whom I love the best simply because I’m distracted and not giving my full attention. Does anyone else have this problem?!

So that’s what my focus will be this week, cleaning out the mental clutter and fighting to stay present.

5 Comments

Socks of Kindness & Shifting Sands Scarf

Crafty, Kids, Small Town

That’s right people, I’m knitting again. And not just picking up a sad sock from last fall and doing a few rows, I am finally back to my ‘knit a pair of socks in a little over a week while baking from scratch and keeping a clean house’ self. Phew. My poor husband lost his June Clever there for a while and it must have been a little scary. Trust me, I was more nervous than he’ll ever be and maybe one day I’ll post about that. For now, however, the domestic goddess is back at it. Let’s talk about socks, shall we?

Wee one #2 started senior kindergarten this year and her teacher is bananas. Bananas in the same way that I am bananas, so I’m really looking forward to this year at school. I really wanted to make her something extra sweet for Christmas, and as any knitter will tell you I’m already behind when it comes to Christmas knitting. I have a queue on Ravelry as long as my leg (maybe longer actually), and this pattern, Socks of Kindness struck me as something she’d really like. Simple but cute.

It’s a 12 row pattern repeat, and really knits up quickly. I mentioned on Ravelry already that it’s a great pattern for getting your knitting mojo back if you lose it because it’s simple enough to knit up without thinking too much, but it’s got some substance to it so it’s not a horribly boring knit. This is also the first time I managed a short row heel! It was easier than I thought it’d be, after a few failed attempts last year it worked this time for some reason. I like the look of this heel better, though it’s less ‘fun’ to knit than the heel flap I usually knit.


I am aware that it is a little nutty to be knitting socks for my kid’s teacher (teachers actually, I’m knitting up a pair for wee one #1’s teacher too…) but I want them to know that I appreciate the one on one teaching that comes from being in this tiny town. So much one on one time also means they’ll get to know my kids in ways that none of their former teachers in Toronto ever could and that deserves something a little extra, right? Oh, so glad you agree! πŸ˜›

I just cast on for the Shifting Sands scarf last night and I had to rip it back – twice. I have no idea why, but I always seem to forget how to cable when I start a new cabling project. I always realize after I’ve knitted a couple of rows and it looks off. One day, I’ll get it on the first row! So, not much progress, but I’ve got one Christmas gift off my list and I’m starting on another.

This afternoon, I’m cooking up my Daring Cook challenge and some treats for my birthday weekend this weekend. I killed my oven on Thanksgiving (sooooo lucky that it was *after* I was done all my baking), so I’m doing stove top, no bake and bread machine baking. That’s right, in the bread machine!

My actual birthday is next weekend, but my ladies (and Andrew) are coming up tomorrow to help me celebrate and I could not possibly be more excited. I’m Greek, I show both love and excitement with food. Get ready!!

6 Comments
« Older Posts