Browsing the archives for the Domestic category.

Pillow Cookies – Cookie #3

Domestic

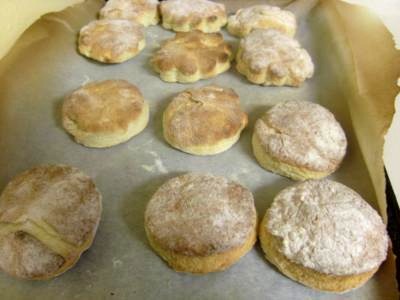
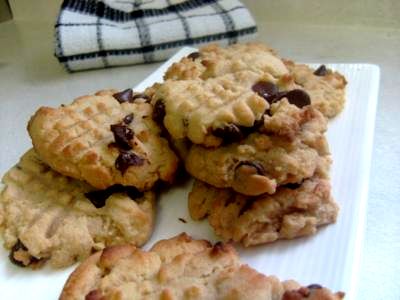
I’m skipping the oatmeal cookie post (cookie #4 for 2011) because oatmeal, however amazing they may be are really not worthy of their own post. My husband may argue that, as he looooves them and requests them on the regular, but we all make oatmeal cookies, don’t we?

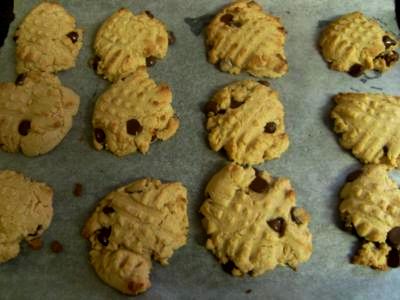
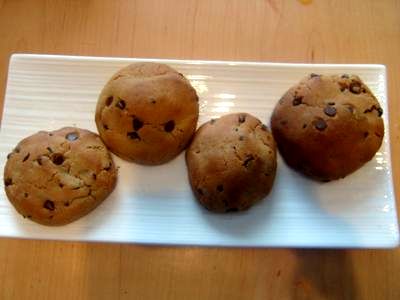
As with most genius baking ideas I come across online, I found the idea for pillow cookies over at Bakerella. She found them in the bakery of Fresh Market and this version was her reproduction. Hers are huge and way way bigger than the inspirational cookies that she ate. I went with much smaller ones, probably closer to the ones she bought, simply because my wee ones and husband will eat them and eat them, so they’ll last a little longer if they’re smaller!


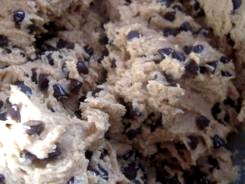
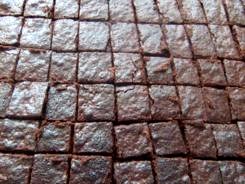
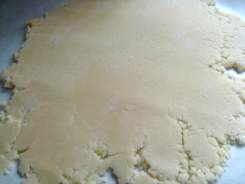
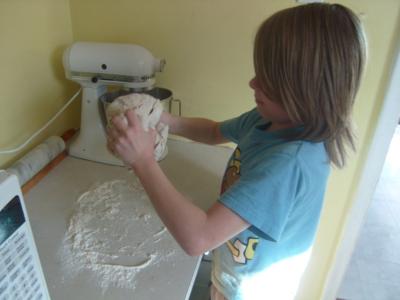
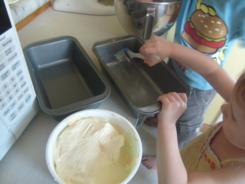
First whip up a batch of brownies and cut them pretty small. I went with 1/2″ squares (ish) and Bakerella went with 1 squares. Then, as they’re cooling, make a batch of chocolate chip cookie dough (use mini chips). Do you need recipes for these elementary school baked goods?

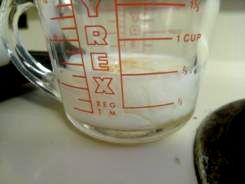
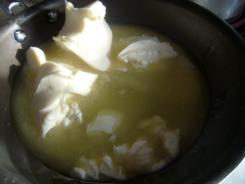
The brownies could not be simpler; melt 1/2 cup butter in a saucepan, once it’s melted add 1 cup of sugar and stir till it’s totally dissolved. Then mix in 2 eggs, one at a time and 1 tsp of vanilla. Now dump in 1/2 cup flour, 1/2 cup cocoa, 1/4 tsp salt, 1/2 tsp baking powder. It’ll be pretty gloopy, but just mix it in till it’s all one gloopy mass and away you go. Pop them in for about 10-15 at 350.

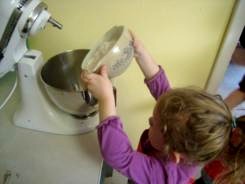
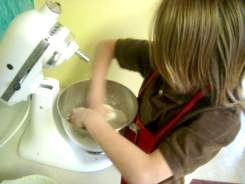
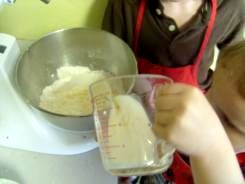
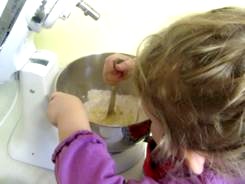
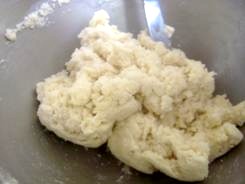
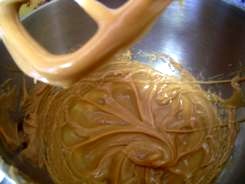
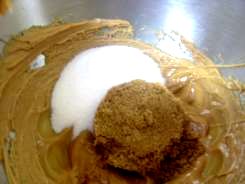
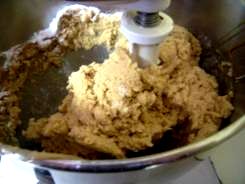
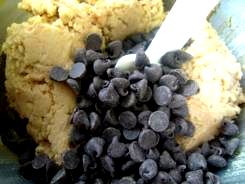
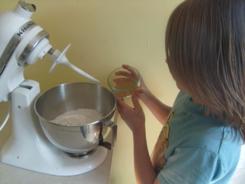
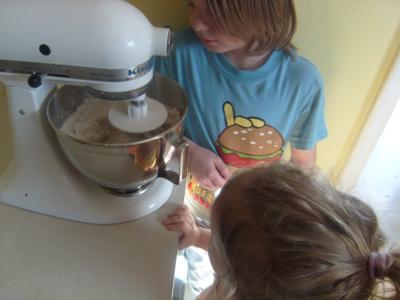
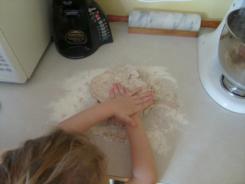
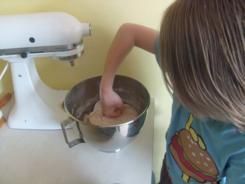
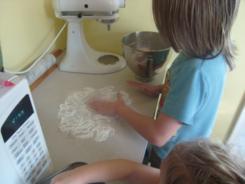
The cookies are also painfully easy. Mix 1 cup butter and the 1 1/2 cups packed brown sugar till creamy. Then add 2 large eggs, 1 large egg yolk, and 1 tablespoon of vanilla. Yes, a tablespoon not a teaspoon. Mix 2 1/2 cups flour, 2 tsps baking powder, 1/2 tsp salt, and 1/2 tsp baking soda. The add that to the rest of the mix. Now stir in a whole 12oz bag of mini chocolate chips. Chill the dough for about an hour.

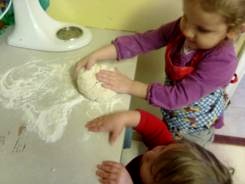
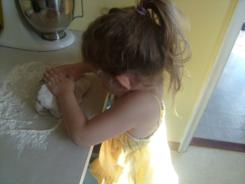
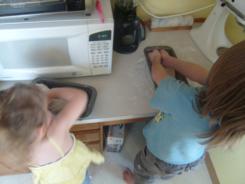
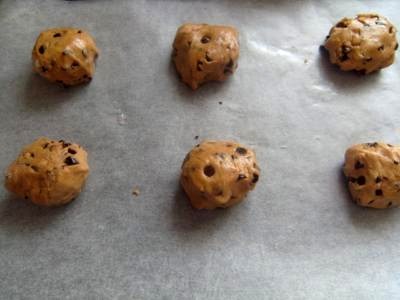
Now, the fun begins! Make a generous ball of cookie dough. Smoosh a thumbprint into it.


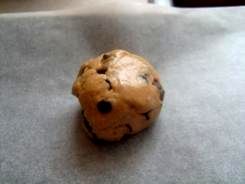
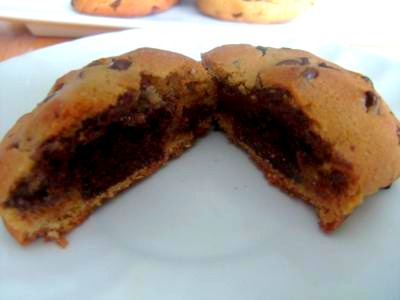
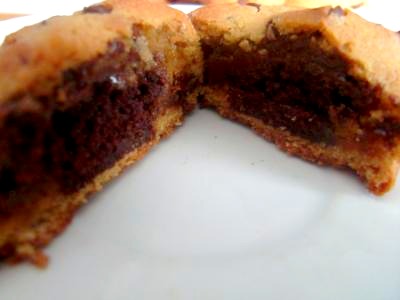
Plunk a brownie into the indentation you just made. Now roll the rest of the cookie ball around the brownie, add a little more dough if you need to. Now giggle. You just hid a brownie in a cookie.


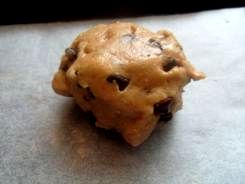
Repeat over and over. Don’t try to put more than 6 on your tray at a time (assuming it’s an average size tray) because they run together like woah.

It was really hard to wait for the kids to get home after school to try one, but I usually have the first tea time treat with them. It was painful but I waited!

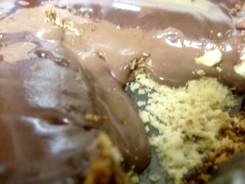
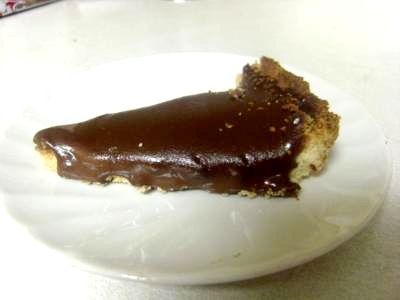
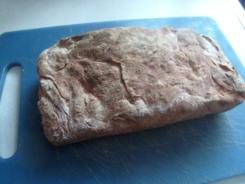
I could not, however, wait to open one up and see what it looked like inside, so I sliced this one – then my husband walked by and ate it! Can you blame him?!

9 Comments

Deceptively Delicious Spaghetti and Meatballs

Domestic, Healthy

This is the fourth recipe in my little kitchen adventure of cooking and baking my way through Jessica Seinfield’s Deceptively Delicious.

This recipe was a winner for the kids and myself, but my husband was not at all a fan of the chicken meatballs. He also commented that the pasta sauce tasted like the dipping sauce at Swiss Chalet (that’s a painfully Canadian reference, it just tastes sort of tangy). So this was an epic fail as far as my husband was concerned but the kids happily ate the pasta and the meatballs, so the next time I make this will be a lunch for the wee ones.

Spaghetti & Meatballs (with butternut squash and carrots) – from Deceptively Delicious (p. 120)

1/2 lb lean ground turkey (or chicken)
1 cup breadcrumbs
1/2 cup butternut squash puree
1 clove garlic, minced
1 tsp salt
1/4 cup + 1/8 tsp black pepper
cooking spray
2 tsp olive oil
1 (26-oz) can whole peeled tomatoes with their juice, pureed
1/2 cup water
1/4cup carrot puree
1/4 tsp garlic powder
pinch cayenne pepper
1 bay leaf
1 lb whole wheat pasta

When I made this I already had some butternut squash puree in the fridge, but I didn’t have any carrot puree so I whipped some up on the spot by steaming in a little water in a frying pan for about 15 minutes, till they were really tender.


Then I tossed the carrot pieces, along with the teeny bit of water that was left in the pan with them into the blender and voila. Once that was out of the way I could get going with the actual recipe.

Mix the ground turkey or chicken with thebreadcrumbs, butternut squash puree, garlic, 1/2 tsp of the salt, and 1/4 tsp of the black pepper till they’re totally mixed, you will have to use your hands a bit! Which is fine because you’ll be using your hands to shape the meatballs anyway! Make them about 1″ and put them on a parchment paper lined baking sheet.


Coat a frying pan with non stick cooking spray, add the olive oil and brown the meatballs for about 5 minutes. I’m paranoid about chicken though so I cooked them for twice as long.

Then I pureed the tomatoes with their juice, and plunked over the meatballs with the water, carrot puree I just made.


Next add the garlic powder, cayenne, bay leaf and the rest of the salt and pepper. Simmer over low heat for about 20 minutes, or till the meatballs are cooked all the way through. Take out the bay leaf.


I found the sauce as is to be really loose and watery at this point. It tasted great but wasn’t really thick enough for pasta, you know? So I added cornstarch. A rookie mistake is to just plunk a tablespoon or so of cornstarch directly into the sauce and try to whisk it in. That will give you serious clumps – everytime. Instead, take a little of the sauce, add the cornstarch to it and whisk it in the cup or small bowl. Then when that little bit is totally mixed in with no clumps, pour it into the rest of the sauce and whisk that in.


Then? Perfection. I turned it off but left it on the burner for a little heat while I boiled water, made the pasta and set the table. Rotini is a favourite around here so that’s what I went with. Nothing could save this dish for my red meat loving husband, but as I said the rest of us loved it so I will likely make it again for lunch.

1 Comment

Baking with Kids – Scones

Domestic, Kids

In this post, I’m participating in Tempt My Tummy Tuesdays, Tuesdays at the Table, Tuesday Night Supper Club, and Hearth ‘n Soul.

This is the third recipe the kids have made themselves and this one turned out the best yet! They’re really getting into it and embracing the concept of testing out every recipe in the book. It’s nice to see them working together and I’ve been impressed with their kitchen skills so far. Thumbs up for the So Very Domestic wee ones! 😉

Scones – from Baking With Kids (p. 13)

2 cups flour
4 tsp baking powder
pinch of salt
1/4 cup sugar
4 tbsp butter
1 egg
about 1/2 cup milk


First mix the flour, baking powder, salt and sugar. Then cut up the butter into small pieces and plunk them in. Use your hands to crumble the butter into the flour mixture until it looks like small crumbs.


Now, crack your egg into a measuring cup and add just enough milk to make 2/3 cup total. Then make a well in your dry mixture and add almost all of your milk + egg liquid.


Use a butter knife to mix the liquid in, until it becomes a soft dough. If you need to, add more of your liquid bit by bit.


Once it looks right, plunk it on a lightly floured counter and knead it. Here, even Wee One #3 got into it! So cute!!!


After both kids had a turn really kneading it, they pounded it down a bit and flattened it out so cut their scones from the dough. Wee One #1 chose a standard circle cutter, and naturally, Wee One #2 chose a ‘princess flower’.


Into the oven they went for 11 minutes at 425! Tah-daaaah!

They honestly were as good as they looked. Wee One #1 tried one with butter, then once he knew he loved it he had another with Nutella! Wee One #2 stuck with her raspberry jam, and the littlest one had a small piece of each!

Fun and simple recipe for kids. Again, all I did was turn the oven on and off and put in and take out the cookie sheet!

,
6 Comments

Marriage Monday & A Chocolate Tart

Churchy, Domestic, Marriage, Small Town

In this blog post I am participating in Marriage Mondays, and on Wednesday I’ll add this link to Living Well Wednesdays

Today’s an exciting day because it’s the first day of the Good Morning Girls Bible study of the book of James and it’s also the day the first book for the Bloom / (In)Courage book club is announced. No lie, I will be picking up (or ordering) that book as soon as I know what it is!

Don’t worry, I’m not going to drone on and on about scripture (unless you’re interested – email me!), I’ll stick to the theme of marriage and family on Mondays.

I’m going to give you a recipe for a chocolate tart that my husband adored last week – in just a sec.

First a quick note on not freaking out over your husband taking the lead.

I have had a great start to 2011 in my teeny tiny little town. The teeny tiny little town in the woods that I never in a million, billion years would have chosen to move to. My husband has been trying to get me to move to the middle of nowhere for years, but since neither of us drove it wasn’t really feasible until the summer of 2009 (when he got his license and a car) and I really wasn’t feeling it. Up to this point I had handed most major decisions to my husband without any trace of weirdness but this decision just felt too much. It was crazy. I’m a through and though city kid. I took streetcars and buses to school! I loved walking everywhere. I have a real affinity for the Toronto Public Library system. Most of all, I’m a seriously social creature and most of my dear friends either live in Toronto or pass through it a couple times a year. If I’m totally honest, that last point is the one I held on to the longest.

Eventually, I started to see that he wanted to live in the woods even more than I wanted to stay in Toronto. Friends reading this probably don’t believe that, but it’s true. He was borderline miserable. And now? Now that we’ve been here for 4 months I feel like so much in my life is better than it was. Don’t get me wrong, I miss my friends and the ability to take the streetcar to the library (or, well, anywhere), but I don’t miss the reality of three kids on a packed streetcar AT ALL.

I have found something out here that I never would have found within my life in Toronto. I have found a new, deeper connection to my husband, I have found that my priorities were not at all in line with really nurturing my family and I have found…wait for it…a desire to slow down. I still do a million things in a day, but I used to do 2 million. Now, when I look out the window while in the middle of the day’s ‘to do’, I see nature and God’s creation everywhere! I know He’s present in Toronto too, but out my old kitchen window I saw a concrete backyard, a neighbour I longed to avoid and rows upon rows of similar houses with hardly a few feet between them. Out this back window, I see snow. Lots and lots and lots of snow, and some days it comes down in such huge beautiful flakes that I have to just stop. I stop and I take my coffee to the big patio doors and I just stand there and watch it fall. So there we have it. He was right, and to put that better, he knew something I didn’t know, something he never could have explained to me. I had to experience it to know that it was better.

And now, onto the chocolate tart! Hilariously, I the title of the blog post that introduced me to this tart is No Bake Chocolate Tart for a Happy Husband. Ha!! It’s a brilliant recipe because it only has three ingredients (unless you count the ingredients for the crust which is only another 6 anyway).

Pate Sucree (Sweet Tart Dough) – from The Art of Simple Food via Shoots & Roots

1/2 cup butter, softened
1/3 cup sugar
1/4 tsp salt
1/4 tsp vanilla extract
1 egg yolk, room temperature
1 1/4 cup all-purpose flour (unbleached)

It’s pretty self-explanatory but here goes. Cream the butter, then add the sugar and beat till fluffy. Add the salt, vanilla & egg yolk, mix till combined. Now add flour and mix until the dough is crumbly and most of the flour is mixed in. Mix the rest by hand until the dough forms a ball. Pop it in the fridge for 4 hours before you roll it out. I’ll wait here.

Of course once you take it out of the fridge you’ve got to let it warm up a little, say 20 minutes or so before you roll it out between parchment paper (or on a floured surface if you must) and pinch it into a cute tart pan, or pie plate.


Chocolate Tart (for a Happy Husband) – also from The Art of Simple Food via Shoots & Roots

6 oz dark chocolate, chopped
1 cup heavy cream
baked and cooled sweet tart crust

First, warm the cream in a stainless steel bowl (I set my bowl over a frying pan of simmering water but there are much fancier ways to do it), when it’s scalding add the chocolate. I took it off the frying pan of water for this part (because, as you probably know, water + chocolate = bad).


Once your chocolate is all melted and mixed in well with your scalding cream, pour it into your cooled tart shell. Pop it in the fridge and wait – forever. Ok, so technically it’s actually 2-3 hours, but when your husband is in the fridge every few minutes poking at it, it seems like forever.


Then, naturally, you take it out an hour early and have the first slice when it’s all gooey and not set up yet. Whoops! Yummy anyway! Hours later, once this treat is completely set, take another slice for photos and then eat that too. 😉


7 Comments

Miss America 2011

Domestic, Kids, Pretty

I adore pageants, their extreme cheesy factor doesn’t bother me at all. The bigger the hair and the more glitter on the evening gowns, the better! I eat it right up. So, naturally, I love, love, love the mother of all pageants, Miss America. For the last few years, I’ve gathered my girlfriends to wear plastic crowns and cute dresses and drink champagne and watch the show. This is my first year in the woods – and just my wonderful luck – its also the first year Wee One #2 is interested and oh boy is she interested.

The celebrations around here started early. I was wearing my rhinestone tiara and my biggest Urban Decay lashes at breakfast (just for the record, these are my dailies). Here is Wee One #2 all set for the show about an hour before it started, the one of me was taken in the morning and then I shoveled and cleaned like this. I adore these lashes, they’re so fun.


We baked up some girlie treats last night and watched Miss America together. She was rooting for Miss Oklahoma (she was the 4th runner up), and I was rooting for Miss Nevada, who unfortunately didn’t even make the semi-finals. Our second choices were Miss Hawaii (my choice, she got 3rd runner up), and Wee One #2’s second choice, Miss Nebraska WON! She’s just 17 and carried herself really well through the whole competition.

I have baked all of these creations before, I just decorated them differently for our girlie evening.

These cookies are Martha’s Snickerdoodles (posted about here), minus the cinnamon and sandwiched with leftover ganache from a treat I made for my amazing husband that I’ll post about tomorrow in Marriage Monday. The ganache is the typical combo of 12 oz of good chocolate pieces, 3/4 cup heavy cream and 6 tablespoons butter (heat the cream and the butter until it’s almost boiling, then pour it over the chocolate and mix).


These little babies, of course are just mini chocolate cupcakes with buttercream frosting and multicoloured coarse sugar. I used the Stir and Bake Chocolate Cake recipe I posted about here.


More chocolate cupcakes, more buttercream frosting. Here I tinted half pink and half purple. I filled the pastry bag half and half so when I piped it, the colours would swirl together. Cute!!

So she now wants to be a beauty queen. So adorable it almost hurts. Here’s some So Very Domestic trivia for you. I was in a beauty pageant when I was 8. I won Miss Sunburst and Miss Photogenic. True story – I still have the trophies to prove it! 😉

2 Comments

Peanut Butter Chocolate Chip Cookies – Cookie #2

Domestic, Kids

Introducing the second cookie of the year – Peanut Butter Chocolate Chip. I bet your Granny made these, or makes if you’re lucky. My Granny made them, and then I made them with her. This isn’t her recipe exactly, unfortunately. I got a bunch of her kitchen gear and two cookbooks after she passed, but I don’t have her scribbled down recipes on messy and stained index cards – yet. That’s what I really want.

So, anyhoo. These cookies are very close to the one she used to make, I adapted the recipe just a teeny bit by swapping chocolate chips for whole peanuts from the excellent cookbook, Great Cookies. I have used this book over and over, and I’m sure I’ll be turning to it a lot during this Year of the Cookie.

Peanut Butter Chocolate Chip Cookies – adapted from the Peanut Jumbles in Great Cookies

2 1/2 cups sifted cake flour
1/2 teaspoon baking powder
1/2 teaspoon salt
1/4 teaspoon baking soda
3/4 cup butter
3/4 cup smooth peanut butter
1 cup lightly packed brown sugar
1/2 cup granulated sugar
2 large eggs
2 teaspoons vanilla
2 cups chocolate chips

First up, of course, you sift together the flour, baking powder, salt, and baking soda, and set that aside. Then, using a stand up mixer if you have one, cream the butter till smooth and add the peanut butter. I love the way it looks, so silky! Next add the brown sugar and granulated sugar.


Plunk in your eggs, one at a time while mixing, then the vanilla. Now put your mixer on the lowest speed, and add your dry ingredient mix very slowly so it all gets combined properly, but don’t over mix! The take it off your stand mixer and fold in the chocolate chips with a wooden spoon.


I have always, always, always put the cross hatch marks on top of peanut butter cookies with a fork. I don’t know if that’s a thing or if it’s just a thing my family did, but I’ve always done it. The addition of chocolate chips didn’t deter me from doing it here too. 😉

8 minutes at 375 and they were perfect. I made great time on these treats too because as soon as I was done pulling the last batch from the oven….

…it was time to set the table for the kids’ after school snack!

Yes, I set a little tea party for my kids every day after school. Trust me, they’re amazing and totally deserve it

1 Comment

Hearty Winter Stew (The French Way) – Daring Cooks Jan 2011

Domestic

In this post I’m participating in (of course) The Daring Kitchen, and also in Social Parade.

Our January 2011 Challenge comes from Jenni of The Gingered Whisk and Lisa from Parsley, Sage, Desserts and Line Drives. They have challenged the Daring Cooks to learn how to make a confit and use it within the traditional French dish of Cassoulet. They have chosen a traditional recipe from Anthony Bourdain and Michael Ruhlman.

Oh. My. Goodness. This challenge? Was challenging. I mean that in the best possible way too. At first it was a little overwhelming to even read the recipe. Me, who makes all kinds of crazy meals and desserts, I was totally intimidated by the concept of a stew that takes 3 days to make. That’s not even days of prep either. It’s involving!

Anyhoo, I’ll start with the recipe itself and then attack you will three days worth of French stew making photos, which ended up being about eleventy billion.

There were a whole lot of substitutions allowed thankfully! Some items I wanted but couldn’t get (like duck for some reason) and other items I just super didn’t want to get (like duck fat).

Cassoulet via The Daring Kitchen

5 cups dried Great Northern beans
2 huge pork hocks (original recipe calls for pork belly)
1 onion, cut into 4 pieces
1 pound bacon (original recipe calls for pork rind)
1 bouquet garni (tie together two sprigs parsley, 2 sprigs thyme and one bay leaf)
salt and pepper
1/4 cup Becel/butter (original recipe calls for duck fat)
12 small pork sausages
3 onions, thinly sliced
1 garlic clove, thinly sliced
8 confit chicken legs (original recipe calls for duck legs)

First, you’ll need to make the confit.

Chicken Confit

4 whole chicken legs (leg and thigh)
sea salt, for the overnight (at least 6-8 hours) dry rub
2 cups Becel/butter
a healthy pinch or grind of black pepper
4 sprigs of fresh thyme
1 sprig of fresh rosemary
1 garlic clove

Making the confit is pretty easy. The first day all you do is rub down the chicken legs with a generous amount of sea salt and pop them in the fridge overnight.


One the second day, preheat your oven to 375, melt the butter in a saucepan. Then season the chicken legs with black pepper and put them in a casserole dish. Add the thyme, rosemary and garlic with the chicken legs and pour the melted butter over them. Cover the dish with aluminum foil and cook for about an hour. Till the bone easily slips out.


Now let it cool, as is, and then pop it in the fridge overnight.

Day one of the actual Cassoulet is painfully simple. Just soak your beans.

Day two, you drain the beans, and put them in a large pot. The quartered onion, herb bouquet and pork hocks all go in with this too. Cover with water and simmer for 1/2 hour. Season with salt and pepper and then simmer for another 1/2 hour.


Let this cool for about 20 minutes and toss the onion and herbs. Take out the pork hocks and take off the meat. Strain the beans and keep the water.

Now, saute the sausages in the butter till they’re well browned. Then drain them on paper towels. Now, in the same pan, brown the onions, garlic and meat.


Once that’s browned….ok follow me here because I had to read this again and again to be sure I was reading it right. There are even photos to go along with this that clearly illustrate what comes next. Ready?

So the meat from the pork hocks and the onions and garlic? You put that in the blender. Yeah, I know! You put it in the blender and make a really super gross looking goo out of it. My husband was in loooove with the smell of it browning and even had a little nibble of the meat and of course reacted with ‘What? The blender?!’


Why is this perfectly delicious snack pulverized? So it can be poured between each layer of this crazy stew, sillyhead!

But wait! It gets even better! Now, you line your dish with, wait for it…bacon. Yes, pork rind is listed in the original recipe but not only is bacon a suitable sub, it was used by one of the hosts this month!


All that’s left really is layering and cooking. This is what I did; beans, puree, sausages, puree, more beans, more puree, chicken confit, more puree and finally even more beans. Cover with the bean liquid before putting in the oven, but make sure you save a cup of the liquid in the fridge.


This is cooked for an hour at 350, then the temp is lowered to 250 for another hour. Then it’s cooled and put in the fridge overnight (notice a trend here).

Now the next day, cook it again at 350 for an hour. Then, break the crust that forms on the top and pour in the liquid you saved. Lower the temp to 250 like the day before, and cook for another 15 minutes.

Voila! Easy peasy, right? 😉

This month’s Daring Baker’s challenge seems about as easy! Wish me luck!

 Smart and Trendy Moms

11 Comments

Baking with Kids – Basic Bread

Domestic, Kids

This is the kids’ second recipe from this book so far this year and they’re having a fun time with it. Wee One #1 has been helping in the kitchen since he was old enough to push a chair up to the counter and mix so he has lots of practice. Wee One #2 has been baking for about as long, but is 5 years younger.

Anyhoo, they’ve both helped bake all kinds of neat things, but they’ve never made plain old bread before, so here we go, on their second recipe all by themselves – they made bread!

Basic Bread – from Baking With Kids (p. 58)
5 cups white or whole wheat bread flour (or 2 1/2 cups each)
1 1/2 teaspoons salt
2 1/2 teaspoons active dry yeast
2 cups lukewarm water or milk


First they added the flour and the salt and the yeast (we used half white and half whole wheat flour). Then I put the hook attachment on the mixer and they poured in the warmish milk.


Taking the bread out of the mixer to get messy and knead it on the counter was the highlight of today’s bread baking session! They really got into it.

Then we covered it with a sort of damp towel and put the bowl on the oven (we turned the oven on super low to give a little heat to the room and bottom of the bowl), and then we waited about an hour.

Once the hour was up and the dough had done it’s thing, they took it out again and punched it down (as per the hilarious instruction).


Wee One #2, who is my official pan-butterizer, set to greasing the pans. She’s pretty serious about it. If she happens to come into the kitchen when I’m baking without her (like say first thing in the morning and she’s barely awake) she mortally offended I’d butter my own pans.


They decided that instead of baking a single 1lb loaf, they wanted to each have their own loaf. Which, of course, changes the baking time and the final look, but they were in charge of this kitchen venture, so two 1/2lb loaves it was.


You know what? Their loaves came out terrifically! They were obviously on the short side, lol, but very, very good! This is a great recipe for anyone to make bread for the first time.

This house feels like the perfect house for kids to cook and bake in because one of the counters is really low! My Kitchen Aid lives there for easy access. 😉

1 Comment

Deceptively Delicious French Toast

Domestic, Healthy

In this post, I’m participating in Tempt My Tummy Tuesdays, Tuesdays at the Table, Tuesday Night Supper Club, and Hearth ‘n Soul.

I was looking forward to making this because I love French Toast and the kids usually do too. I say usually because if you add too much to it it’s not always acceptable to their discerning palettes, dontcha know?

Not sure exactly why one would need to hide bananas in other foods (I thought all kids loved bananas), but she also offered up pineapple, sweet potato, carrot, butternut squash and pumpkin as alternatives). I went with banana even though I just made fun of it because I didn’t have any purees on hand and making a banana puree is well, the easiest thing in the world.

French Toast (with banana) – from Deceptively Delicious (p. 49)

4 large eggs
1 table spoons banana puree
1/ tsp cinnamon
4 slices whole wheat bread
nonstick cooking spray
2 tsps Becel
maple syrup
flaxseed meal (optional)


So, of course, start by whisking your eggs with your banana puree and cinnamon. Once it’s blended well together, plunk your bread in.


Some people have trouble with how long to leave the bread in the egg mixture or they get hung up in which is the correct tool for flipping the bread. Leave it in a few seconds past ‘just wet’ and use a fork!


Just a few minutes each side and it’s done!! French Toast is so fast! I love it! By now, the house smells like cinnamon and banana (and really strong coffee) and at around 150 cals per piece I was game to have one with the kids.

I was a little nervous they’d think the banana taste was weird by they were down and all three wee ones at it up like it was a tray of pancakes! Hey pancakes! I bet I could hide things in there too!!

,
12 Comments

Homemade Spaghetti / Lasagna Sauce

Domestic, Healthy

In the last few months, I have mastered my husband’s favourite lasagna – his mother’s recipe. Last summer, I was buying frozen lasagna and now I’m making it myself! Doing more and more from scratch around here has really inspired me to keep going. So now, I’m breaking down the ingredients to make them from scratch too – which just means the sauce, stock and the pasta, really.

The pasta and stock will wait for another day, this week I made the sauce from my father’s classic recipe.

May’s Dad’s Pasta Sauce

2 lbs ground meat
(beef, chicken, pork, turkey or a combo)
1 onion
4 or 5 cloves of garlic
2 cans tomato paste
1 cup chicken stock
5 tomatoes
1 red pepper
1 green pepper
1/4 tsp nutmeg
oregano to taste

Chop your onions and garlic first. It’s a big joke in my family that my father will chop onions and garlic before he even knows what he’s making, so all his recipes start like this. Anyhoo, once your onions and garlic are browning a little, add your meat. My dad tends to use pork and beef or turkey and chicken. I sometimes use pork and beef, but this time around I just used beef. Let that cook on a back burner, stirring from time to time to keep it from burning horribly.


Then put the tomato paste and chicken stock in a large pot and whisk together. As I was emptying the cans of tomato paste into the pot, I thought about making my own tomato paste too, because even though the ingredients on the side of the can just say tomatoes, we all know the can is full of chemicals. Eww. Next round, I’m doing the paste too! You decide if you use store bought chicken stock or homemade. I love homemade chicken stock and I swear you can taste the sodium in the store bought stuff after tasting scratch stock. I had no scratch stock though, so I went with the new little jelly-style stock from Knorr. It actually worked out really well and the sodium content wasn’t bad. While that’s simmering, chop your veggies, then add them to the sauce. Now sprinkle in your nutmeg and oregano, maybe salt and pepper if you feel the need. 😉

Meanwhile, your meat is probably cooked through now and the smell of garlic and onions have no doubt filled your kitchen at this point. Mmmm. Drain your meat through a colander lined with cheesecloth (or paper towel) and then add it to your sauce.


The sauce can sit as it is for as long as you’d like on a very low simmer, as long as you keep stirring. I left it simmering for about an hour or so, while I cleaned up my kitchen and got the cheese and pasta and all that ready for the lasagna I was making.

This recipe made about 4 mason jars full. I say ‘about’, because I usually go through 2 jars when I make it with store bought and here I used a bit more than typical and I still had 2 mason jars full.

It was fun to make, my kitchen wasn’t too much of a disaster and it makes lots. You can do two big lasagnas with it or four pots of spaghetti!

6 Comments
« Older Posts
Newer Posts »