Browsing the archives for the Kids category.

I’m baaaaack!!

Crafty, Domestic, Healthy, Kids, Pretty, Small Town

I’m baaaaack!!!

I know I said I’d be back in a week four months ago and as you can see there as been a whole overhaul around here, the blog has expanded to better sort and organize all the content and the really exciting news is in the middle of all of this – we bought a house!! There are a lot of reasons we love the house we bought but for now I’ll give you a sneak peak of our favourite parts – the backyard and of course the kitchen. There’s no way we could buy a house without a serious kitchen.

There will be more pictures as we move in and get settled – which isn’t happening until August anyway. The backyard is huge and has an area already set aside for gardening, and as you may have suspected, will be growing once I get my hands on it. The other thing I adore so much about this house is that it has a pantry – an absolute necessity in my dream kitchen.


The changes to this site have been long in the making and I am so happy to finally be finished and able to show it all off. I’m still going to be posting my weeklies – I love doing them! Just now I’ll be linking to the pages instead of putting the recipe or instructions directly in the blog post – this way I can include more than one if I want to.

Tomorrow, we’ll get back to business as usual, with a few little changes. The weekly line up looks like this now:

Mondays – Menu Mondays from Kate Says Stuff

Tuesdays – Tempt My Tummy Tuesdays, Tuesdays at the Table, Tuesday Night Supper Club and Hearth ‘n Soul

Work in Progress Wednesdays – from Freshly Pieced, Tami’s Amis and Musings from the Fishbowl

Baking with Kids Thursdays – documenting the kids’ cooking and baking through Baking with Kids

Cookie Fridays – perhaps the best day of the week, check out the gallery

Super Cute Saturdays – if I have time for this, so do you!

Catchall Sundays – rando day, for things that don’t fit anywhere else

I have still been doing my self-inflicted challenges, so I’ll be posting them as often as I can to catch up. Right now, I have a lot of fun stuff to share with you!

As far as my domestic endevours go, I feel head over heels for Bakerella’s Cupshakes, which essentially is a milkshake crossed with a cupcake. I also made step by step instructions for eclairs, and chocolate fudge. As part of the Baking With Kids challenge, where the kids are baking and cooking their way through Linda Collister’s cookbook, I made a batch of puff pastry for them to use in the giant cheese straws recipe. I also added the 4th cookie of the year, the playfully pink cowgirl cookies to the gallery.

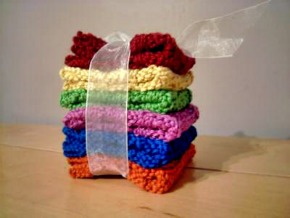
I have gotten my crafty groove back, though so far I’ve only posted about my stack of facecloths. Ahem. I did add two window shopping posts though, one on Charlene’s Supply Closet and one on The Loopy Ewe, two shops I am moderately to severely obsessed with. I’ve also added two interviews (Krissy of Krissyanne Designs and Megan of Radmegan) plus a book review of yet another new obsession – Martha Stewart’s Craft Encyclopedia. I’ve been busy!

There have been some health-concious related kitchen changes around here as well. I may as well just say it now without outing anyone, but two dear friends of mine have gone vegan. Which means two things really. First of course it means I now know way more than I ever wanted to know about being vegan and what rules there are and what different types of vegans there are which then also means I also know a whole lot about all kinds of scary stuff that even my vegan friends are not interested in. What’s that? SUGAR. Wowzers. White sugar is way worse than I thought and people let me tell you, I love me some sweet treats so what to do? I’ve been testing recipes using other kinds of natural sweeteners (because as bad as white sugar is fake sugar is even worse), and they’re working out pretty well. I mention this because while I am still cooking and baking my way through Deceptively Delicious, and while I am aware that adding veggies to pretty much anything is never a bad thing, I hesitate to call these recipes healthy knowing all that I know now. I am going to keep them in the ‘healthy’ category anyway because they are miles healthier than what used to come out of my kitchen. The second thing that happens when good friends go vegan is that I have to learn to cook and bake for them! I can’t have them coming up for the weekend to eat pasta and lettuce, can I?! I have been learning so much – expect some uber healthy additions to the healthy section in the coming weeks.

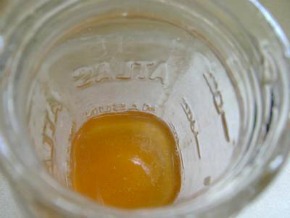
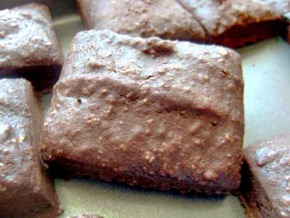
In the meantime though, here’s what I have added to that section to start with – Deceptively Delicious Stew (which adds pureed borccoli to a yummy stew), Dr Oz’s Green Smoothie (this is crazy healthy), Deceptively Delicious Mac & Cheese (with cauliflower puree and two kinds of cheese), Deceptively Delicious Applesauce Muffins (with applesauce duh and carrot puree), Deceptively Delicious Brownies (with pureed carrots and spinach), and an old school homemade Garlic, Honey & Lemon Cough Syrup recipe. Very old school, my Granny would be proud.

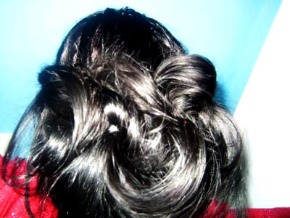
Aaaaad just like I said I would, I dove right into making a ‘pretty’ section. I’ve become more of a girly girl than ever in the last year so it’s been fun to write about it! I added two window shopping pieces, Body Shop and Mod Cloth, plus a 101 on Lotions, my Make Up Bag Must Haves and my first hair tutorial ever – my Puffy Bun, which literally takes 5 minutes – no more than 10 even with all three wee ones running underfoot at once.

Phew. I hope my little hanful of loyal readers are happy with the changes. Let me know what you think guys!!


2 Comments

Biscuit Joconde Imprime/Entremet – Daring Bakers Jan 2011

Domestic, Kids, Pretty

In this post, I’m participating in The Daring Kitchen!

The January 2011 Daring Bakers’ challenge was hosted by Astheroshe of the blog accro. She chose to challenge everyone to make a Biscuit Joconde Imprime to wrap around an Entremets dessert.

Here we go, another French dish from the Daring Kitchen. However, unlike the Cassoulet I made a few weeks ago that didn’t look too complicated once served but actually took 3 days to make, this little treat looks like I slaved over it forever but really it came together super quick. I did hit a totally unrelated-to-the-hard-part snag when I ran out of chocolate pudding ingredients. I just could not bare to use plain instant pudding in this lovely creation, and chocolate pudding is what the wee ones requested inside it. Anyhoo, it’s done now. Two days late.

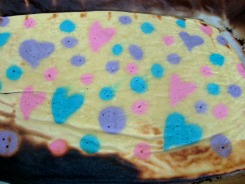
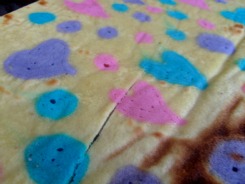
So the challenge was to make what I think is best described as a cake-like wrap for a mousse or pudding or something like that. I know I’m dumbing it down horribly, but that’s essentially what it is. The fancy part, and of course there is a fancy part this is a Daring Kitchen challenge after all, is that there is a layer of decorations baked right into the cake. I have seen them in bakeries, but I have never tried one. Turns out, it is very similar to the jelly-roll type cake we used last summer when the Daring Bakers made swirly ice cream cake. Oh. My. Goodness. I went to find the link for you to see what I was talking about and I didn’t post it!! In my defense this challenge came on the heels of my Granny’s passing and I didn’t really do much of anything but bake and eat and bake and bake and cry and eat. Ahem.

Moving on. First you need to make the batter for the ‘sponge’, as the recipe calls it.

Joconde Sponge – via Daring Kitchen

3/4 cup almond meal
1/2 cup plus 2 tablespoons icing sugar
1/4 cup cake flour
3 large eggs
3 large egg whites
2 1/2 teaspoons sugar
2 tbsp butter, melted

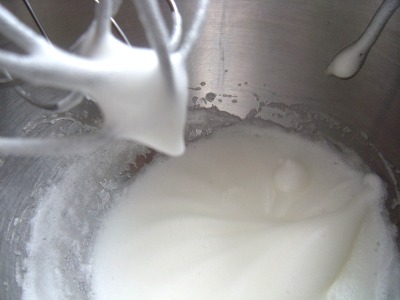
So first you whip your egg whites and sugar until they’re meringuey, set aside.

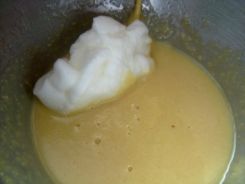
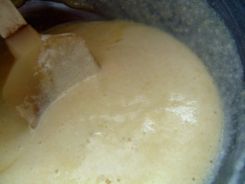
Now sift the almond meal, icing sugar and cake flour (original recipe notes that you can do this in your dirty meringue bowl, so I did). With the mixer on medium, add the eggs individually, then mix until smooth. Fold in a third of the meringuey mixture, then fold in the rest. Finally, fold in the melted butter.


Done! Set this aside. You’ll need it soon enough!

Now, you need to make the decorative part.

Patterned Joconde-DΓ©cor Paste – via Daring Kitchen

14 tbsp butter, softened
1 1/2 cups plus 1 1/2 tablespoons icing sugar
7 large egg whites
1 3/4 cake flour
Food coloring gel, paste or liquid

Oh boy. That’s right people! 14 tablespoons of butter (of course I used Becel, but still) and 7 egg whites! 7. Sigh. You know I only went through with this to make Julia Child proud. Duh.

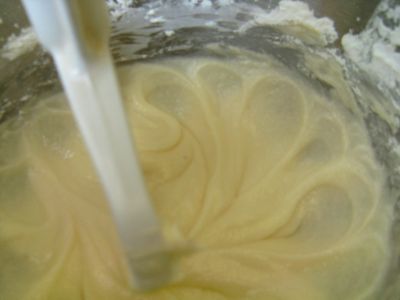
Ok, so first cream the butter and the sugar till nice and fluffy. Then add your gigantic pile of egg whites. Mix. Fold in the flour and voila. You’re ready to tint it. I went with three colours. I asked Wee One #2 for her opinion on colours and just as I expected, she suggested Pink, Purple and Blue. Away we go!

So I divided the paste into three cups, tinted them and filled my pastry bags (I used 2 #2 tips and 1 #3). Line a baking sheet with parchment paper and pipe on decorations to your heart’s content.

Then, pop the baking sheet in the freezer for about 20 minutes. I’m not entirely sure why the recipe has us making the joconde sponge batter first when it could easily be done at this point in the game – but I did as I was told!


Once your piped decorations are frozen, pour the sponge on top of it! I know, it’s weird. Just do it.

Bake at 475. Yup. 475 for 15 minutes. Or a little less. My edges burnt horribly!


So now, you’ve got this spongey cake with beautiful decorations baked right into it – now what?

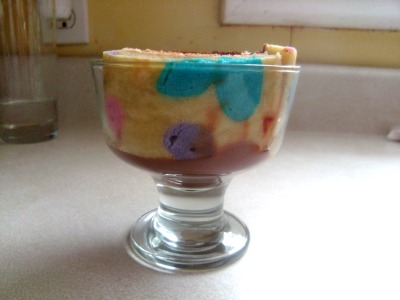
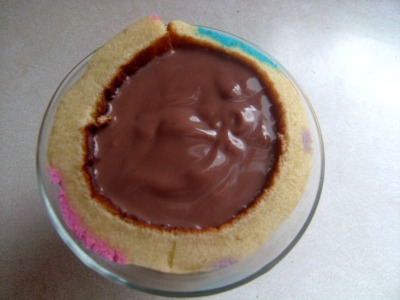
This is where I strayed from the instructions because there was talk of using a PVC pipe (really, there was) or a springform pan with the base removed. So what did I do? I used clear glass dessert dishes! That way I could show off my adorable little hearts and polka dots while holding the chocolate pudding I intended to put inside!

I didn’t even get to taste one because the wee ones gobbled them up – which totally works for me!

2 Comments

Baking with Kids – Baked Alaska

Domestic, Kids

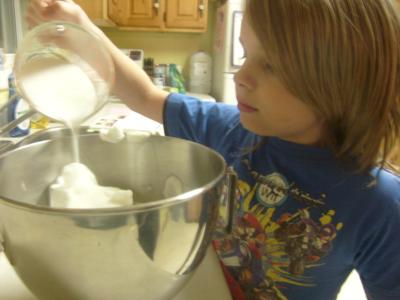
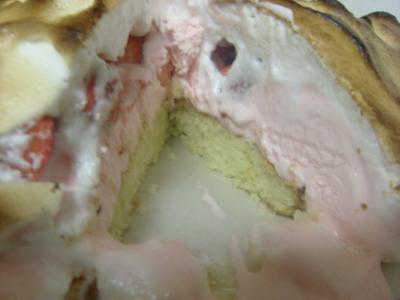
Yup, it’s true. My 10 year old made a Baked Alaska – about 95% on his own too. So what’s a Baked Alaska? I thought it was a better known dessert than it actually is. A Baked Alaska is ice cream and fruit on top of sponge cake, covered in meringue and then baked! So when you eat it, the meringue is warm, and the ice cream is still cold. Amazing.

I helped at a very crucial stage in the quick-cover-the-ice-cream-with-meringue stage. He opted to make this after Wee Ones #2 and #3 were in bed, even though he was making it for Wee One #2’s Godparents. We all agreed that as great as she is in the kitchen, baking ice cream may have been made even trickier with a 5 and 2 year old in the kitchen as well.

Baked Alaska – from Baking With Kids (p. 106)

For the Sponge
3/4 cup + 2 tbsp flour
1 tsp baking powder
1/2 cup + 1 tbsp sugar
1/2 cup butter, soft
1/2 tsp vanilla
2 eggs
1 tbsp milk
To finish
1 pint strawberry ice cream
4 eggs whites
1 cup + 2 tbsp sugar
1 1/2 cups chopped strawberries

Mix the flour and baking powder. The stir in the sugar, add the soft butter and vanilla.

Add the eggs, stir and bake in a greased cake pan for about 20 minutes at 350.


Make the meringue by beating the egg whites for about 10 minutes with a mixer.

Pop the cake in the fridge or freezer for about 15 minutes before spooning the strawberry ice cream on.


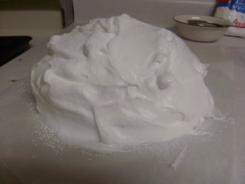
Top that with the chopped strawberries and meringue. Stir the sugar into the meringue and then spoon on top. Make sure the meringue is totally covering every little bit of the ice cream and cake. Every. Little. Bit.


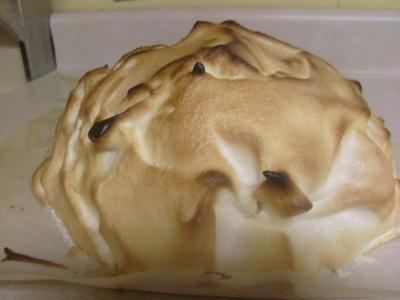
Then pop the whole thing in the oven at 425 for 4 minutes. Cross your fingers that you didn’t miss a spot or you’ll have a pool if melted ice cream in your oven!

Mission accomplished! Amazing!!!

3 Comments

Marriage Monday (with chicken pot pie)

Churchy, Domestic, Kids, Marriage

In this blog post I am participating in Marriage Mondays, and on Wednesday I’ll add this link to Living Well Wednesdays

It’s Marriage Monday again! Last week, my Good Morning Girls group was talking about something Courtney had said in a recent blog post. Essentially, that if you bump a cup full of water, water will come out (duh lol) but that it’s the same with our hearts! If you have a heart full of frustration (or anger or resentment etc), that’s what will come out when you hit a bump! So if we work every day to fill our hearts with love and joy, that’s what will come out! I’ve been thinking about that a lot this week and it makes so much sense!

We are all human so it’s easy to do things that annoy the people around us, and it’s easy to let ourselves be annoyed. This morning, it is -37 with the wind chill and though I know I saw him wear it home on Friday, Wee One #1 could not find his hat as he was getting ready for the school bus – this bumped my cup. If I was already frustrated, (perhaps with him constantly losing tupperware at school), frustration would have spilled out and he would have taken off for the bus with a cloud over him and a chilly head. Instead I told him that he needed to keep track of his things, especially necessary things like that, and I gave him a spare hat! Had I reacted angrily or meanly, I may have ruined his day and likely mine too because I’d spend the rest of it feeling guilty!

My husband and I went to bed at 3:30 this morning because dear, dear friends we only get to spend time with once a year were here. When we went to bed he said he’d like to get up at 7:30 when I do – it is 10 and he is still sleeping. This doesn’t really bump my cup at the moment, but when he gets up in a few hours annoyed that I was unable to get him out of bed when he asked me to, I will not respond with anger or resentment for being the one that gets up early. I’ll make him and coffee and tell him playfully not to be so grumpy. When his Eeyore cloud passes I’ll be very happy that I didn’t incite an argument just because he can’t get by on as little sleep as I can.

I have tired to live like this since I noticed myself not paying attention to my reactions a couple of years ago and of course every day I can get better and better at it. I’m human so I’ll never totally get it right, but as long as everyone around me knows that I am trying, and if I get it right more often than not, it’s a win!

My husband works from home – we are incredibly blessed to be able to say that!! That means we are together pretty well all day, everyday. We each have things in our days that do not involve the other so we’re not as connected at the hip as that may sound, but being around each other this much could be horrible if we were not mindful of what’s in our cups!!
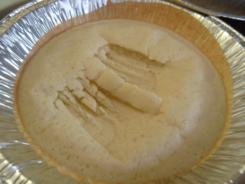
I’m ending Marriage Mondays now with my husband’s favorite recipe form the previous week. Last week it was Chicken Pot Pie!

This version of Chicken Pot Pie is the short of shortcut my Granny would take and then never tell anyone about. She was up making muffins almost every day at 5am for her family, so she could take as many shortcuts as she needed to in my book!

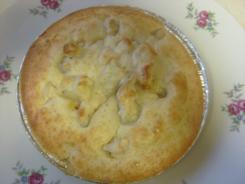
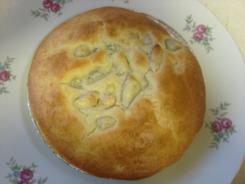
Shortcut Chicken Pot Pies
Makes 6 individual 6″ pies

2 1/2 cups mixed frozen veggies
2 cups (or more) chopped cooked and seasoned chicken
2 cups thickened chicken stock or cream of chicken soup
2 cup Bisquick
1 cup milk
2 egg

Preheat your oven to 400. Thicken your chicken stock by taking a little and mixing it with about 1 tbsp or so of cornstarch, then add that back into the rest of the chicken stock. The original recipe calls for cream of chicken soup, I’ve also seen it done with a can of gravy (!) but my husband likes it best with thickened chicken stock. πŸ™‚

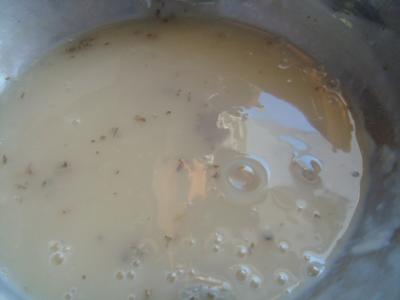
Mix 1 cup of the Bisquick, 1/2 cup of the milk and 1 egg together and pour that into the bottom of your pie pans (of course you could also just use a big pie pan), and bake for about 15 minutes.


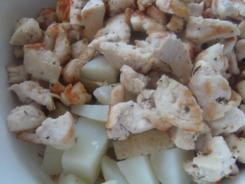
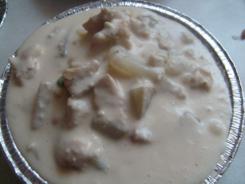
Meanwhile, stir the veggies, chicken and thickened chicken stock (or soup or gravy) together. Once the bottom crusts are ready, pour this mixture over them. I made little fork indentations in the bottom crusts because they puff up a bit. The mix the rest of the Bisquick, milk and remaining egg and pour over top the veggie and chicken mixture.


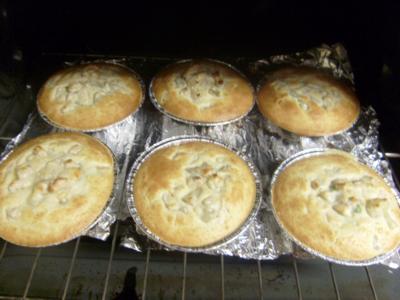
Cook this for another 25-35 minutes, till puffy and golden on top and voila! Amazingly simple chicken pot pie without rolling any pie crust at all!


The original recipe just puts the veggies and chicken mix directly into the pan(s) with no bottom crust, so you only use half the Bisquick, milk and eggs but then you sacrifice having a bottom crust so it’s less a pie and more a savory cobbler situation.


2 Comments

Baking with Kids – Scones

Domestic, Kids

In this post, I’m participating in Tempt My Tummy Tuesdays, Tuesdays at the Table, Tuesday Night Supper Club, and Hearth ‘n Soul.

This is the third recipe the kids have made themselves and this one turned out the best yet! They’re really getting into it and embracing the concept of testing out every recipe in the book. It’s nice to see them working together and I’ve been impressed with their kitchen skills so far. Thumbs up for the So Very Domestic wee ones! πŸ˜‰

Scones – from Baking With Kids (p. 13)

2 cups flour
4 tsp baking powder
pinch of salt
1/4 cup sugar
4 tbsp butter
1 egg
about 1/2 cup milk


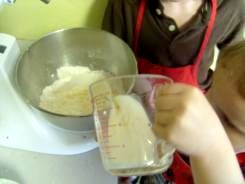
First mix the flour, baking powder, salt and sugar. Then cut up the butter into small pieces and plunk them in. Use your hands to crumble the butter into the flour mixture until it looks like small crumbs.


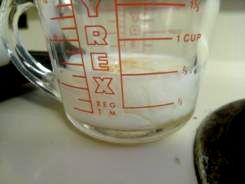
Now, crack your egg into a measuring cup and add just enough milk to make 2/3 cup total. Then make a well in your dry mixture and add almost all of your milk + egg liquid.


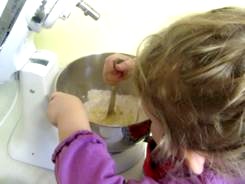
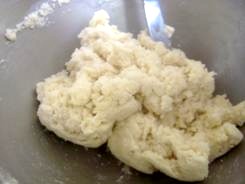
Use a butter knife to mix the liquid in, until it becomes a soft dough. If you need to, add more of your liquid bit by bit.


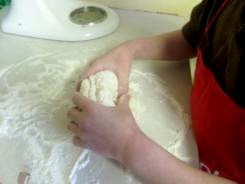
Once it looks right, plunk it on a lightly floured counter and knead it. Here, even Wee One #3 got into it! So cute!!!

 

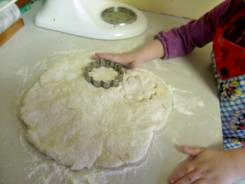
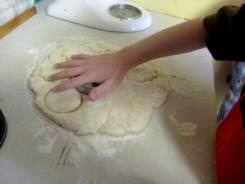
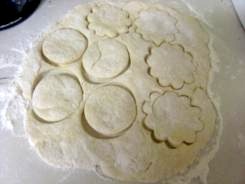
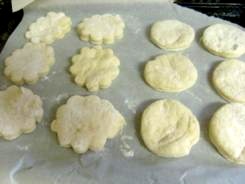
After both kids had a turn really kneading it, they pounded it down a bit and flattened it out so cut their scones from the dough. Wee One #1 chose a standard circle cutter, and naturally, Wee One #2 chose a ‘princess flower’.


Into the oven they went for 11 minutes at 425! Tah-daaaah!

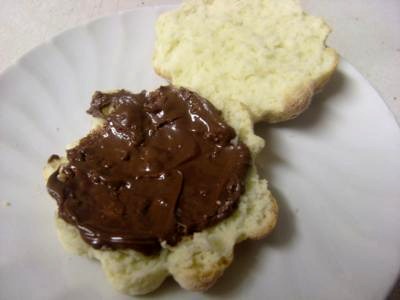
They honestly were as good as they looked. Wee One #1 tried one with butter, then once he knew he loved it he had another with Nutella! Wee One #2 stuck with her raspberry jam, and the littlest one had a small piece of each!

Fun and simple recipe for kids. Again, all I did was turn the oven on and off and put in and take out the cookie sheet!

,
6 Comments

Miss America 2011

Domestic, Kids, Pretty

I adore pageants, their extreme cheesy factor doesn’t bother me at all. The bigger the hair and the more glitter on the evening gowns, the better! I eat it right up. So, naturally, I love, love, love the mother of all pageants, Miss America. For the last few years, I’ve gathered my girlfriends to wear plastic crowns and cute dresses and drink champagne and watch the show. This is my first year in the woods – and just my wonderful luck – its also the first year Wee One #2 is interested and oh boy is she interested.

The celebrations around here started early. I was wearing my rhinestone tiara and my biggest Urban Decay lashes at breakfast (just for the record, these are my dailies). Here is Wee One #2 all set for the show about an hour before it started, the one of me was taken in the morning and then I shoveled and cleaned like this. I adore these lashes, they’re so fun.


We baked up some girlie treats last night and watched Miss America together. She was rooting for Miss Oklahoma (she was the 4th runner up), and I was rooting for Miss Nevada, who unfortunately didn’t even make the semi-finals. Our second choices were Miss Hawaii (my choice, she got 3rd runner up), and Wee One #2’s second choice, Miss Nebraska WON! She’s just 17 and carried herself really well through the whole competition.

I have baked all of these creations before, I just decorated them differently for our girlie evening.

These cookies are Martha’s Snickerdoodles (posted about here), minus the cinnamon and sandwiched with leftover ganache from a treat I made for my amazing husband that I’ll post about tomorrow in Marriage Monday. The ganache is the typical combo of 12 oz of good chocolate pieces, 3/4 cup heavy cream and 6 tablespoons butter (heat the cream and the butter until it’s almost boiling, then pour it over the chocolate and mix).


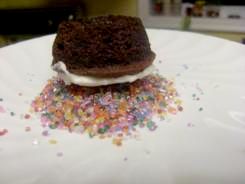
These little babies, of course are just mini chocolate cupcakes with buttercream frosting and multicoloured coarse sugar. I used the Stir and Bake Chocolate Cake recipe I posted about here.


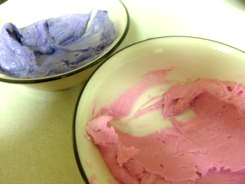
More chocolate cupcakes, more buttercream frosting. Here I tinted half pink and half purple. I filled the pastry bag half and half so when I piped it, the colours would swirl together. Cute!!

So she now wants to be a beauty queen. So adorable it almost hurts. Here’s some So Very Domestic trivia for you. I was in a beauty pageant when I was 8. I won Miss Sunburst and Miss Photogenic. True story – I still have the trophies to prove it! πŸ˜‰

2 Comments

Peanut Butter Chocolate Chip Cookies – Cookie #2

Domestic, Kids

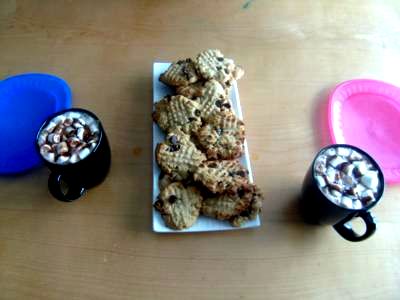
Introducing the second cookie of the year – Peanut Butter Chocolate Chip. I bet your Granny made these, or makes if you’re lucky. My Granny made them, and then I made them with her. This isn’t her recipe exactly, unfortunately. I got a bunch of her kitchen gear and two cookbooks after she passed, but I don’t have her scribbled down recipes on messy and stained index cards – yet. That’s what I really want.

So, anyhoo. These cookies are very close to the one she used to make, I adapted the recipe just a teeny bit by swapping chocolate chips for whole peanuts from the excellent cookbook, Great Cookies. I have used this book over and over, and I’m sure I’ll be turning to it a lot during this Year of the Cookie.

Peanut Butter Chocolate Chip Cookies – adapted from the Peanut Jumbles in Great Cookies

2 1/2 cups sifted cake flour
1/2 teaspoon baking powder
1/2 teaspoon salt
1/4 teaspoon baking soda
3/4 cup butter
3/4 cup smooth peanut butter
1 cup lightly packed brown sugar
1/2 cup granulated sugar
2 large eggs
2 teaspoons vanilla
2 cups chocolate chips

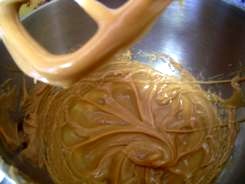
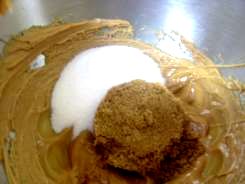
First up, of course, you sift together the flour, baking powder, salt, and baking soda, and set that aside. Then, using a stand up mixer if you have one, cream the butter till smooth and add the peanut butter. I love the way it looks, so silky! Next add the brown sugar and granulated sugar.


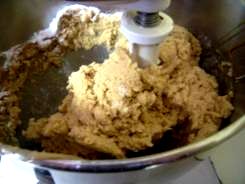
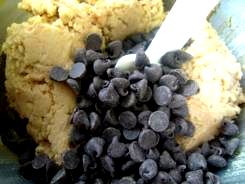
Plunk in your eggs, one at a time while mixing, then the vanilla. Now put your mixer on the lowest speed, and add your dry ingredient mix very slowly so it all gets combined properly, but don’t over mix! The take it off your stand mixer and fold in the chocolate chips with a wooden spoon.


I have always, always, always put the cross hatch marks on top of peanut butter cookies with a fork. I don’t know if that’s a thing or if it’s just a thing my family did, but I’ve always done it. The addition of chocolate chips didn’t deter me from doing it here too. πŸ˜‰

8 minutes at 375 and they were perfect. I made great time on these treats too because as soon as I was done pulling the last batch from the oven….

…it was time to set the table for the kids’ after school snack!

Yes, I set a little tea party for my kids every day after school. Trust me, they’re amazing and totally deserve it

1 Comment

Baking with Kids – Basic Bread

Domestic, Kids

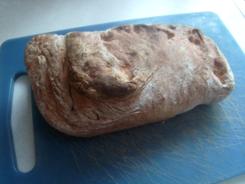
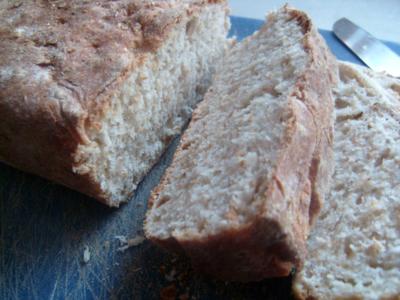
This is the kids’ second recipe from this book so far this year and they’re having a fun time with it. Wee One #1 has been helping in the kitchen since he was old enough to push a chair up to the counter and mix so he has lots of practice. Wee One #2 has been baking for about as long, but is 5 years younger.

Anyhoo, they’ve both helped bake all kinds of neat things, but they’ve never made plain old bread before, so here we go, on their second recipe all by themselves – they made bread!

Basic Bread – from Baking With Kids (p. 58)
5 cups white or whole wheat bread flour (or 2 1/2 cups each)
1 1/2 teaspoons salt
2 1/2 teaspoons active dry yeast
2 cups lukewarm water or milk


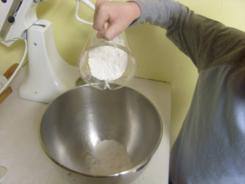
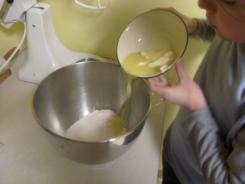
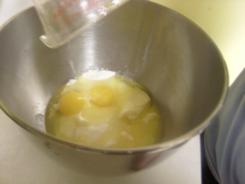
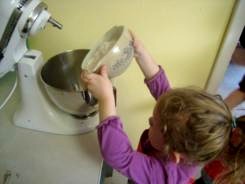
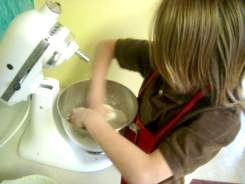
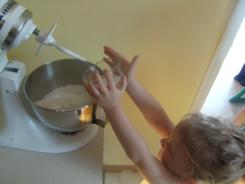
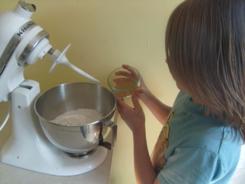
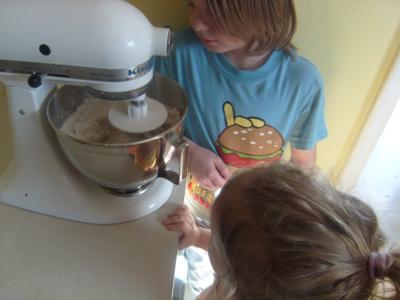
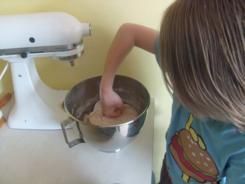
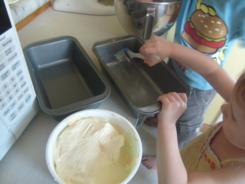
First they added the flour and the salt and the yeast (we used half white and half whole wheat flour). Then I put the hook attachment on the mixer and they poured in the warmish milk.


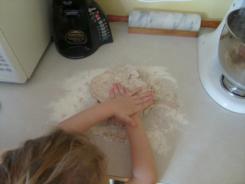
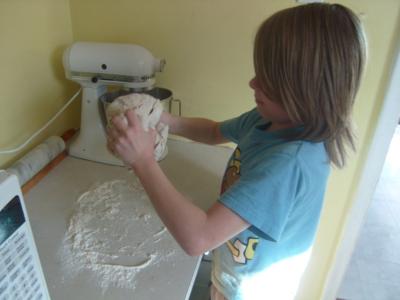
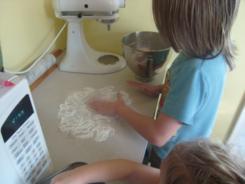
Taking the bread out of the mixer to get messy and knead it on the counter was the highlight of today’s bread baking session! They really got into it.

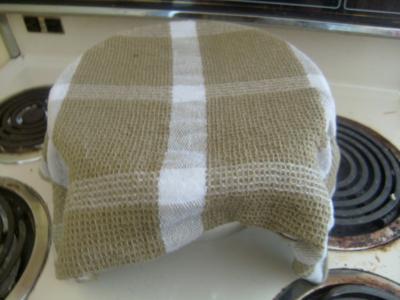
Then we covered it with a sort of damp towel and put the bowl on the oven (we turned the oven on super low to give a little heat to the room and bottom of the bowl), and then we waited about an hour.

Once the hour was up and the dough had done it’s thing, they took it out again and punched it down (as per the hilarious instruction).


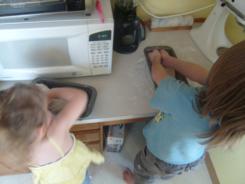
Wee One #2, who is my official pan-butterizer, set to greasing the pans. She’s pretty serious about it. If she happens to come into the kitchen when I’m baking without her (like say first thing in the morning and she’s barely awake) she mortally offended I’d butter my own pans.


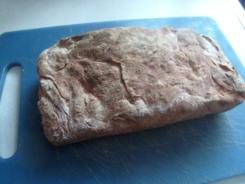
They decided that instead of baking a single 1lb loaf, they wanted to each have their own loaf. Which, of course, changes the baking time and the final look, but they were in charge of this kitchen venture, so two 1/2lb loaves it was.


You know what? Their loaves came out terrifically! They were obviously on the short side, lol, but very, very good! This is a great recipe for anyone to make bread for the first time.

This house feels like the perfect house for kids to cook and bake in because one of the counters is really low! My Kitchen Aid lives there for easy access. πŸ˜‰

1 Comment

Work in Progress Wednesday #3

Crafty, Kids

In this post, I’m participating in three WIP Wednesdays; Freshly Pieced, Tami’s Amis and Musings from the Fishbowl.

I have something that isn’t being knitted this week!! Do you need a moment?

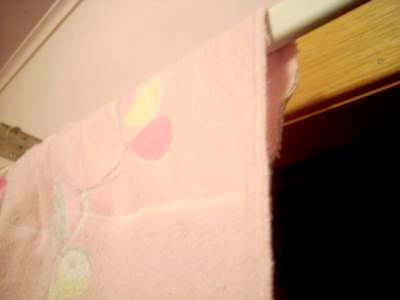
It’s hard to believe that I haven’t knitted at all this week, but I have been sewing! So far, I’ve stuck to very small items, like baby dresses and bags. Technically, curtains should be incredibly easy after making cute little baby dresses that actually fit and were totally wearable. So I figured instead of potentially ruining new fabric, I did just what I did with the baby dresses – I used sheets!

Hilariously, even after measuring the window, I cut my panels too short. Of course. They cover the window…mostly. Also, it really looks like I used the wrong stitch for my hems too, doesn’t it? Like it was too tight because it almost looks like it’s puckering. I think. I dunno, but it looks ‘weird’. I definitely need a do over, but after having made that mistake with practice sheets, next time I’ll do them properly, with more fabric.

These curtains are as plain as humanly possible – to try to minimize the mishaps lol! I made a little folded over sleeve from the wide hem at the top of the sheet, then I hemmed the edges. They’re a WIP, not a FO because (if I was going to keep them, but I’m not) they’d need a backing before they could be officially finished and some kind of trim would be nice. However, I’m not keeping them so they’ll serve their purpose while I find more fabric and and try again.

I also ordered some fabric from Fabric Closet for Wee One #1’s bedroom. No pink princesses here. I know I ordered enough and hopefully this time, I wont find a different way to muck it up. πŸ˜‰

WIP Wednesday at Freshly Pieced
12 Comments

Peace on Earth Recap

Churchy, Kids, Marriage

In this blog post I am participating in Marriage Mondays, and on Wednesday I’ll add this link to Living Well Wednesdays

I looooooove Courtney’s blog and her challenges. She’s an inspiration to me and a lot of other like-minded wives and mommies out there. I have participated in three of her challenges, the last one, Peace on Earth, challenged us to stay focused on what was really important during the holidays. Not the cookies and the gifts, or even the gatherings or even our families – but our faith! That’s what it’s all based in, right? Anyhoo, I really took to heart the first two challenges, to take a night just for me to pamper myself a bit, and to take a night to go to bed early. I made taking care of myself a priority and I started going to bed a little earlier on a regular basis. Then, I dropped off the blogosphere all together!

I did do my challenges though. <3 The next one, (#3) was to make a hot drink - I went with green tea - and sit alone in the quiet dark with the twinkling Christmas tree and just be alone with God. I didn't fall asleep, I didn't really let my mind wander much, I just thought about God and life and all the ways I am so thankful and appreciative for all that I have. It was so nice I did it a few more times before we took the tree down. The fourth challenge was to get outside and be alone with God in nature. As you've read over and over on this blog, I live in the woods and have nature to spare! LOL So getting out and being in awe of all that He has created is a daily occurrence, but I did make sure to go out and with that in mind and just wander around the property for a while. I was greeted with blue jays, squirrels and chipmunks and the same day my husband was so lucky he got to drive (slowly) through a group of deer - they even ran with him for little, until he was going too fast. What a treat!! The newest challenge is actually hosted by her other site, Good Morning Girls, it’s a full out study on the book of James. I’ll be tackling this with my Good Morning Girls group, so I likely will not be posting my deets about that here. However, there is a new link up on Women Living Well, called Living Well Wednesdays. That’s a bit of an issue for me though because, of course, I’m doing Work in Prorgress Wednesdays now. I think I will stick with Marriage Mondays, and just post my Monday link in the Wednesday linky. πŸ˜‰

I’ve blathered on quite a bit already, and I have a tart to make, but I want to share with you that I have been reading Come Have a Peace, the creator of Marriage Mondays, quite a bit in the last year or so and she’s taught me so much about being humble in marriage and taking a step back. A lot of people will tell you that if you have a servant’s heart and you work on being meek, it’ll come back to you tenfold. I tried several times in the past to make this work, but when I wasn’t met immediately with the response I had hoped for, I’d give up. Which was my mistake in the first place. I didn’t really have a servant’s heart if I was only giving of myself to get something back, was I?

So, when we moved out here in September, a lot of things changed. My husband’s home office is now on the main floor of our house when before it had always either been in the basement or tucked away in a spare bedroom. Now, the office is off the kitchen so I see him all day. Also, since my husband is the one who runs all the errands (his idea!), and now that we’re deep in the woods, there’s no way I could possibly go anywhere without him, he is on the same schedule as me and we are together all the time. Keeping that in mind, at the same time as this, I started really, honestly working towards having a servant’s heart. For about a month or so, we were pretty much the way we had always been – we had an amazing marriage but there were days of bickering, and heated moments (and not in the good way).

But then? After a month or so of this, something really amazing happened. There has been no bickering at all. Honest! Times when we’ve disagreed, if it’s been a subject that doesn’t actually affect us, we let it go, if it’s a decision that needs to be made, I have just given it to him and believe it or not, more than half the time my willingness to hand it over to him has opened him up to either rethinking my point of view and making a compromise or even making a full out concession. There is more joking and playfulness, there is a lot more time spent as a family. He even has taken a full out interest in my knitting and wants to play in the kitchen with me when I’m testing out new recipes. I hardly even need the tripod because he’s there lending a hand and making it even more fun.

Wait. I’m not gloating. I’m not going to air the dirty laundry of months and years prior with you either, but please know that our marriage was never this amazing, until I was willing to let go of myself and devote myself to it. Even the kids are turning a corner with my new approach because I’m not raising my voice to them anymore, I’m not short or rude when they forget their lunch bags at school or have a shower with the curtain on the outside of the tub <--that was a serious test, let me tell you. This has them reacting to me differently as well. But, it took at least a month (longer with the kids) of me modeling this behaviour before I saw it come back to me. So. Totally. Worth it. <3

2 Comments
« Older Posts
Newer Posts »