Browsing the blog archives for August, 2013.

Strawberry Ninjas

California, Healthy, Kids

This is not a recipe, it’s just a cute idea. It takes less than 10 minutes and it’s really adorable. All day in the sun was super fun and calls for some strawberry ninjas.

Strawberry Ninjas
fresh strawberries (hulled)
fresh whipped cream
mini chocolate chips

All you do is place the hulled strawberries upside down and cut enough of the point off so you can fill it from the top. Remove the point, fill the strawberry with whipped cream and put the point back on. Pop mini chocolate chips in as eyes and voila. Super cute snack for pretty much anytime.

Strawberry Ninjas

I spent the day at Seaside Lagoon with all the littles. With the load of work we have for homeschool this year, I’m not really a fan of taking a day for the beach, but I made an exception today because this is their favorite spot and it’s seasonal so it closes for the off seasons this weekend. Our last time for 2013 was super fun and I’m looking forward to going back again next year.

Strawberry Ninjas
Strawberry Ninjas
Strawberry Ninjas
Strawberry Ninjas
No Comments

Mozzarella Sticks

Domestic

Mozzarella Sticks are standard pub fare and often accompany pizza on family game night with garlic bread, because when are you ever going to have time to make them yourself – and why would you? They must take hours right? And you can’t just make it with stuff you probably already have in your pantry RIGHT NOW, can you? I swear, these little snacks go from passing thought to burning your greedy fingers in less than 30 minutes. No, honest. I have seen versions of them kicking around online but I didn’t trust that any recipe I could make myself would come close to the glorious fried gooeyness Mr So Very Domestic adores so much. And you know, given that I clearly refer to myself as ‘so very domestic’, I take kitchen fails as crushing blows to my womanhood a little harsher than most others. Ahem.

Then my husband got me The Pioneer Woman’s cookbook and this little gem was in there! I adore Miss Ree so much I’d never reprint a recipe from her book – however, she first posted this on her recipe site Tasty Kitchen over 3 years ago, so I think it’s ok. πŸ˜‰

I am all over any excuse for my husband and I to play around in the kitchen (no, not like that). He especially likes to offer up help with frying, shaping and any cutting that looks the least bit complicated or fun (hello scalloped potatoes and my mandolin). When we make these, we save even more time by working together so we can get back to the movie watching / Chinese checker playing / whatever silly thing we are doing at 1am while making food we shouldn’t. We have been known to even make these for the kids, but since only 1/3 of them likes them it’s still a pretty self indulgent endeavour. I set up the bowls of flour / egg / crust and he opens and cuts up the cheese.

I bread a few while the oil heats up and then he fries as I finish breading. Match made in heaven, really.

Here are the deets!

Mozzarella Sticks

Mozzarella Sticks via The Pioneer Woman
16 pieces string cheese, (removed from wrappers)*
Β½ cups flour
2 eggs
3 tablespoons milk
1 tablespoon dried parsley flakes
canola oil (for frying)
2 cups panko bread crumbs

*you’ll get two mozzarella sticks per string cheese, so just use as many as you need

First, unwrap all the string cheese you need and cut each piece in half. We’ve also experimented with making the sticks smaller by cutting each string cheese in three pieces. It works better that way for a crowd so you have more pieces but if there are just two or three people, halves is fine. Then prep the bowls. You’ll need one with the flour, one with the egg and milk and one with the panko and parsley. Just like when you’re making fish and chips, roll the cheese first in the flour, then the egg and then the breadcrumbs. Make sure each piece is well coated each time so it all sticks!
Mozzarella Sticks
Mozzarella Sticks
PW flash freezes these before she fries them but really ain’t nobody got time fo’ that!, so we just jump on in. Fry as many at a time as you feel comfortable with. We usually do about 6 or 8 at a time, but we have been known to be snacky and impatient (a dangerous combo really) and make them all in two batches. It doesn’t take long to cook these babies! The entire operation in the pan is under two minutes for sure. Just marvel as they turn a lovely golden brown about 45 second after you drop them in the oil, poke them a bit to turn them over around the one minute mark and take them out before the two minute mark.
Mozzarella Sticks
Mozzarella Sticks
I know right?!
Mozzarella Sticks
My husband eats them with nothing at all, I love them in marinara sauce or a sweet and sour sauce. Our one, lone mozzarella stick loving child (how are the rest even related to us?!) looooves them with ketchup. She’s 4, so ketchup is still socially acceptable on pretty much everything, right? No matter what you eat them with, they’re crazy amazing and so much better than they are at restaurants or from frozen.
Mozzarella Sticks
Mozzarella Sticks
No Comments

Alphabet and Number Matching Wheels

Homeschooling, Kids

This year, Wee One #3 would be starting kindergarten if we were still in Canada. We’re all happy to be homeschooling, and we’re all happy to be down here but it feels really weird to not be registering our four year old for kindergarten. So while I can’t officially enroll her in the same homeschooling program our other two are in, I can start formally homeschooling her. I will drone on about that more next week. πŸ™‚

Right now, I’m excited about some of the supplemental activities I’ve pulled together for her. There are a lot of great finds over at Confessions of a Homeschooler, and these wheels are two of them. I find that after kids learn something new, it’s important to make sure they practice it enough that it sticks but not so they are bored with it. These matching wheels are awesome for reaffirming what kids already know, but are not so boring that they’re over them if they know the material already.

Our kindergartener is still working on matching up some of the uppercase / lowercase letters and having the alphabet wheel in my (admittedly huge) purse has been really helpful for her learning some of the lowercase letters in small doses and it has the very pleasant side effect of keeping her engaged and happy while waiting at doctor offices and the like. She uses them at home sometimes too when I am busy with the other kid’s lessons and so far, so good! We have alphabet and number flash cards and worksheets in folders that she will dig out just so she can clip the matching clothespin to them!

If you’ve been homeschooling for any length of time, I’m sure I don’t have to tell you to invest in a good laminating machine! I only mention it because I try to buy things based on recommendations from others who get heavy use out of items I know I’m going to get heavy use out of, and I love my Scotch Laminator!

Alphabet and Number Matching Wheels

Huge thank yous go out to Confessions of a Homeschooler for making these printables and making them available free for personal use! All you need is a printer, a laminating machine, wooden clothespins and a marker! I keep each set in gallon-size Ziploc bags.

The number wheel has dots from 1-10 and clothespins with the matching numbers on them. Since there are no dots on the clothespins and no numbers on the wheel, this wheel is wonderful to drive home a lesson on numbers or review the same concepts a few days later. This wheel has helped our kindergartener to have a solid understanding of numbers up to 10. There is another wheel available for the numbers 11-20.

Alphabet and Number Matching Wheels

The alphabet wheel follows the same basic idea as the number wheel with the uppercase letters on the wheel and the lowercase letters printed on clothespins. This is a little trickier of course, since there is so much more to remember. Trying to teach a pre schooler or even a kindergartener the entire alphabet at once is overwhelming, but a few letters at a time breaks it down into manageable pieces and teaching aids like this one are perfect for both reviewing and introducing new letters!

Alphabet and Number Matching Wheels
No Comments

Baking With Kids – Sticky Toffee Pudding

Domestic, Kids

This is a hit or miss when it comes to the kids actually eating it at the end, but Miss Wee One #3 really liked making it. Some of our friends in the 10 and over crowd liked it, all the adults who tried it loved it, but none of the littlest ones liked it very much. Except for the syrup. Oh my. It so good, I made extra to give to a friend that loves caramel because it has that caramel taste to it (it’s only one ingredient away from the Amish caramel I make). I haven’t tried yet, but I’d imagine it would be perfect on everything from ice cream to apple slices.

I think the syrup is the main attraction here and it really takes the date cake over the top, but the cake itself is pretty good. It is a spice cake dotted with dates which really make or brake loving this or not. If you’re into them, it’s a win. If you’re not, just leave them out!

Baking With Kids - Sticky Toffee Pudding

Sticky Toffee Pudding via Baking with Kids

Cake:
1 cup pitted, chopped dates
1 1/4 cups boiling water
1 teaspoon baking soda
4 tablespoons unsalted butter, softened
3/4 cup granulated sugar
1/2 teaspoon vanilla extract
2 extra large eggs
1 2/3 cups flour
1 teaspoon baking powder
Syrup:
2/3 cup brown sugar
4 tablespoons butter
1 cup light cream

Preheat to 350, and pour the boiling water over the chopped dates. Add the baking soda and let it sit for a while.

Mix the sugar, butter and vanilla until well combined. Whisk the eggs on their own to break them up and then add them to the sugar/butter mixture one at a time. Make sure it’s well mixed each time.

Baking With Kids - Sticky Toffee Pudding
Here’s the water/dates/baking soda ready to roll.
Baking With Kids - Sticky Toffee Pudding
Sift the baking powder with the flour and add to the egg/butter/sugar mixture, then add the water and date mixture and mix it up!
Bake for about 45 minutes.
Baking With Kids - Sticky Toffee Pudding
Make the syrup while the cake is baking by heating brown sugar, butter and cream until it starts to bubble and crystallize at the edges.

Baking With Kids - Sticky Toffee Pudding
Once the cake is ready, chop it up however you like and then drown it in the syrup. Voila!

Baking With Kids - Sticky Toffee Pudding
No Comments

First Day Teacher Gifts

Crafty, Kids

Today is the first day of school across the LAUSD – for the homeschoolers as well! In our case, we check in with one elementary school teacher and one middle school teacher so we have the same teachers as last year! Fun! I pulled together a couple of sweet ideas I had pinned a while ago to usher in the new school year right.

A lot of homeschoolers don’t like working with their school boards, and I’m not really sure why. I love having teachers to go to with questions about the kid’s work and also being able to work closely with them in an independent study program is wonderful because we can tailor projects and activities to fit them while at the same time working in a school situation that comes with report cards and transcripts!

One of our daughters, Wee One #2 has been working hard over the last year to fast track through second and third grade. She has just a couple of months left in 3rd grade and then she’ll be able to start on 4th. Thankfully, we have the same teacher until 5th grad to help us get through the process! She’s a really sweet person and a great teacher!

She drinks coffee and we have a similar sense of humor so I thought she’d both find this gift funny and useful. It a 16oz Starbucks mug filled with Starbucks instant French Roast coffee packets. The little note is a reproduction I’ve seen all over Pinterest – a little something to get you back to the grind. That’s delicious cheese, amirite?!

The VIA packets are shorter than the cup and didn’t look very pretty at first so I turned a paper Starbucks espresso cup upside down in it and put the packets on top of that so they stuck out more. I have yet to knit with this yarn, but I used a little Biggo yarn in Dogwood Heather from Knit Picks to attach the note (which is just cut out and backed onto brown card stock).

First Day Teacher Gifts

Our oldest’s teacher has been amazing in helping us with the transition to homeschooling a middle schooler, which is an entirely different beast than homeschoooling an elementary aged child! He has the same passion for art that our son has so they hit it off right away. So much in fact, that he’s comfortable calling him if he has questions about an assignment or if he just wants to clarify something. Such a great benefit to independent study!

I hope he likes this little something, I know he likes plants and since he’s working with older kids whose attention can be even harder to hold than small children, hopefully his note will speak to him. πŸ™‚ Teachers plant seeds of knowledge that will grow forever. I went with a cactus since it’s pretty hard to kill them and it went with the whole ‘forever’ theme!

To decorate the pot the cactus came in, I glued pages from the world’s most pathetic dictionary* (the word teach isn’t even in it) to the sides and attached his card stock-backed note with some backyard rope.

First Day Teacher Gifts

I mention that it was a terrible dictionary because the idea of ripping pages from a dictionary (or any book really) totally horrifies me. It had no words between tea and team, for example. It also had a ‘computer terminology’ page at the very back with terms like ‘USB’ and ‘internet’. My husband insisted I laminate it so he could take it to work with him because he is a hilariously ironic dude when he wants to be.

No Comments

Baking with Kids – Banana Loaf

Domestic, Kids

We have made this recipe so many times, I’ve lost count. These pictures are from the first time we made it and they make me nostalgic for our old house, though I quickly remember the snow raging outside so much of the time and then I’m thankful for the beach. πŸ˜‰

Where ever we are, there is always a lot of baking going on, and this recipe has been one of the ones that has moved around with us. The only down side to non stop summer is there are no cold winter nights that it makes sense to bake something like this on, but of course we bake it anyway!

Baking with Kids - Banana Loaf

Banana Loaf via Baking with Kids

2 cups flour
1 teaspoon baking soda
pinch salt
1/2 cup packed light brown sugar
1/2 cup granulated sugar
7 tablespoons butter
2 eggs
2 large bananas, mashed
1/2 cup chocolate chips or chunks

It’s a pretty standard banana bread recipe, but it’s so so good!

Preheat the oven to 350, and grease a loaf pan.

Sift the flour, baking soda and salt into a mixing bowl and stir in both sugars. Make a little well in the middle of the mixture. Melt the butter either in a small pot on the stove or in the microwave and pour that and the eggs into the well. Mix it all up and add the bananas. Mix again and then add the chocolate chips or chunks.

Pour into the loaf pan, pop in the oven and bake for about an hour.

Baking with Kids - Banana Loaf

The best thing about this recipe is the kids can so it almost all themselves, especially if you have an older one to help with melting the butter and pouring the batter into the loaf pan. The satisfaction they get from cracking eggs, mixing, stirring and baking is one of those unmatched things. Making something the rest of the family loves is pretty special too! It helps that this loaf is so moist and just sweet enough. It’s not overpowering with the banana flavor either, just perfect – which is probably why we’ve made it so many times!

No Comments

Strawberry Shortcake

Domestic

It started with beautiful strawberries. Huge, bright, lovely strawberries that inspired me to whip up a strawberry shortcake. For a split second, I thought of making an angel food cake with this but if I’m honest, as natural as angel food cake is to pair with fruit, I don’t really love it all that much. My husband doesn’t hate it but he’s not crazy over it either so I went with a pound cake.

I’ve been using Alton Brown’s pound cake recipe for about 4 years and it’s never gone wrong.

Strawberry Shortcake
Pound Cake via Alton Brown

16 ounces unsalted butter, cut into pieces and softened
16 ounces cake flour
16 ounces sugar
9 large eggs, room temperature
1 teaspoon vanilla extract
1/2 teaspoon kosher salt

Preheat to 350 and grease and flour three 9″ cake pans, or one 9″ x 13″ cake pan or a bundt or whatever makes you happy, in this case I went with fou4 9: cake pans (only three were used so I covered the fourth in whipped cream and strawberries and brought them to my neighbor). Cream the butter and the sugar, then add the eggs one at a time. Be sure to scrape down the sides with a spatula and then add the vanilla and salt.

Now very slowly add the flour, with the mixer on low, until it is all incorporated. Then pour into your prepared cake pan and bake for about an hour.

While it’s baking, prepare your whipping cream and strawberries! Wash, hull and chop your strawberries into smallish pieces. If you prefer bigger chunks, go for it. When I make whipped cream for dipping fruit in, or for something like this when it’s acting as a frosting, I always use the one pint carton. I whip it into oblivion with 1/4 cup confectioner’s sugar and about 1 or 2 teaspoons of vanilla. I used 2 teaspoons when I made it for this cake and I also added 2 tablespoons of granulated sugar for a slightly different texture from the standard whipping cream we are always dipping strawberries in.

Strawberry Shortcake

Once the cakes have cooled, flip one out onto a plate (or whatever you’re serving from) and slater it in a layer of whipping cream. Then sprinkle the bits of strawberry on top, but do a whole lot of sprinkling. You’re going to want a lot of strawberries in this. Add the second cake carefully and slater that with a (not so) healthy helping of whipping cream as well, and then again with the generous sprinkling of the strawberries. I opted not to cover the top of the cake as well, you can always add a dollop of whipped cream and more strawberries on the side for anyone who wants more.

Strawberry Shortcake

This really does taste even better if you pop it in the fridge for a bit before you’re ready to serve it. The whipping cream softens up the cake juuuust enough that it’s got a nice texture but not enough that it’s soggy and because the cake is so sturdy it can also absorb some of the strawberry juice and still hold it’s shape. So good!!

Strawberry Shortcake
No Comments

Deceptively Delicious Tofu Nuggets

Healthy

A couple of years ago, I set out to cook and bake my way through Jessica Seinfield’s book, Deceptively Delicious. I did manage to cover a lot of the book, but I didn’t do every recipe. I brought it with me to LA though, and I’m still working through it!

This is one of those recipe you’ll likely enjoy of you’re down with tofu. If you’re not, this is probably not a winner! I made these for a handful of tofu-friendly friends and everyone really liked them, my husband and littles? Notsomuch.

Deceptively Delicious Tofu Nuggets

Tofu Nuggets via Deceptively Delicious
1 cup whole wheat breadcrumbs
1 tablespoon ground flax
1 tablespoon grated Parmesan
1/2 teaspoon paprika
1 cup spinach or broccoli puree
1 large egg, beaten
1 14oz package extra form tofu
1/4 teaspoon salt
1 tablespoon olive oil

The process for these is, unsurprisingly, the same as for breading pretty much anything else. First dipped in vegged up egg and then in fibered up breadcrumbs. Bake or fry and voila!

To health up the breadcrumbs, mix them with the flax Parm and paprika. Then cut the tofu into nuggets. I sliced the block in half widthwise first so it was half as thick as it was, and then in half lengthwise so I had four blocks. Each of those blocks I cut into 6 more pieces for a total of 24 pieces.

Whisk the pureed broccoli or spinach (I used spinach) and you’re ready for dredging!

Deceptively Delicious Tofu Nuggets

Each piece goes first into the egg and spinach mixture to have something for the coating to stick to, then into the breadcrumb. Done!

Add the olive oil to a frying pan and cook the nuggets for 3-5 minute each side.

Deceptively Delicious Tofu Nuggets
No Comments

Learning About Germination Part I

Homeschooling, Kids

Learning About Germination

There are so many different ways to ignite interest in science with small children. Looking at found objects under a microscope and watching the starts come out with a telescope are classics, but the very best one to hold their attention over a period of a time is sprouting seeds! Any kind of planting will do, I will post more of our planting projects in the coming weeks but this one, sprouting seeds to learn about germination is a great launching point.

Use any seeds you like! We used three different flower seeds – zinnias, marigolds and forget me nots. All you need in addition to the seeds are damp paper towels and zip top plastic bags. Place the seeds in the damp paper towel and fold it over, tuck the paper towel into the bag, zip it up and place it in a cabinet for a few days. It’s like magic for them when they open up the bags to see the seeds have sprouted. Be sure to use a lot in case some of them are dead.

Learning About Germination

After the kids marvel over the sprouts, (it’s even more fun with a magnifying glass) you can keep the magic happening by planting them! Planting them in a clear jar or plastic cup with where you can see the roots growing hold interest too and becomes it’s own lesson, especially if you plant something that grows under the dirt, like carrots or beets.

You can customize your own data charts so the kids can check on their seeds every day and record changes. If you choose seeds that will grow into larger plants (like a bean plant, for example) they’ll be able to record data longer.

The BBC has a good video to start with here, called An Introduction to Seed Germination and Growth

More on germination:

How Stuff Works video
Back To Constitution video
Kids Growing Strong

No Comments

Menu Monday with Apple Cobbler, also where did summer go?

California, Domestic, Kids

Amazing to me that summer break is almost over for us! We had intended to be pretty laid back this summer (yeah, yeah, I know I can’t) and get some summer school work done. The first two weeks of summer break we ran around South Bay hanging out with my dear friend Jennifer and her kids before they moved back to Texas (sadface), and we really did manage to do a lot in those two weeks. Wee One #2 had a dance performance at a fair and our oldest was promoted to a second stripe white belt in jiu jitsu!

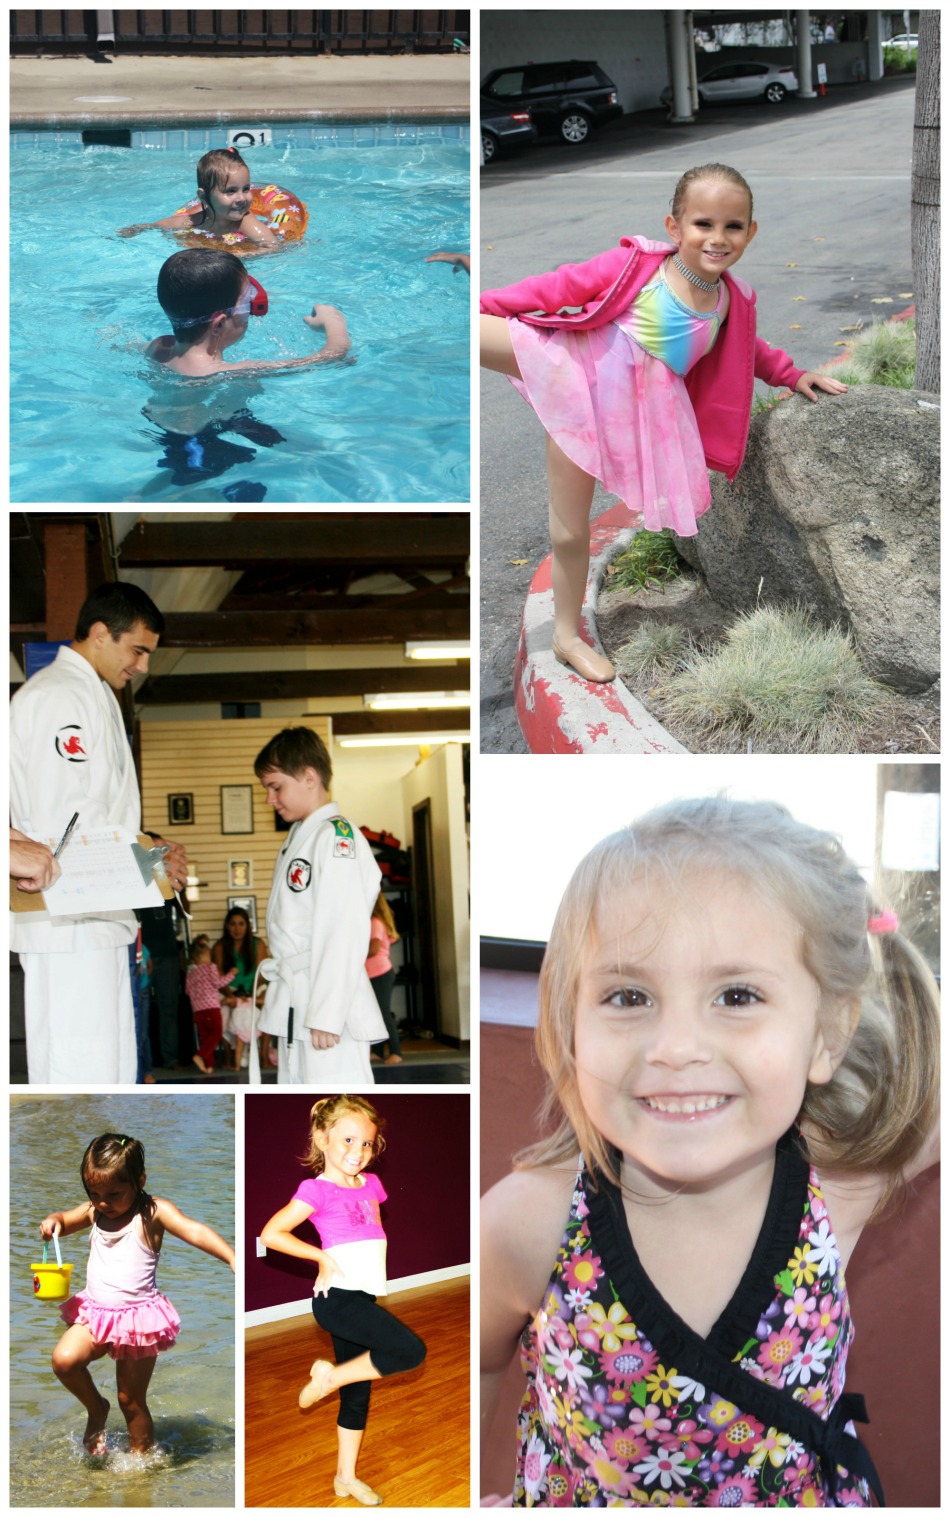
Then? July happened. The oldest two started swimming lessons three days a week, Wee One #2 started dance camp, and evening classes at the studio started up again as well. Most days she was at the studio for half a day, but at least once a week she was there all day. The window of her at dance camp in the morning and the second window of her home from dance camp in the afternoon wasn’t really long enough to go far, but I had fun in the pool and the yard with the other two. Our oldest had jiu jitsu camp this summer as well, every afternoon plus he has regular classes three days a week plus one additional lesson. Wee One #3 made running around our little ‘hood all month feel fun. The library is very close and she’d always suggest a trip over there to get new books between dropping off and picking up the big kids. <3 
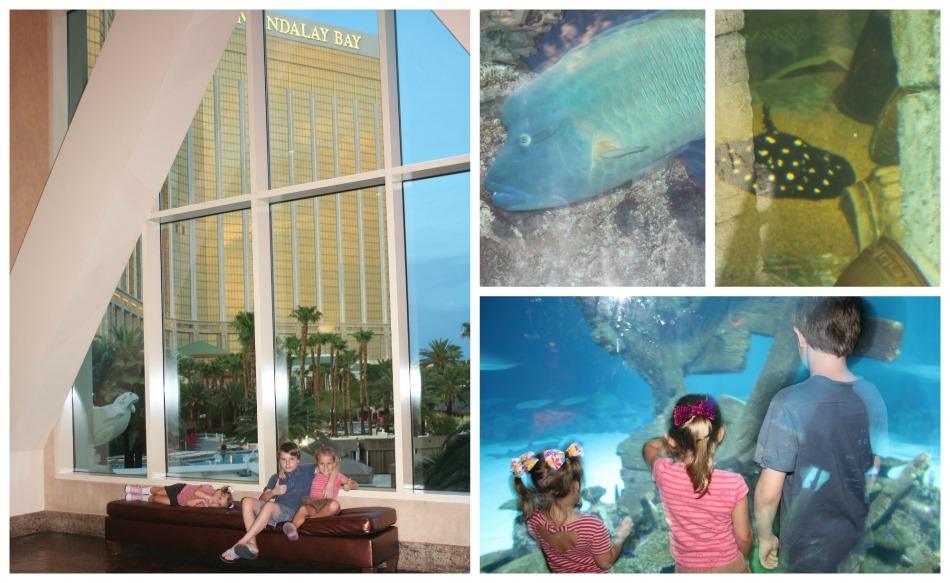
We had a break last week from the studio, and now our tiny dancer is starting her 'summer dance intensive' schedule today. Half day of dance classes from lunch until just before dinner. The catch for her is that she has her first check in day for school during the second week of intensives but I'm sure we can make that work. So just like that, our summer break is over and it feels both like it didn't even happen (where's the 'break' part?) and like it was well spent! We did manage to sneak in a weekend in Vegas with the kids to hang out with my girl Nichole and her kids and do some tourist stuff too. I am especially grateful to live somewhere that feels like summer so much of the year that you didn't really miss it, even if you missed it. You know? πŸ˜‰

This week, I’m trying to make my husband’s favorite meals paired with desserts that will win our kids over if they didn’t love dinner as much as their Daddy. πŸ˜›

This Week’s Menu August 5-11

Monday – Lasagna with Savory Onion Bread and Pioneer Woman’s Apple Dumplings for dessert

Tuesday – Parmesan Breaded Chicken Breasts, Creamy Broccoli Noodles with Corn and Pioneer Woman’s Knock You Naked Brownies for dessert

Wednesday – Shredded Chipotle Chuck Roast with Bacon Mashed Potatoes and Roasted Cauliflower with Apple Cobbler for dessert

Thursday – BBQ Steaks, Hassleback Potatoes and Corn on the Cob with Pioneer Woman’s Homemade Glazed Donuts for dessert

Friday – Roasted Chicken, Baked Potatoes with Carrots and Pioneer Woman’s Malted Milk Chocolate Chip Cookies

Saturday – Tacos with Lime Jello Cubes and Whipped Cream for dessert

Sunday – Homemade Pizza with Ice Cream Sundaes for dessert

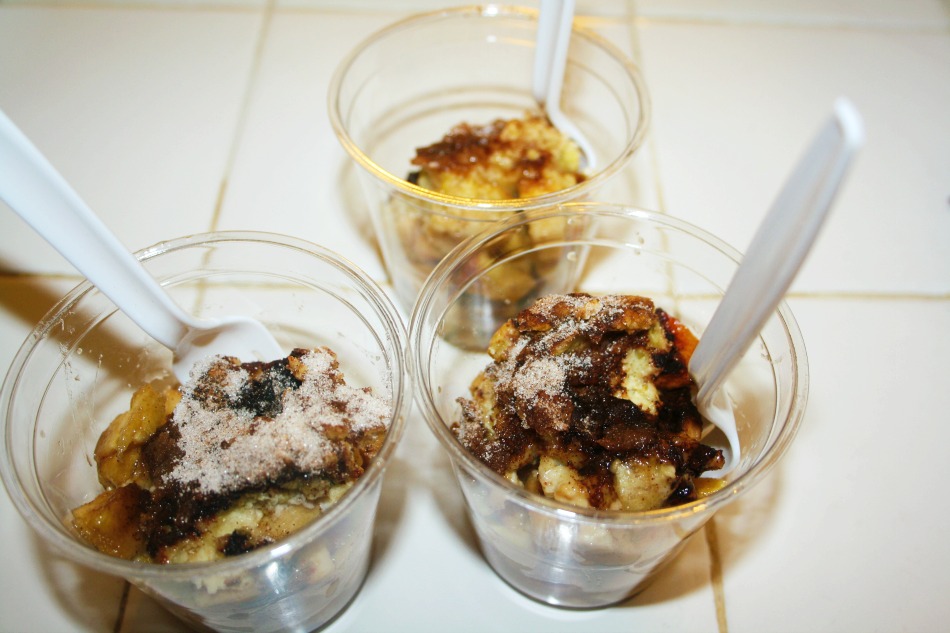
Apple Cobbler is hands down one of my husband’s all time favorite desserts and our kids are all big on apples. This was a hit, I loved it so much I shared with our neighbors. πŸ™‚

Apple Cobbler via Baking Bites

1/3 cup sugar
1 1/2 teaspoon cinnamon
5 medium apples (about 2 lbs)
1/2 cup brown sugar
1 tablespoon cornstarch
1/8 teaspoon salt
1 1/3 cups flour
1/4 cup quick oatmeal
1 1/2 teaspoon baking powder
1/4 teaspoon salt
4 tablespoons butter, chilled and cut into small pieces
1/2 cup milk

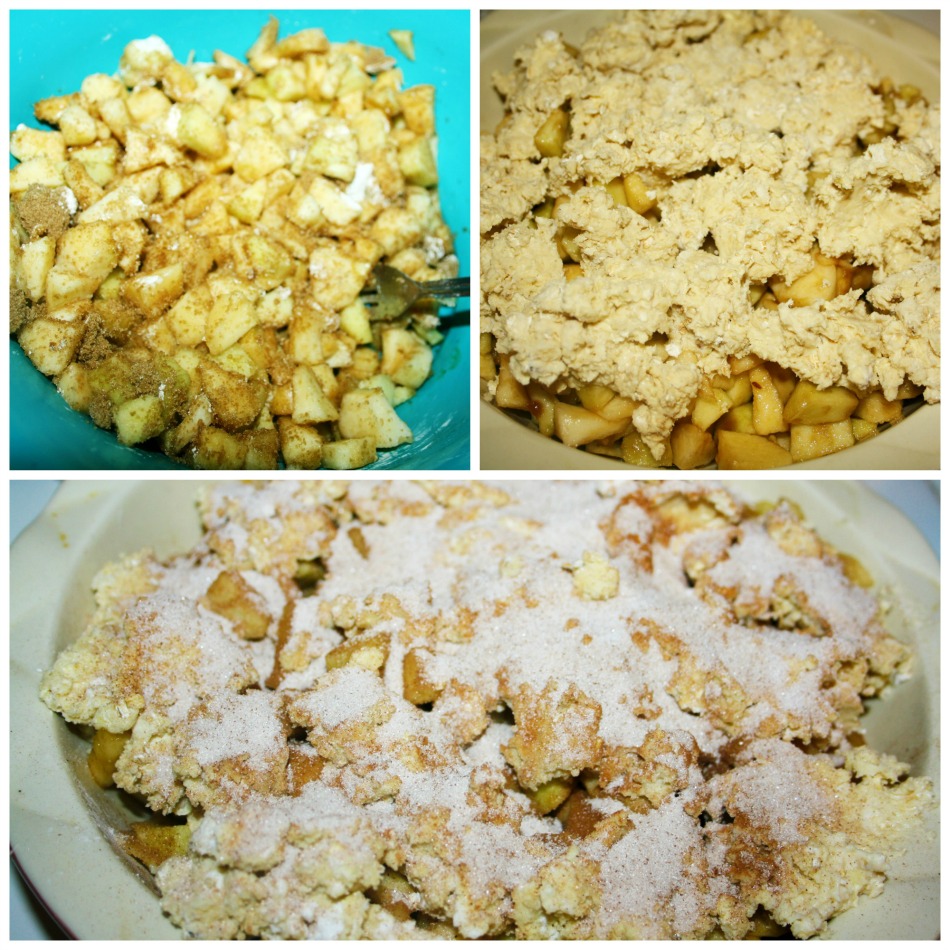
Preheat oven to 350, and mix the sugar and cinnamon, you’ll need this later. Peel and core your apples, and chop them up. Mix the apple pieces with the brown sugar, cornstarch, and salt. Pour this into your baking dish and make the topping!

The topping is really simple and so so good! Just combine the flour, oatmeal, baking powder, salt and 1/4 cup of the cinnamon-sugar mixture you made first. Mash the butter in with your fingers to get it all combined. Drop this all over the top of your apples to form a messy crust, sprinkle with the rest of the cinnamon-sugar and bake for about 45 minutes.

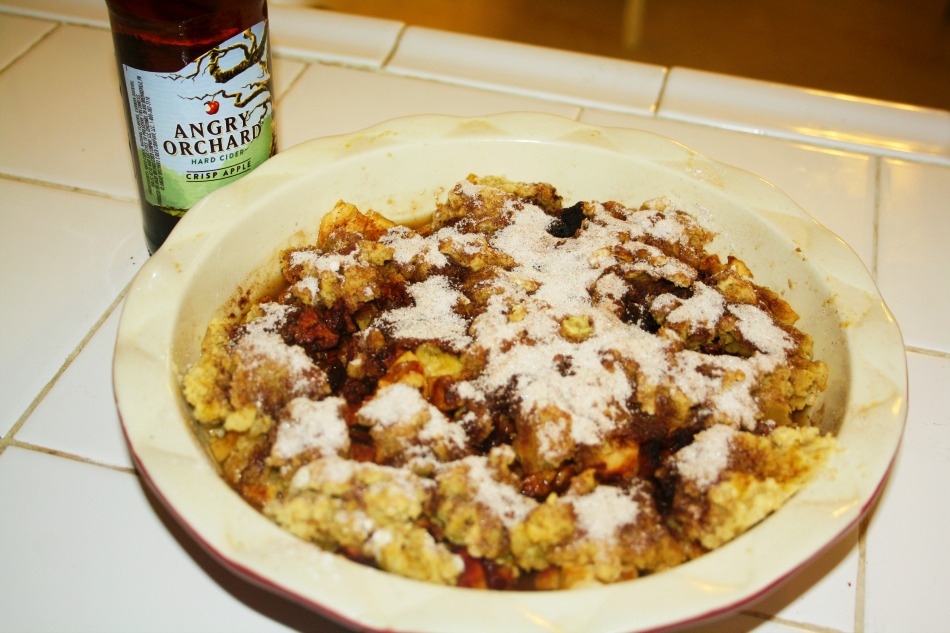
I served it with hard cider from Angry Orchard but it was just as amazing later with coffee. πŸ˜‰

It was so good I ended up bringing some around to our neighbors!

1 Comment