Anyone who reads this blog with any regularity knows that I adore holidays. I was going to say especially ones where the kids have some magic like the Easter Bunny and Santa Claus but I also really love holidays that bring people together like Thanksgiving and the 4th. So, yeah, just about every holiday is awesome as far as I’m concerned. So we’ve been doing it up with the kids with crafts and baking and celebrating with friends. With just two more sleeps to go, the littlest ones are hyped for the hunt and since Wee One #1 is turning 13 this year instead of subjecting him to the standard-issue egg hunt, we are doing up a treasure hunt for him where he’ll find things along the way with clues for what’s next and then at the end his basket of mostly non-sugary items. I can hardly wait.
The other exciting news is that we are moving to a bigger place on Monday – within the same complex! So we get the upgrade of more space and a yard and a bigger kitchen, and we don’t have to lose the pool or this amazing location where all the essentials (and so much fun) are a short walk away. I’m packing up soooome things, since everyone keeps reminding me that I can literally just walk all of our stuff over to the new place in just a few hours. I also don’t want to turn the place upside down before Easter, but a little chaos is pretty natural for the 5 of us. 😉
After posting all of our Easter fun this week, it occurred to me that some people may like to make actual Easter bread for their families this weekend, not sweet bread stuffed with cheese and made to look like bunnies and not Greek Easter bread, but you know, standard old school straight up Easter bread. Like your granny probably made, in a braid, with dyed eggs on top.

Standard Easter Bread – I’ve been using this recipe forever
2 1/2 cups flour
1/4 cup sugar
1 teaspoon salt
2 1/2 teaspoons active dry yeast (1 pkg)
2/3 cup warm milk
2 tablespoons butter
2 eggs
PLUS:
4 or 5 whole, dyed eggs (they don’t need to be hard boiled first since they’ll cook in the oven with the bread)
2 tablespoons butter (to brush over dough before baking)
Pretty standard bread dough. Mix 1 cup of the flour with the sugar, salt and yeast. Then warm the milk and butter in a small saucepan and mix this in with the flour mixture.
Let it set for about 10 minutes, then add the eggs and another 1/2 cup of the flour and mix until it’s fully incorporated. Slowly add the rest of the flour 1/2 cup at a time. Now turn out the dough and knead it for about 8 minutes.
Spray a large bowl with cooking spray and put the dough in. I usually use the same bowl I mixed it in. Cover it with a damp cloth in a warm place and let it rise for about an hour. It should be double the size.
Punch down the dough and divide into three pieces. Let them rest 10 minutes.
Roll out each piece into about a 36″ strip and loosely braid them, then join the ends. Or don’t, some people make it a ring and some don’t. Delish, either way. My recipe card says ‘lay eggs’! Haha, place the eggs around the braid, brush with butter and bake for about 50 minutes at 350.

Mar 22, 2013
I love, love, love Greek Easter bread (technically it’s called Tsoureki). My mother is Greek so any time we celebrated something a second time because of the Eastern Orthodox calendar we just called it Greek Christmas or Greek Easter or whatever food we were eating that was slightly different because of the Mediterranean influence we’d toss the word Greek in front of it and my sister and I would happily partake in whatever it was. Now that I’m older and have been ribbed by my friends for years that it’s actually Eastern Orthodox Christmas and Eastern Orthodox Easter we were celebrating two weeks after the western version and that it’s more like Mediterranean chicken and pilaf – not just for Greeks – but I don’t care. I still use ‘Greek’ instead of ‘Eastern Orthodox’ and I can’t help it. 😉
This year, Greek Easter falls an entire month after western Easter but I’m baking up some Tsoureki anyway – because why not? I made this before we left Canada and one of my (painfully honest) Greek aunts said it was good, which is the equivalent of angels singing and clouds parting after two days in the kitchen trying to get it right. All it takes is the right recipe – and a little patience.

Tsoureki via Thea Rika
8 cups all purpose flour (plus more for counter)
1/2 teaspoon salt
1 1/2 cups warm milk
3 envelopes dry yeast
1 2/3 cup unsalted butter
1 2/3 cup sugar
zest of one orange
zest of one lemon
1 tablespoon mahlab
5 eggs, lightly beaten
1 egg, beaten with a splash of water
sesame seeds or chopped almonds for sprinkling
1 red egg (optional)
It’s not that far from making sweet rolls, really.
Sift the flour and the salt, dissolve the yeast in the warm milk (not too hot or it’ll kill the yeast), after a few minutes add 1/2 cup flour and 1 tablespoon of sugar. Now let it sit till it foams up. I usually cover it too.
Melt the butter in a large saucepan, stir in the rest of the sugar, the orange zest, lemon zest and mahlab. Remove from heat and stir in the beaten eggs.
Using a large bowl, combine your yeast mixture with your warmish egg and butter mixture and very slowly add in the flour. Cover it and let it rise for two hours.
Now is the fun part! Sprinkle your counter with flour, punch down the dough and knead it. Separate it into four balls and let them rest for 10 minutes. Roll the pieces into long strips, about 12″ long. Braid the dough, tuck it into a loaf pan and place your eggs in the braid. Let it rise again, this time for about an hour. Preheat your oven to 350.
Before you pop it in the oven, brush an egg wash over it (just water and an egg whisked together) and sprinkle with sesame seeds or almonds (or not). Bake for about 30 minutes until the top is golden brown.
Nov 12, 2012
This week I’m linking up with Organizing Junkie!
First thing on my mind this morning was hitting up random.org to choose a winner for the Williams Sonoma / Sur la Table giveaway, sponsored by Country Crock. We had 5 entries, I numbered each person 1-5 and the random number generator picked…..

Congratulations Julie! Email me back and Country Crock will get your prizes out to you!
So most of you know we are going to Vegas for Thanksgiving this year to celebrate with a dear friend and her children. A dear friend who just happens to be a real, live, Southern Belle! Please note the capitalization. She’s from the south, y’all so our very first American Thanksgiving is going to be a down home American Thanksgiving. We will be spending the whole day cooking and cleaning and then cooking and cleaning and cooking and baking and cleaning – all with 7 children underfoot. I will do some prep here since I’m not sure it’s physically possible to do the entire menu in a single day at her house. We are, both of us painfully, overachievers. Expect epicness next Thursday.
Anyhoo, so since we have so many kids between the two of us and since arts and crafts will only distract them for so long, I’d love for them to jump into the kitchen for a kid-friendly recipe! This comes from Linda Collister’s Baking with Kids (the best kid’s cookbook we’ve ever used). My kids have made this recipe so many times I’ve lost count. Not So Wee One #1 likes these with a little butter, Wee One #2 likes them with jam and Wee One #3 likes them with maple syrup – and they all like them still warm! They’re a hit with grown ups too, especially good with gravy – you know, like with a serious turkey dinner!

Popovers – via Baking with Kids
1 cup whole or half fat milk
1 cup all purpose flour
1/4 teaspoon salt
1 tablespoon wheatgerm or oat bran
3 extra large eggs
2 tablespoons melted butter
|
|
|
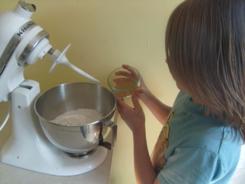
| Preheat your oven to 425 and add the milk, flour, salt and wheatgerm (or oat bran) to a food processor or blender and process just to mix them. |
|
|
|
|
|
|
|
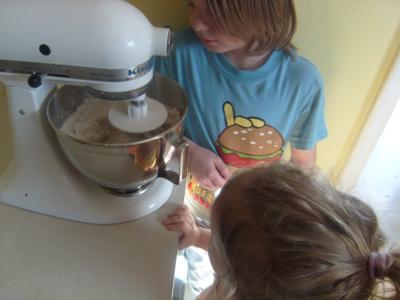
Now it’s egg breaking time and they’re really serious about it.
|
|
|
|
| Melt the butter and add it and the eggs to the processor and pulse again until it’s well blended together. If your food processor has a spout (or you used a blender), you’re set. Otherwise, pour the batter into a pitcher to make it easier for the kids to pour it into the (lightly greased) muffin cups. Each muffin cup should be about half full. |
|
|
| Now carefully watch them puff up. 🙂 Bake for 25 minutes and then without opening the door turn the oven down to 350 and bake for another 15 minutes. |
|
|
|
|
|
They are best just a few minutes out of the oven, which is perfect for impatient wee ones, but they are still good later the same day!
|
Now, since it’s menu Monday after all, here’s what’s up this week around here!
This Week’s Menu (Nov 12 – Nov 18)
Monday – Beef Stew with Cheesy Pull Apart Bread and Boston Cream Whoopie Pies for dessert
Tuesday – Chicken Alfredo with Ceaser Salad and Fudgey Oreo Brownies for dessert
Wednesday – Toasted Ravioli with Parmesan Knots and Sugar Cookie Bars for dessert
Thursday – Chicken Crescent Rolls with Hush Puppies and Triple Chocolate Pound Cake for dessert
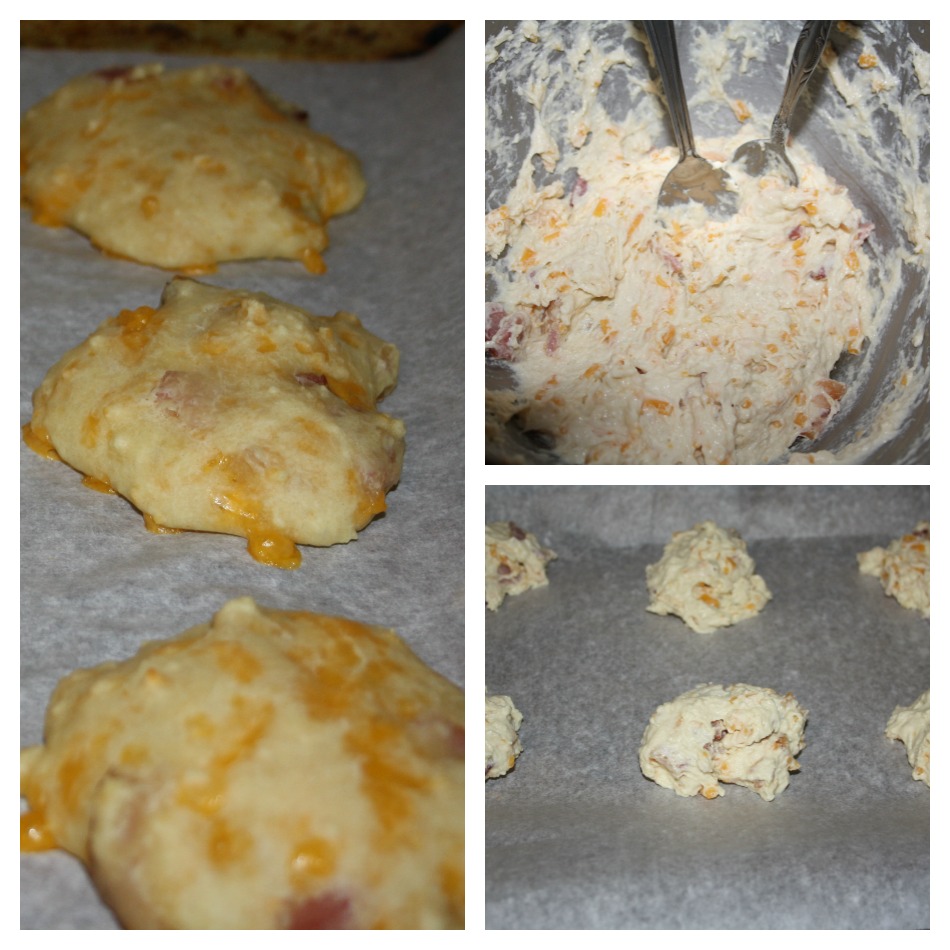
Friday – Chicken Florentine Bowtie Pasta with Garlic Cheddar Biscuits and Rolo Cupcakes for dessert
Saturday – Old Fashioned Chili with Bacon Cornbread and Cookie Dough Brownies for dessert
Sunday – Chicken Parmigiana with Scalloped Potato Stacks and Nutmeg Donuts with Berry Icing for dessert
Jan 13, 2011
This is the kids’ second recipe from this book so far this year and they’re having a fun time with it. Wee One #1 has been helping in the kitchen since he was old enough to push a chair up to the counter and mix so he has lots of practice. Wee One #2 has been baking for about as long, but is 5 years younger.
Anyhoo, they’ve both helped bake all kinds of neat things, but they’ve never made plain old bread before, so here we go, on their second recipe all by themselves – they made bread!
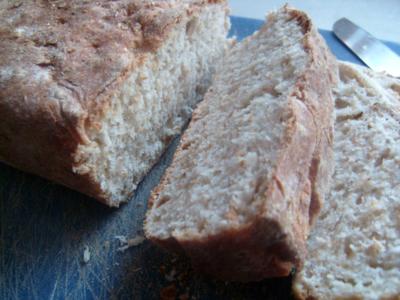
Basic Bread – from Baking With Kids (p. 58)
5 cups white or whole wheat bread flour (or 2 1/2 cups each)
1 1/2 teaspoons salt
2 1/2 teaspoons active dry yeast
2 cups lukewarm water or milk

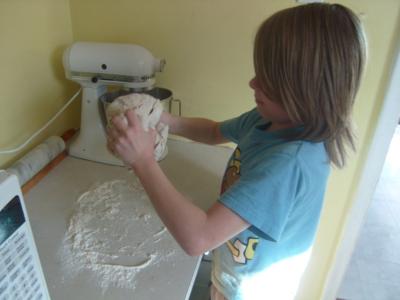
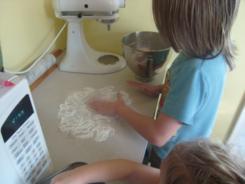
First they added the flour and the salt and the yeast (we used half white and half whole wheat flour). Then I put the hook attachment on the mixer and they poured in the warmish milk.
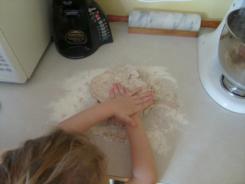
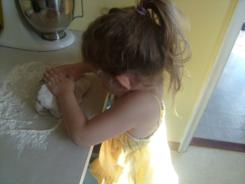
Taking the bread out of the mixer to get messy and knead it on the counter was the highlight of today’s bread baking session! They really got into it.
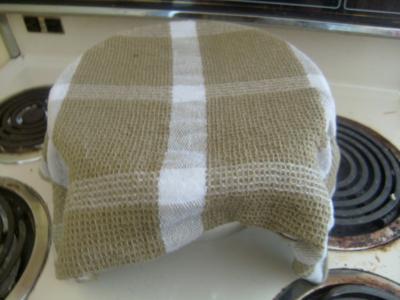
Then we covered it with a sort of damp towel and put the bowl on the oven (we turned the oven on super low to give a little heat to the room and bottom of the bowl), and then we waited about an hour.
Once the hour was up and the dough had done it’s thing, they took it out again and punched it down (as per the hilarious instruction).
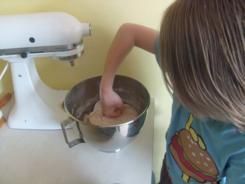
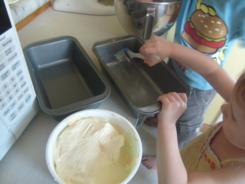
Wee One #2, who is my official pan-butterizer, set to greasing the pans. She’s pretty serious about it. If she happens to come into the kitchen when I’m baking without her (like say first thing in the morning and she’s barely awake) she mortally offended I’d butter my own pans.
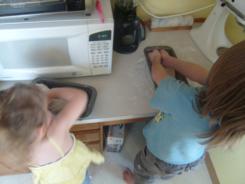
They decided that instead of baking a single 1lb loaf, they wanted to each have their own loaf. Which, of course, changes the baking time and the final look, but they were in charge of this kitchen venture, so two 1/2lb loaves it was.
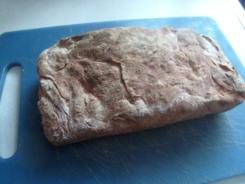
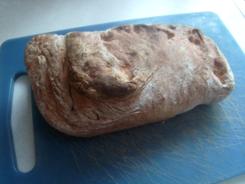
You know what? Their loaves came out terrifically! They were obviously on the short side, lol, but very, very good! This is a great recipe for anyone to make bread for the first time.
This house feels like the perfect house for kids to cook and bake in because one of the counters is really low! My Kitchen Aid lives there for easy access. 😉