Oct 15, 2012
I’ll quickly rhyme off this week’s menu so we can get onto the burritos!
This Week! (Oct 15 – 21)
Monday – Chicken Alfredo with Rosemary Buns for the fam, Vegan Falafels with Rice for me
Tuesday – Spaghetti with Meatballs and Garlic Bread for the fam, Tofu Stir Fry for me
Wednesday – Pork Chops with Mashed Potatoes and Corn on the Cob for the fam, Crack Wrap and Corn on the Cob for me
Thursday – Breaded Chicken with Cheesy Noodles and Green Beans for the fam, Vegan Falafels with Rice for me
Friday – Beef Stroganoff with Parmesan Breadsticks for the fam, Pumpkin Oatmeal Bake for me
Saturday – Out celebrating my birthday! 😀
Sunday – Roasted Chicken with Root Veggies and Pull Apart Garlic Bread for the fam, Vegan Nachos for me
*I didn’t list desserts because I’m making Halloweeny treats I will be blogging about later
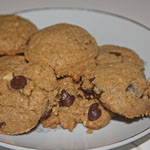
This week’s Menu Monday recipe is called Throwback Burritos because until I made them for these photographs I hadn’t had one in about 13 years. Yes really, and it’s not that I’m all that old really. These were the burritos I lived on with my now husband/then boyfriend and our hilarious roommate Ken. The background on that is that my husband and his roommate go waaaay back, and then I moved in as well years after the fact. No one but Ken ever made these either! I was always strictly on cheese grating duty while he worked his magic in the kitchen.
Now that we are living in Los Angeles, my husband and I have a horrible addiction to Chipotle and while eating a massive Chipotle burrito recently my husband reminisced about all the burritos we used to eat back in the day so I fired off a Facebook message to Ken and we were eating this throwback dinner a few days later.
Most of the instructions here I am pulling straight from the message I got from Ken because his descriptions are pretty bang on, especially when he opened with ‘those burritos were dirt simple’, and I’m all ‘is that why you kept us out of the kitchen?!’ hahaha.

Throwback Burritos via Ken Snider
-large tortillas
-taco seasoning
–Sirarcha/rooster sauce
-minced garlic (though back in the day we used garlic powder)
-some sort of salsa or pico de gallo
-ground beef at least lean/medium (high fat content is needed here to get the smooth texture, if you use extra lean it’ll taste grainy)
-Uncle Ben’s long grain & wild with roasted garlic flavor (you can make this yourself in a rice cooker with some chicken broth and garlic, but if you want the taste you remember you want Uncle Ben’s)
-*fucktons of cheese* (I believe that’s an accurate measurement of the specific amount of cheese needed)
|
|
|
| Ok, so first brown ground beef, drain. Add taco seasoning and water (one cup water per packet per pound of ground beef) and simmer until thicken (it won’t thicken much, might want to add some cornstarch or flour, not much, maybe a teaspoon, to allow it to thicken). Now add Sirarcha and garlic to taste. Prep rice and prepare. If you use the uncle bens stuff, it takes two mins in the microwave, which is awesome. (Except I still don’t have a microwave haha). |
|
|
|
| Add rice to meat mixture and stir. Remove from heat, place in a heat-resistant bowl and refrigerate, for a minimum of one hour. THIS STEP IS CRUCIAL. It’s what allows the fats from the meat and cheese to commingle and congeal into burrito deliciousness. Be patient. Wait. It’s worth it. (Obvy, Ken is a wise, wise man). Then grate your fucktons of cheese and set aside. I put them side by side in the fridge in similar container and cover them. |
|
|
|
| I usually layered cheese (as a stabilizing agent), then some of the mixture, then cheese, some of the pico de gallo, some more mixture, fold and top with more cheese, and more hot sauce if needed. Nuke for 3-5 minutes and you’re done! (The first time I folded one of these – well the first time this time around – I did it perfectly and crazy fast and my husband goes ‘omg what was what?’ and I was all ‘it came from the back of my brain!’). |
|
|
|
Mine were heated in the oven this time around, but I swear, they taste like 1999. <3
|
Oct 10, 2012
Today I am linking up with Freshly Pieced
I can hardly believe it, but Sockdown 6 has totally lit a fire under me for finishing socks within a respectable time frame!
I cast on for this pair on October 3 and I am about 10 minutes from finished – and that’s with two days of not knitting because I was doing homeschool prep one night and Halloweeny stuff with the kids the other night. Which means I managed a pair of socks in 5 days! What?! I’m going to cast on for another pair tonight! Officially that’s two pairs of socks in September and so far one in October.
The pattern is called Summer Lovin and I used Knit Picks’ Felici Fingering Self Striping Sock Yarn in ‘Mixed Berries’. I made them as a birthday gift for one of the kids’ godmothers (which totally gives it away since only one has an autumn birthday and her favorite color is purple, however she almost never reads my blog anyway 😛). Anyhoo….these will be finished up today and popped in the mail this week!
These are the beauties I finished up last week, the pattern is called Maidenhair Fern and it was a fun knit. I am totally in love with this yarn, Nova Sock that I picked up in the woods before we moved. It’s pretty and soft without being so soft it slips off the needles. My only issue with this yarn, and yes it is an issue, is that the colors are always just numbers. Pfft. Part of the love of yarn are skeins with names like Whitewater or Black Purl or Greenling, and even names that don’t sound like colors at all like Juice Box and Tree Fort and Hayride. Not numbers. Ugh.
These little beauties are going in the mail today as a treat for an unsuspecting friend – an unsuspecting friend that reads my blog! Just you wait! Haha. 🙂

Oct 9, 2012
Today, I’m linking up with Sugar Bee Crafts, A Bowl Full of Lemons, My Uncommon Slice of Suburbia, Today’s Creative Blog, Tip Junkie, Our Thrifty Ideas and Cherished Bliss
This is easily one of my favorite projects I’ve made. I adore Halloween and I adore countdown calendars so pairing the two makes me happier than it probably should. The original inspiration for this project came from Make it, Give it. I followed the basic guidelines but since, you know, I’m me, I had to make them a little more. Haha. I love how they turned out and I made a little tutorial in case you want to make one too.

You will need:
-glue gun and refills
-magnet dots
-orange and black construction paper
-wooden pieces (something to act as a backing for each piece)
-a small baking sheet
-Halloweeny paper
-eleventy billion trinkety things (or you know, 31)
-scissors, ruler, white colored pencil, black marker, orange or white crayon
|
|
| First decorate the cookie sheet however you see fit. You could paint the whole thing black and then add stickers and other embellishments. I glued some cute Martha Halloweeny paper to my cookie sheet, and a rectangle of black construction paper to act as my calendar background. You can’t see but I didn’t stack the papers behind it, they are arranged in a frame around it with the construction paper overlapping just a little. Otherwise, there would likely be a magnet issue!
You’ll notice there are only 30 squares on my calendar, I did that to make #31 a bigger piece under them all but you can make your calendar however many days you like. If you only want to count down two weeks before, make it just 14 squares.
|
|
|
|
| Then I went through some of the trinkety things I picked up and decided where I wanted to use some of them and I cut down a few bamboo coasters to be the backings for my pieces. |
|
|
|
|
Next I glued orange construction paper to every other piece and black to the leftover pieces.
|
|
|
|
| This is where it really gets fun! The only guidelines here are that each piece needs some kind of embellishment, a number and a magnet dot on the back. The details are up to you. My first two were a sparkly bat sticker and a skull from a seriously ugly bracelet. I used plain stickers, raised stickers, and beads. The purple bat was cut off the front of a plastic ring and the key is from a Martha scrapbooking set. |
|
|
|
| Once I had finished making pieces for each day, I embellished the cookie sheet itself a bit more. I added a witch broom to one corner and a big ugly spider to another. I also added magnets to some squares on the calendar that had especially heavy pieces to make sure they wouldn’t fall off. |
|
|
|
I have seen some versions of this with holes drilled in the cookie sheet to allow a ribbon to be weaved through for it to hang from. I had to recharge my Dremel and decided to try out the 3M Command Hooks I just picked up and they worked really well! Two hooks on the back of the cookie sheet and one hook on the wall. I just picked up and they worked really well! Two hooks on the back of the cookie sheet and one hook on the wall.
|
|
|
|
|
The kids are taking turns putting one up each day, and all of the magnets are stored on the back! Happy Halloween!!
|
Oct 6, 2012
Last year I started experimenting with making my own mineral makeup, lip glosses and bath fizzies and a few months ago we made soap with new friends! Since all of these experiments went so well and I was not only able to use everything I made, but it all turned out really nice and in some cases even better than I expected, I started experimenting with face masks! There are a zillion recipes online for masks and cleansers and potions, but some of them have either hard to find ingredients or unnecessarily expensive ingredients. So after wading through about 100 recipes, I read up on the most common ingredients and what properties they have that are so good for skin and of course I tried out a bunch of these myself!
Watermelon
Watermelon is one of the ingredients that comes up again and again in facial mask recipes. Mostly because just like when you eat it, applying it to your face really hydrates your skin, regardless of whatever else you add to it, so when you add it to anything else that hydrates on contact (like cucumbers) you can quickly and safely moisturize a dry face. Win! The Watermelon and cucumber combo also has skin lightening and soothing properties, so the next time you’re nursing a sunburn, mash half a cup each of watermelon pulp and cucumber and spread over where ever you are red!
So, why? Well, I mentioned that watermelon pulp hydrates your skin like crazy and it’s also an amazing anti-inflammatory. It’s also full of vitamins C, A, potassium, and magnesium, which I generally only think of in terms of eating it but there’s a lot of research swirling around that since your skin is your biggest organ you’re absorbing (and therefore ingesting) whatever you use topically.
Watermelon Yogurt Mask
1 teaspoon watermelon juice
1 teaspoon plain Greek yogurt
Yogurt & Oatmeal
There are a lot of yogurt based masks out there. After reading about all of yogurt’s superpowers for skin, I get why. It it chock full of lactic acid, which apparently is beyond department store creams in refining pores, scrubbing out the dead skin cells and get this, stimulating collagen production. Any bottle that says that in a spa will instantly be twice as expensive as anything around it, so getting that for next to nothing from yogurt? Sign me up!
Another reason yogurt seems to dominate the recipes for DIY facial masks is it’s consistency is perfect for making a paste out of so many other ingredients that are good for your skin (like oatmeal and honey).
Oatmeal is extremely beneficial to your skin and since we have already covered what yogurt can do, I’d happily rate yogurt/oatmeal combos as serious winners! Apparently, humans have been using oatmeal on their skin since 2000 BC (don’t ask me how ‘they’ know that, but they do)! Oatmeal contains polysaccharides and these little babies get all gooey in the water and leave a (good) film on your skin that protects against flaking! It does a good job of moisturizing as well since oats are full of good fats, and natural cleansers that pull out dirt and oil from pores!
Yogurt & Oatmeal Moisturizing Mask
2 tablespoons plain (full fat) yogurt
1 tablespoon honey
1-2 tablespoons cooked & cooled oatmeal |
Yogurt & Honey Cleansing Scrub
1 tablespoon honey
1 teaspoon plain yogurt
2 tablespoons finely ground almonds
1/2 teaspoon lemon juice |
Calming Mask
1/2 cup of plain yogurt
2 tablespoons Aloe Vera gel or juice
1 tablespoon honey
1/2 peeled cucumber
3 drops of chamomile oil |
Old School Oat & Honey Mask
2 tablespoons old-fashioned oats
2 tablespoons hot water
1/2 tablespoon honey |
Smoothing Apricot Mask
2 pitted apricots
2 teaspoons greek yogurt
Olive oil |
My Favorites
Baking Soda Scrub
I have been using a 3:1 mixture of baking soda and water for about 5 months, every other day on my face, elbows and knees because I have read in various cheesy magazines *cough*Seventeen*cough that using a baking soda paste safely brightens your skin, or at least takes the dull film off the top! I have noticed an honest improvement in the brightness of my skin and there has not been any irritation. There is a version of this that uses orange juice instead of water (here)and it is supposedly crazy amazing at getting rid of oil and blackheads. I’ll test this out and report back!
Cucumber Slices
Ever since I first started skipping sleep about 12 years ago, I’ve been using cucumber slices on my eyes when I wake up looking like I need another 3 or 4 hours in bed! While I know that everyone already knows this one, I’m crediting my mom because she was the first one to magically make me not look like a zombie at 6:30am after being up with a baby all night. (Thanks Mom!)
Egg White Masks
My aunt got me into egg white face masks even before I needed the cucumbers. She and my mom and I would spend nights putting egg white masks on each other’s faces and hands. Why hands? Both my mom and my aunt always rocked manicures so I guess it’s no surprise they made sure their hands were soft and smooth! These masks were fun for me as a kid because, aside from the gross fun of spreading egg whites with a pastry brush, there is the strange sensation of the eggs drying on your face and your feeling the pull. You can rinse it off in the sink or shower, but peeling it off was always more fun. I had forgotten about these masks until I thought about writing this post so I did one just to see how my skin felt immediately after and woah. Way, way smoother than pre-mask! All it takes is one egg white. I’ve read a lot of people use the yolk in their hair to make it shinier, but I have not tried that one myself yet!
In all the reading I did about DIY face masks I found so many amazing recipes I want to try out! Here are a few more!
Green Tea Face Mask
green tea (just enough to make a paste)
1 tablespoon sugar
1/2 tablespoon lemon juice
|
Banana Face Mask
1 banana
1 teaspoon honey |
Blueberry Lemon Mask
4 tablespoons mashed blueberries
3 teaspoons ground oats
1 teaspoon finely ground almonds
2 teaspoons distilled water
1 teaspoon lemon juice
1 drop lemon essential oil |
Papaya Mask
2 tablespoons mashed papaya
1/2 teaspoon pineapple juice
1 teaspoon powdered green algae |
Pumpkin Facial
2 teaspoon pumpkin puree
1/2 teaspoon honey
1/2 teaspoon milk
1/4 teaspoon cinnamon |
Nutmeg Honey Cinnamon Facial
2 tablespoons honey
1 teaspoon nutmeg
1 teaspoon cinnamon |
Sep 26, 2012
Today, I’m linking up with Freshly Pieced, Yours Truly, 3 Four and Under, Free Pretty Things for You, The Trendy Treehouse, Ginger Snap Crafts, Rae Gun Ramblings, My Girlish Whims, Southern Lovely, Clean and Scentsible, Milk and Cuddles, JAQS Studio, Family, Home & Life, The Life of Jennifer Dawn, Uncommon Designs, and Polka Dots on Parade
I finally casted on my second pair of socks for Sockdown September! I just started them last night and I’m making decent progress. I think with this weekend’s little road trip (more on that when we get back) I will finish these babies off. I’m making them as a surprise for a old friend who reads my blog so I’m not telling, other than to say I hope to get these on her feet by the first week of October.
The way Sockdown works is pretty simple really. First of all, if you’re asking WTF, Sockdown is a knit-a-long (KAL) within the Sock Knitters Anonymous group on Ravelry. Essentially, every month a bunch of us try to knit as many pairs of socks that fit under the same guidelines as possible. We post cast on and bind off information and of course all the stuff in between. Every month the guidelines are 1) a set ‘technique’ (though it’s not always technically a technique) like for example socks designed for men or a specific color or cables or something like that. 2) there are a couple of featured designers each month, whose patterns you can knit and NOT follow the technique rule (obviously it’s more fun if you try to find a pattern by the featured designer that uses that month’s technique) aaaaand 3) every other month there is a mystery sock pattern, the mystery being that only one part of the pattern is released at a time as a ‘clue’ and no one really knows what it looks like!
One other rule that I really like is that you actually have two months to finish each months’ socks – as long as they were cast on in the proper month. So for example, as long as I cast on all of my September socks before September 30, I have until October 31 to finish them! At first I thought this might get me trapped in always being a month behind and then never getting a chance to catch up but Sockdowns go from September to September and August is considered a vacation month, you can finish July’s project in time.
Why? Well, other than the fun of a KAL and the public pressure to actually finish my socks in a timely manner, there are prizes! They are drawn for the day after the deadline (so September’s prize will be drawn for on November 1). So fun! Of course the more pairs of socks you finish by each deadline, the more times you are entered in the draw!
The Sockdown challenge for September is just to knit in red. This yarn is Nova Sock Print in 411, I bought it from a cute hobby shop in the woods in Ontario before we left.
Now! Onto my finished socks! These babies, my Zephyr socks, were my first ever Sockdown socks. Knit in a beautiful yarn by Alisha Goes Around, called Panoply of Peacocks Fingering in ‘Parted’. I ordered it from The Loopy Ewe and I seriously recommend them to anyone. They are a wonderful shop! Physically, they are in Fort Collins in Colorado. The next time we are in Colorado I’d love to take a drive up there!
These socks were knitted for my littlest little! I have enough yarn left for plenty of puffs for my blanket too!

Sep 25, 2012
Today is a fun link up day! All these link ups are full of beautiful and inspirational projects – check some of them out! A Bowl Full of Lemons, Sugar Bee Crafts, My Uncommon Slice of Suburbia, Funky Polkadot Giraffe, Today’s Creative Blog, The Blackberry Vine, Adventures of a DIY Mom, Our Delightful Home, Carolyn’s Homework, Vintage Wanna Bee, The Little Giggler, Crafty Confessions and The Kurtz Corner.
Making your own bath bombs seems a little crazy and to me anyway, it sounds like a lot of work. It’s surprisingly easy though! I made a batch a little while ago to give as gifts and I kept a few for myself, they turned out so well. Now that I have done this once, I know I can make them look a lot prettier!
I made two kinds. One is more dense than the other. The dense batch dissolved pretty unnoticeably in the tub and made my skin crazy, amazingly soft. The puffier kind gave more of a show when they dissolved and also made my skin crazy, amazingly soft. I think the puffy version is better though because part of the fun of bath bombs is the fact that they explode, right?
There are heaps of recipes and tutorials online, but so far I think this one from Martha herself is the best one.

Bath Fizzies via Martha Stewart
1/2 cup citric acid
1 cup baking soda
3/4 cup cornstarch
1/4 cup organic cane sugar
food coloring
essential oil(s)
travel-size spray bottle
silicone ice-cube tray
storage jars
|
|
|
| First, mix the citric acid, baking soda and cornstarch in an oven proof bowl. Sift it to get the clumps out of the cornstarch. Now stir in the sugar. |
|
|
|
| This part is so cool! Fill a spray bottle with water and food coloring. Of course the more food coloring you use, the more vibrant the color will be. I had two batches going here, one was a light blue and one was a light pink. |
|
|
|
|
|
|
| Spritz the water into the powder mixture until you can form it with your hands, then press it onto whatever molds you choose! So fun! |
|
|
|
| These trays took overnight to dry on the counter, the denser ones were sprayed less than the puffy ones, and the puffy ones grew overnight! Store them in pretty jars or wrap them up in pretty chello bags to give away! |
|
|
|
|
Sep 24, 2012
Today I’m linking up with Organizing Junkie and Life as a Lofthouse for Menu Monday!
I made this recipe for the first time with a friend who had just learned it from her aunt and it was so simple and so delicious, my kids and my husband were all about me making it at home. It’s hardly even a recipe (with only two ingredients), but I find some of the best meals come from ‘hardly recipes’.
The nice thing about this recipe (besides the fact that it requires little to no effort at all and still tastes amazing), is that you can either cheap out or go high end and either way, it’s pretty good. Of course high end is going to taste better and since there isn’t much to this, you can splurge a little and not really break the bank! We used some fancy organic canned pineapple but there is no reason not to chop up a fresh pineapple! The sausage we used was an apple smoked sausage and man it was perfect for this.

2 cans pineapple chunks (with juice)
2 packages sausages
|
|
|
| Chop up the sausages and add them and both cans of pineapple to a large sautee pan (this is when you should start whatever rice you’re going to have with it. We made a basmati pilaf. Cook over medium-high heat until the sugars in the pineapple juice caramelize. |
|
|
|
My husband had his side by side, but the rest of us piled ours over a bed of rice and mixed it all together. A side salad is also a smart idea. 😉
|
This Week’s Menu (Sept 24-30)
Monday – Homemade Beef Hamburgers & Fries for the fam, Homemade Spinach Veggie Burgers for me, Vanilla Cakeballs for dessert
Tuesday – Pineapple Sausages for the fam, Vegan Quesadilla for me, Ice Cream with Berries for dessert
Wednesday – Homemade Chicken Nuggets with Rice & Corn for the fam, Tofu Nuggets with Homemade BBQ Sauce for me, Ginger Cookies for dessert
Thursday – BBQ Chicken Legs with Noodles & Peas for the fam, Chick Pea Falafels with Rice for me, Cocoa Brownies for dessert
Friday – We’re off on an adventure, so I have no idea what dinner will be!
Saturday – We’re off on an adventure, so I have no idea what dinner will be!
Sunday – Stew for the fam, Homemade Spinach Veggie Burgers for me, Rice Krispie Squares for dessert
Sep 22, 2012
Ok so, as you are all painfully aware by now, I’m the biggest fan girl there ever was for Peas and Thank You and for Mama Pea’s cookbook . I will have to tally it up but I think I have made almost all of the recipes now. However, since Mama Pea (aka Sarah Matheny), is someone I really admire and look up to, there is no way I’m posting the details to her recipes – you’ll just have to buy her book. So all year long, I have been posting pretty pictures of my attempts at her recipes and my thoughts on them and how many of our littles liked them and that sort of thing.
However.
The recipe for these crackers is available on her blog, (in the reci’peas’ section har har). So I can post this recipe and encourage you to visit her blog and it’s win-win! We all loved these – and so did our neighbors!
Before I do that though, take a look at some of the recipes I’ve made from her book recently!
|
|

These cupcakes have enough sweetness to them to easily be called a cupcake – but they are healthier than your average muffins! 2/3 of my kids loved these and to be fair the one that didn’t isn’t big on jam. I will try these again as Peanut Butter Cupcakes and see what happens. They come together pretty quickly too! |
|
|

I know, I know. ‘Mama Pea’s Balls’. Whatever. You’re the one with your head in the gutter. |
|
|

These cupcakes have enough sweetness to them to easily be called a cupcake – but they are healthier than your average muffins! 2/3 of my kids loved these and to be fair the one that didn’t isn’t big on jam. I will try these again as Peanut Butter Cupcakes and see what happens. They come together pretty quickly too! |
Ok, so moving along. No, these do not taste just like a goldfish cracker, because vegan cheese doesn’t taste like cheese. But that doesn’t mean they aren’t amazing! I love these! I love them with soup or alone or dipped in whatever I’m dipping veggies in at any given moment.
")
1 cup all purpose gluten free flour
1 cup garbanzo bean flour
3/4 teaspoon xanthan gum
1 teaspoon salt
1/4 teaspoon dry mustard
1 cup non dairy cheese
1/2 cup vegan margarine
5 tablespoons cold water
|
|
|
| First process both flours, the xanthan gum, salt and mustard. Then add the vegan cheese and pulse. Add the vegan cheese and pulse till it’s all mixed. Now add the vegan marg in chunks and pulse till that is all mixed as well. |
|
|
|
|
Dump this mixture into a bigger bowl and slowly add the cold water while stirring. Eventually, it’ll hold itself together.
|
|
|
|
| Once you can make a loaf out of it, wrap it in plastic wrap and pop it in the first for about an hour (or more). Theeeeen, preheat your oven to 350 and roll out your chilled dough on a floured surface and cut out shapes (or if your cookie cutters happen to be, oh I don’t know, say 4200km away – that’s 2600 miles, people, you can just use a knife and cut little squares out of them). Then bake them for 10-14 minutes. The kids totally demolished them when they came out of the oven. |
|
|
Sep 14, 2012
First my husband’s wonderful parents came to visit us for the first time in LA and we had such a fun time showing them around. So much fun that I fell behind in both homeschool prep and with the Coursea classes I’m taking. The good news is I’m up to date so I’m back to the blog to share with you some of our adventures!
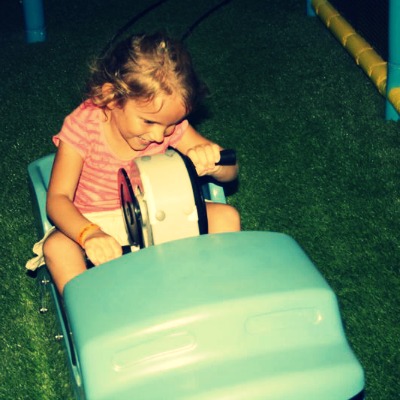
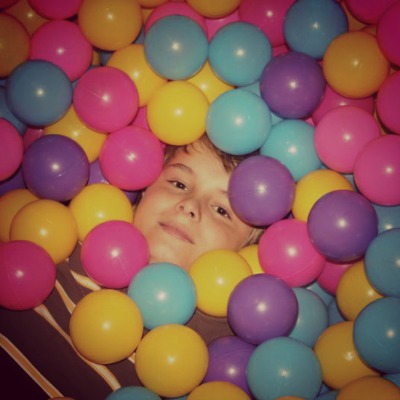
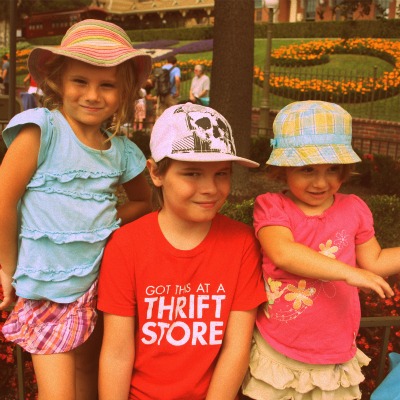
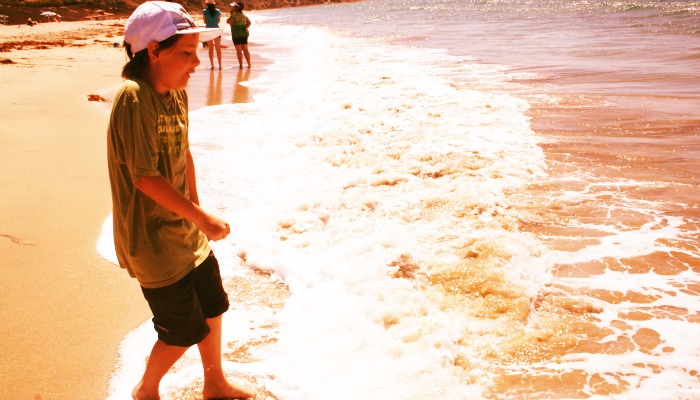
These pictures are from Twinkle Twinkle, a really cute and laid back indoor play space that serves perfect Americanos and really pretty pots of Earl Grey tea (and ice cream piled high or fries for the kids), Disneyland we met Sleeping Beauty, Tiana and Jasime and man I was way more hyped than I thought I’d be, Pacific Park at the Santa Monica Pier (and then later the Santa Monica beach of course), Silly Goose Indoor Playground, Chuck E Cheese, Redondo Beach and duh the Hollywood sign. There are a heap of delicious rando shots I got with my phone too but I will have to add those another day.
Actual blog posts coming at you this weekend, I promise. 🙂 I always struggle with eating awful (as in it tastes good but I know it’s not good for me) food when we have visitors and this time was no exception. I’m back on the wagon and am armed with a ton of recipes I can’t wait to share! Plus homeschooling has been going really well and we’ve all been learning a lot (& also having a lot of fun with arts & crafts) so there are fun things to share on those fronts as well. Happy Friday!!!
Aug 31, 2012
Ok so I have been walking and taking the bus in LA for 5 whole months. I take the Metro Transit City bus all the way to the end of the line and then transfer to the Blue bus to get to Venice and sometimes take that to the end of the line to get to the Santa Monica Pier (2 hours, people)! I take that same Metro Transit City bus up and down the PCH to Redondo Beach, Manhattan Beach, Hermosa Beach, and the other way all the way out to Long Beach to hit up the Aquarium. We take other buses to the farmer’s market and it’s all very sweet and environmental and wonderful – until it isn’t.
Last week, I was trying to meet up with a mommy group in my area at a neat outdoor mall with a fountain for the kids to play in (not renegade style, that’s what the fountain is for), it was a really quick trip too. Just ten minutes on my beloved Metro Transit City bus and then another 15 minutes or so on a connecting bus. Dude! We waited an hour for that connecting bus. Eventually, we gave up walked a few minutes up the street to a cute park we found the first week we got here and called it a day.
Theeeeeen…
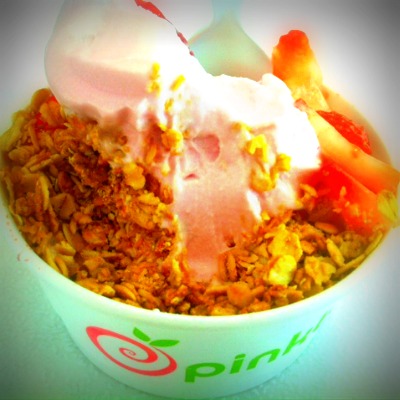
A couple of days ago, we were headed out to a park that isn’t directly accessible by transit. We knew we were going to have to walk a bit from the bus stop. No biggie. I’m from Toronto! We walk everywhere! So, away we went – except we got off at 8th Place in Hermosa instead of 8th Street in Redondo. It was about a 40 minute walk. Wee One #1 just gave me ‘the face’ and we went to Pinkberry for some pomegranate frozen yogurt and turned around and went home. If I was driving and accidentally turned up 8th Place instead of 8th Street, I could just turn around and keep going.
Times like these are the only times I really wish I was a driver. Honestly, it’s not a money thing, I could get a car if I really wanted one and it’s not a fear thing, I could drive if I really wanted to, but I just can’t justify owning two cars with all these buses and everything I need within walking distance. Plus since my husband drives everyday (he is madly in love with his car) he picks up random heavy things I can’t drag home in the wagon and since he loooooves driving, we do a fair bit of road tripping. So my not driving doesn’t really rob us of any of those driving perks.
Something important came up in conversation with the kids when we were talking about the frustrations over the bus system here, the kids noted that we have an incredibly good time together when we’re adventuring around the city on the bus in ways we couldn’t do if we were driving. We go to a lot of places where parking is a total nightmare and we don’t have to worry about it, we play a lot of eye spy at bus stops while we wait for the bus, we play games on my phone at the back of the bus and best of all? We just chat. Endlessly. About nothing. My 12 year old and I will go on and on and on about nothing and everything and my 6 year old makes up games and stories and then my three year old wants in on it too and she gets really animated and I love it.
So, the kids and I sat down and made some ‘booting around LA on foot / the bus rules’ and I thought it would be fun to share what happens when we are faced with frustration. Giving up or giving in is not an option. Especially when Wee One #2 says, while waiting for the bus that began that insane trek on Wednesday ‘where does all the smoke from the cars go, Mommy?’ Into the air we all breathe, sweetheart.
So, here are the general rules agreed upon by the two oldest Wee Ones and myself:
1) 1 mile is the furthest they are willing to walk and / or sit in the wagon (which totally works because Whole Foods, the grocery store and our fave thrift store are all under a mile away)
2) With the exception of a once a month trip out to Santa Monica, no bus transfers to avoid the trip abruptly starting to suck mid-journey
Which led to some related rules for our schedules:
1) We will meet up with our local homeschooling group once a week IF the park they are going to fits the above guidelines, otherwise, we’ll go to our local beach.
2) We will meet up with the local mommy / small kid group once a week IF they’re nearby, otherwise we’ll go out for ice cream
*we made an exception for our favorite park because it’s 1.4 miles away but they agreed the slushees on the way back from the 7-11 are worth the extra 0.4m


")
")
")
")
")
")
")