Oct 11, 2013
We have been decorating our home this week. There are Scooby Doo Halloween decals on windows, silly banners in the kitchen, and even purple and orange lights strung up here and there. Too cute! My littles wanted to also make some Halloween decorations, they are still in the midst of gluing and painting and getting sticky with more ideas, but here are a couple we did this week.
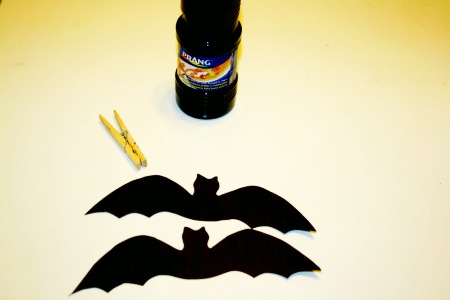
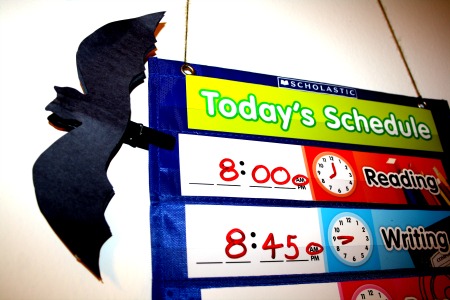
The clothespin bats were our inspiration for our bats. We didn’t follow all the directions, because one of my children is 4 is just wants to attack everything with glue. 😉
All you have to do is paint a wooden clothespin black, cut out two bats from black construction paper (using this template) and glue the bats to the clothespin! Super easy and so cute. My two littlest ones made these themselves! Secure the bats to the clothespin by gluing down the middle of the clothespin, and once bats have been glued to both sides, glue the tips of their wings together. Voila! Done!

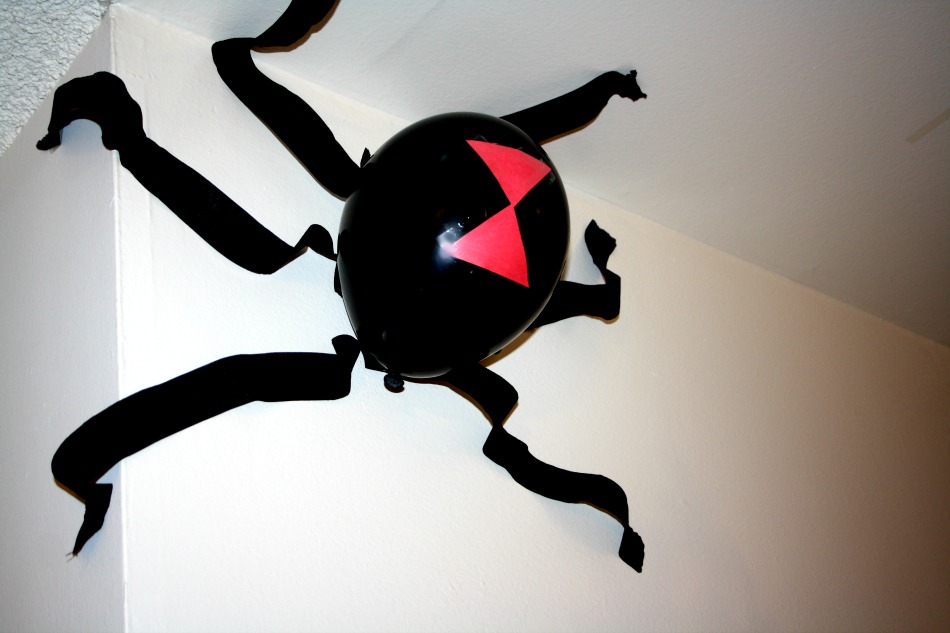
This black widow balloon took literally 5 minutes, maybe less. You need a black balloon, black streamers and red construction paper. I found that this looked best in a corner, but you could really put it anywhere. I taped the streamer ‘legs’ directly to the balloon, and to the wall in two places to mimic their little knees. Are they knees?! You know what I mean. 😉 My very literal 7 year old pointed out that it didn’t really look like a black widow because there were no markings on it….so we fixed it. When we lived in the woods, we had about a zillion spiders in our lives and man am I ever happy to be away from them all.
Oct 10, 2013
Whenever we count down to something that is a month or more away, the kids never have a hard time being excited. It might be harder for me to muster enthusiasm if theirs was not so infectious. They are legit hyped about every holiday we celebrate and every birthday between them all, I love it. So with 21 sleeps to go until Halloween, you’d think they’d be fizzling out for a bit but no, not even close. Especially when I busted out the gear for a haunted gingerbread house. You can get a kit like this Wilton one or of course you can make your own. Usually at Christmas I make one big one from scratch but when they really want to whip one up, I’ll bring home a ready to go kit. With this, we used a kit for the house and I added a bunch of sugar embellishments that I bought for cakes.
There are a few silly ideas I’d like to try out this month that are usually reserved for Christmas, but after watching The Nightmare Before Christmas yet again, it really makes me want to do Halloweeny versions of Christmas fun. Which I guess is exactly like when I have the urge to Halloween-up Christmas stuff in December!
This afternoon we’re working on decorating and some kid’s crafts. They saw all the orange, black and purple gear and got really excited!
Oct 9, 2013
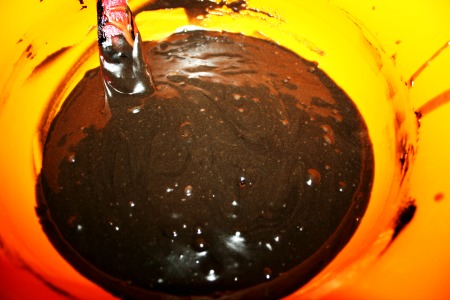
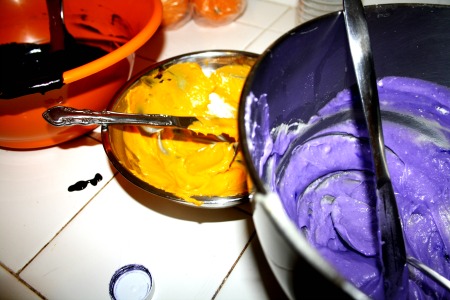
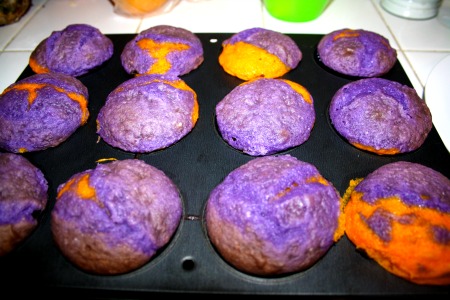
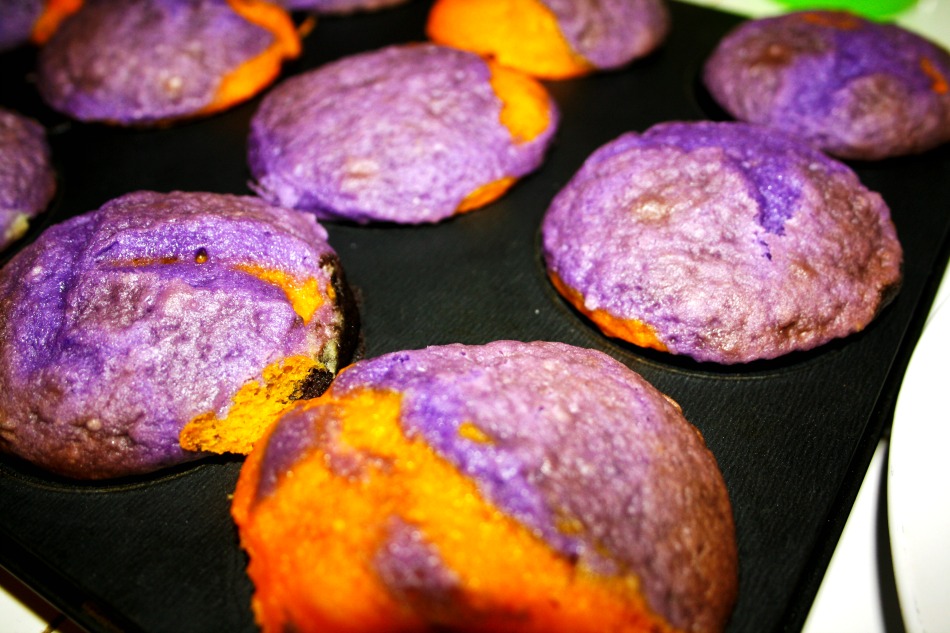
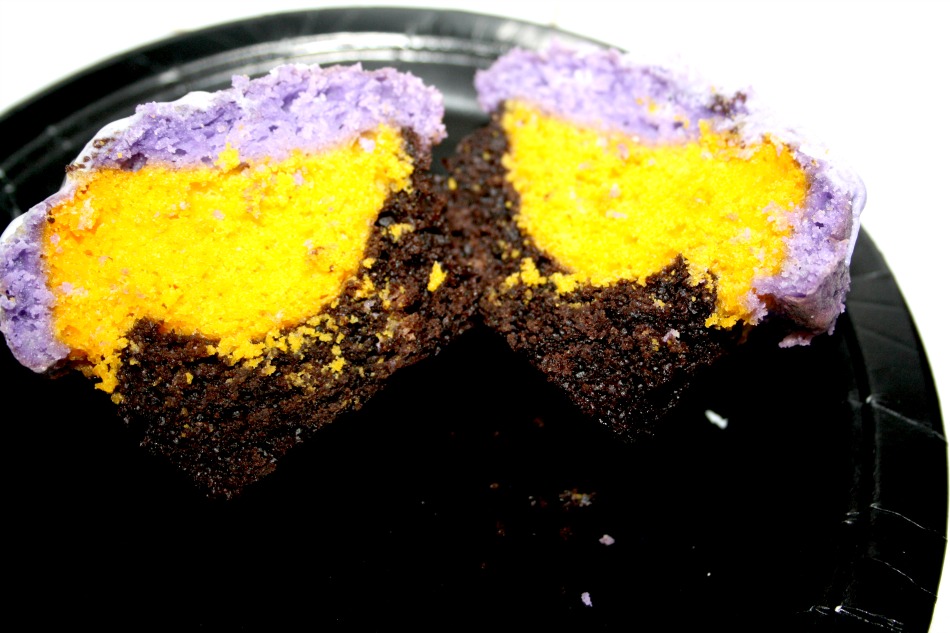
Rainbow cupcakes are so fun to do and you can make them fit any occasion. The first time I made them I used primary colors for Wee One #3’s kindergarten classmates. This time around, I used black, purple and orange. Since black mixed with white or an off white is usually gray and not actually black, we used chocolate cake for that part and vanilla cake for the purple and orange. It worked perfectly!
If you have your own favorite vanilla and chocolate recipe feel free to use those. It really doesn’t matter. I’m pretty partial to these though, and I’ve been using them both for a long time. If you are going to use cake mixes, please don’t tell me about it. 😉
I used my stir and bake chocolate cake for the black portions and the vanilla cake recipe from The Red Hen .
.
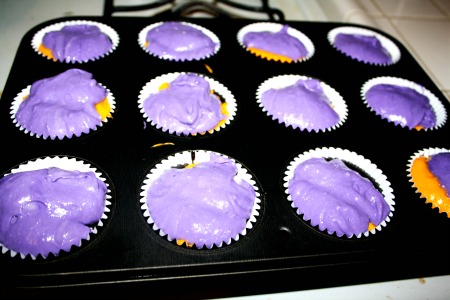
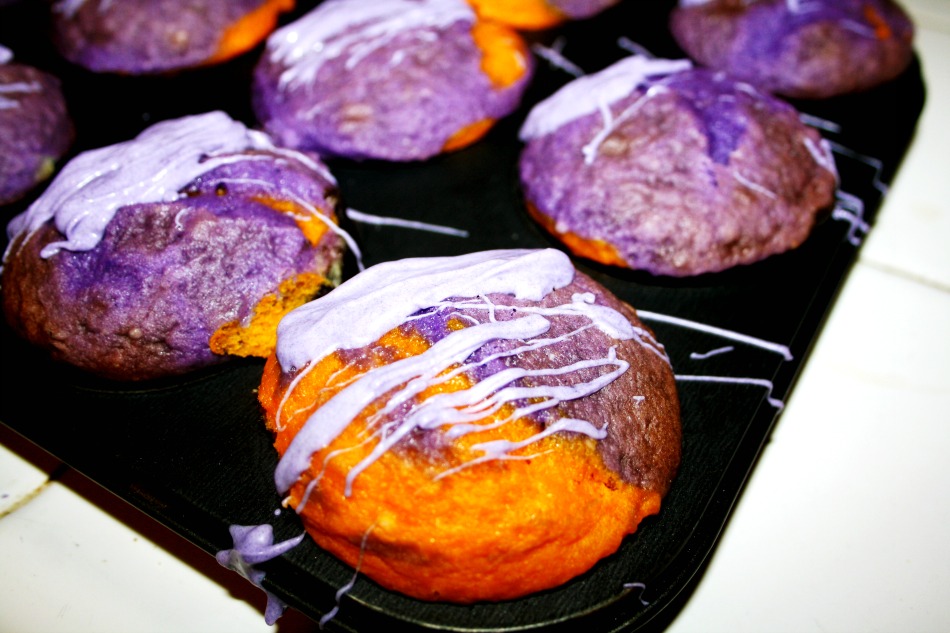
Whip up your cake batters, whichever ones you choose. Then add black food coloring to the chocolate batter, and divide the vanilla batter in two. Add purple to one and orange to the other. Then layer the colors however you like, I went with black, orange and purple. Following the baking time and temp for your recipe. Once they’re cool, melt some candy melts or tint some white chocolate to drizzle over top!
Oct 7, 2013
I know, I know. This is gnarly. Not even just gross, but gnarly. Fun too though, right? Especially for the littles. I think the very first time I saw this was on Noble Pig, and since then I’ve seen it all over the place. My kids thought they were equal parts gross and amazing.
There is so much Halloween insanity going on around here. Pumpkins galore, like whoa we have a lot of pumpkins to carve. Big ones, small ones, medium ones, white ones – even those neat bumpy ones (they’re called knuckleheads, for the record). There’s also a lot of costume preparation, though again, the littles want something specific they have seen and considering I left my sewing machine in Canada, I’m not really arguing with them about it. When I get my hands on a sewing machine though, watch out!
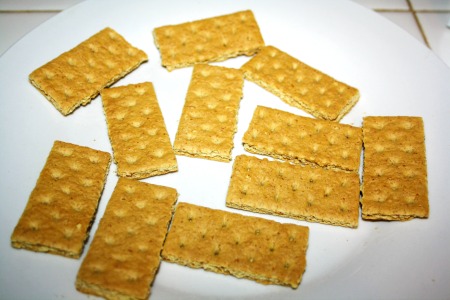
In the meantime, I’m all about the festive food. This is not really a recipe, all you’re doing is dressing a graham cracker up like a band aid and you know, finishing it off with a little smear of blood. No biggie.
Graham Cracker Band Aids
-graham crackers
-cream cheese (or icing)
-seedless strawberry jam (or red decorator’s gel)
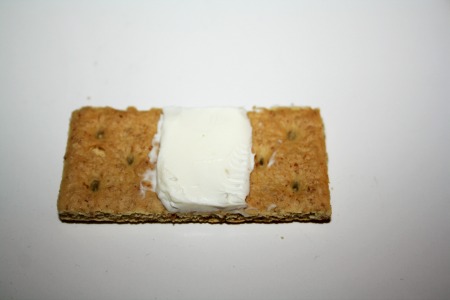
Just break the graham crackers along their ‘perforated edges’ (though really, do they ever break clean?!), use a knife to clean them up a bit. Then spread on a little cream cheese (or frosting) just in the middle. Try to level it out into nice little rectangles.
Now just add your little dollops of blood. I had seedless strawberry jam on hand and it’s yummy with cream cheese. The recipes that call for the decorator gel will work just as well though!
Oct 6, 2013
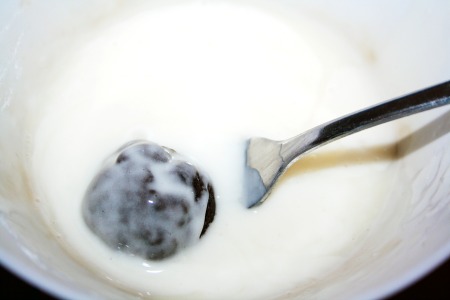
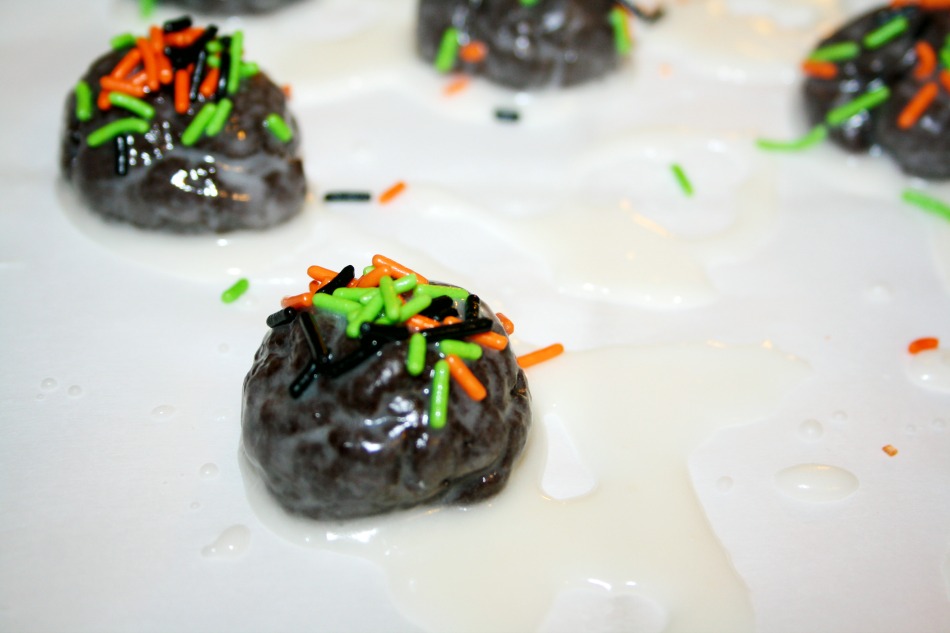
What to make when you’re meeting up with some mommy friends mid-morning and your littles are busy doing cursive and Lit? You whip up some donut holes, of course! The prep time was maybe 10 minutes and total baking time was 15. I pointed a fan at the kitchen counter and they only took a few minutes to cool. Then I mixed the glaze and used a fork to cover and lift out each donut hole, immediately covered them in festive sprinkles and put them back on the counter in front of the fan. They dried super fast and everyone who had one really liked them. I had two left on our way home when we ran into a neighbor and gave them to her to share with her little.
Fast. Easy. Yummy.
Halloweeny Donut Holes
3 cups all-purpose flour
1/2 cup cocoa
1 teaspoon freshly ground nutmeg
1-1/2 teaspoons baking powder
1/2 teaspoon salt
1 cup (2 sticks) unsalted butter, softened
1 cup sugar, divided
2 large eggs, room temperature
2 teaspoons vanilla extract
various festive sprinkles
Glaze:
1 cup confectioner’s sugar
2-3 tablespoons milk
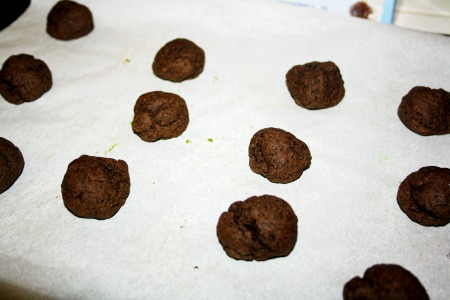
Very straightforward. Mix all the dry, then cream the butter and the sugar and add the wet ingredients. Once it’s all combined, slowly mix in the dry ingredients and voila! Roll into balls, and bake.
While they’re cooling, mix the confectioner’s sugar and milk for the glaze.
Oct 5, 2013
This is not really a recipe, it’s just an idea and comes together with 5 ingredients. You don’t even have to turn on the oven, the microwave will work for this too! Totally perfect for a last minute addition to a Halloween party or potluck.
Zombie Eyeballs
-square pretzels
-green candy melts
-black icing
-assorted M&Ms
-red sprinkles
Arrange the pretzels on a baking sheet (or a plate), then place one green candy melt on each pretzel square. Either pop the tray in the oven for about 10 minutes at 300 or microwave the plate for 5 minutes. Whichever method you choose, make sure to check on the candy melts so they are just melty and not burny. 🙂
Once they’ve melted and you’ve taken them out of the oven, push one M&M (‘m’ side down) onto each candy melt and then dot each M&M with a tiny bit of black icing. Now sprinkle the red jimmies over all of them and voila! Creepy zombie eyes!
Oct 3, 2013
Truthfully, when my littlest tossed the orange and dark chocolate chocolate chips in the cart last week I had no idea what I was going to do with them. I did know however, that there can never be enough orange and black around this month. I’m trying to avoid random baking this month since I want to do up as many Halloweeny treats as possible, and when I saw that one of my favorite Canadian chefs, Michael Smith posted what he claimed to be the best chocolate chip recipe ever, I was tempted to just go off course and bake them because I wanted to see if they really were the best ever (so far each of his ‘best ever’ claims that I’ve tested have absolutely been the best). Then, I remembered those seasonal chocolate chips and started making them pretty much right away because now that they could be deemed Halloweeny, there was no reason not to make them! Right?! I know!
As I was making them I realized I had used the last of the brown sugar on some butter tarts and though I swear there is an extra bag (there is always an extra bag) I couldn’t find it anywhere and ended up using granulated sugar instead. Guess what? They’re amazing. I’m going to do them again with brown sugar and I have no doubt they’ll be even better.
Best (Halloweeny) Chocolate Chip Cookies Ever
1 1/2 cups all purpose flour
1 teaspoon baking powder
1/4 teaspoon salt
1/2 cup butter, softened
1 cup brown sugar
1 tablespoon corn syrup
1 egg
1 teaspoon pure vanilla extract
1 cup chocolate chips
Fairly simple. Preheat to 375 and whisk the flour, baking powder and salt.
With a mixer or food processor cream the butter and sugar until smooth. Then add the corn syrup, egg and vanilla. Scrape down the bowl before slowly adding the flour mixture. Now stir in your chocolate chips and you’re ready to go!
I scooped out the dough with a 1/2 tablespoon and overpacked it a little. I rolled it into a ball and then flattened it out with the bottom of a glass dipped in sugar for a little sparkle and crunch on the top of the cookie. I baked for exactly 13 minutes and my kids have nearly eaten the whole batch already. That’s a win!
Oct 2, 2013
When I find a recipe that works for run of the mill things like brownies, I tend to stick with it and only deviate when it changes the flavor. I don’t know how many times I’ve made this recipe, but I know it by heart and didn’t even bring the cookbook it’s in with us to California. I love that cookbook too, The All New Good Housekeeping Cook Book . My go-to chocolate chip cookie recipe is from the same book. 😉
I love how 1953 it is to point to a Good Housekeeping recipe as my family’s favorite. Probably more than a person should, really.
Candy Corn Brownies
via The All New Good Housekeeping Cook Book
1/2 cup flour
1/2 cup unsweetened cocoa
1/4 tsp baking powder
1/4 tsp salt
1/2 cup butter
1 cup sugar
2 large eggs
1 tsp vanilla extract
+ handful of candy corn
The brownies are crazy simple. Melt the butter in a small saucepan and mix all the dry in a medium bowl and set aside. Add the sugar, eggs, and vanilla one at a time, stirring until each ingredient is mixed in. Whisk in the dry ingredients and pour it all into a greased brownie pan. Bake at 350 for 25 minutes.
Then? Make them Halloweeny by studding the tray with candy corn!
Oct 1, 2013
Let the countdown to Halloween begin!!
These little cupcakes are so cute!! I really like to get crafty with kid food, and holiday kid food is my favorite! I used one of my go to chocolate cake recipes. This one is from Robin Hood and I’ve been baking it since 2009 at least. It is one of those wonderfully simple ‘dump all the ingredients in one bowl, mix, pour and be done’ recipe. However, unlike most of those recipes, this one actually comes together with no lumps and it comes out just perfect.
Stir and Bake Chocolate Cake
via Robin Hood
1/2 cup flour
1 cup granulated sugar
1/4 cup unsweetened cocoa
1 teaspoon baking powder
1 teaspoon baking soda
1/2 teaspoon salt
1 cup warm water
1/3 cup oil
1 tablespoon vinegar
Start with the flour, sugar, cocoa, baking powder, baking soda and salt. Whisk it all together. Then mix in the water. Then mix in the vinegar. Whisk, whisk, whisk and pour into 12 cupcake cups (cups you have previously lined with black or otherwise Halloweeny liners) and bake for about 30 minutes.
To make them witchy you’ll need:
green buttercream icing
decorative chocolate wafer cookies
Hershey kisses
black sprinkles
M & Ms
black shoestring licorice
candy corn
First I frosted the cupcakes, then I made their little hats by ‘gluing’ the Hershey kisses to the chocolate wafer cookies with a little dab of buttercream icing. Then I piped orange frosting around it to secure it.
Next I added their black sprinkle eyebrows, M&M eyes and their candy corn noses! The personality is all in the eyebrows, amirite?! Some of them look confused but I think the overall effect of grumpy witches worked out.
Sep 30, 2013
Starting tomorrow, I’m going to get into the spirit of Halloween and celebrate by counting down the days with silly and only slightly scary ideas. Before we get to that though, I want to do a little homeschool catch up post on what structure we’re working with in 3rd grade this year. Today is our 40th day of school for 2013/2014. I only know because we’re going to celebrate the 100th day of school this year and I figured that we should be counting so the days don’t get away from me. This will be our second full year homeschooling and I really feel like I have a better way of running our days than I did when we started. This was our schedule and our materials last year.
We work a standard schedule 5 days a week, taking Wednesdays and Saturdays off, though the weekend is usually when our 8th grader reads his assigned literature and our 3rd grader finishes all her art.
Since our youngest isn’t 5 yet, she can’t be enrolled in the same homeschooling program as our other two children. Obviously, she can still do a kinder program at home with me. The program I’ve set up for her is very similar to the junior kindergarten program in Ontario, it needs it’s own post. Our 8th grader works on a three classes per semester schedule and since it is technically an independent study program, he also has options open to add more and more onto what was assigned. I’m really impressed with the way he has chosen to build onto this system, and this will get it’s own post as well. For now though, the grade I think I end up spending the most combined hours on…3rd.
|
3rd Grade
|
| 8:00am – 8:45am |
Language Arts – Spelling / Reading |
| 8:45am – 9:30am |
Language Arts – Grammar, Reading Response |
| 9:30am – 9:45am |
first break |
| 9:45am – 10:45am |
Math |
| 10:45am – 11:45am |
Lunch |
| 11:45am – 12:45pm |
Social Science or Science |
| 12:45pm – 1:45pm |
Math or Language Arts Homework |
| 1:45pm – 2:05pm |
Cursive |
| 2:05pm – 3:00pm |
Art or Music |
| 3:00pm – 4:30pm |
FREE TIME 🙂 |
| 4:30pm – 6:30pm |
PE (swimming, dance/ballet) |
Our 3rd grader is in her second year in the primary program and I really like the way it is laid out. Essentially, we work on a 5 day schedule and hand in the previous week’s work mid-week. We try to stay a day or two ahead of schedule as a buffer in case something comes up and of course something usually does so I try not to deviate from the schedule too often. As far as how each class breaks down, here is a general idea. Aside from the classes listed, our 15 minute breaks are spent however they choose to use them. Sometimes they’ll all go outside, sometimes they’ll all relax in the living room for a while and sometimes they all scatter and do different things. Lunch is almost always taken as a picnic poolside. Some days it is too cool to go to the pool, but it’s not like that enough days in a row to make it off limits for a prolonged period so they get to have a nice break mid-day. On days when it is too cool for the pool we have a backyard picnic instead. Just the concept of not having to think about school for an hour, and eat food you love with your siblings, preferably outside.
Language Arts – Spelling / Reading – 45 minutes
Each day, we start with the vocabulary words for the week by going over their spelling, definitions and using them in context. We do a pretest on Mondays and a spelling test on Fridays. There are also usually 4 or 5 worksheets related to our spelling words and the phonics we are working on and we do those now. She reads aloud the selection for the day and we go over the reading comprehension for it. There are usually a few worksheets we will do for this portion as well.
Language Arts – Grammar, Reading Response – 45 minutes
We have daily language activities we complete for grammar and the flow on my end goes; introduce the concept, teach the concept, review and practice, review and proofread, and then on Fridays I assess and reteach. There are always worksheets for grammar and we also do a daily composition book prompt and a paragraph practice exercise that we usually do twice a week.
Math – 60 minutes
Generally speaking, we introduce a concept each day that builds on what we did the previous day. The workload is usually about 20-30 questions in the textbook and about 15 questions on an accompanying homework sheet. Throughout the math text there are pages with mini tests, prompts to review work from the previous topics, and opportunities to reteach. We use the time left at the end of the formal lesson to go back and cover these extras to both keep older lessons fresh and to practice the new lessons until they become simple.
Social Science – 60 minutes
The curriculum we follow outlines one chapter a week in the textbook. The first day she reads the chapter aloud, goes over the captions, photos, charts and additional information and then we do the lesson review. The second day there is an art activity where the lesson is made creative, the third day the lesson is extended with a personalized activity. The fourth day is a writing activity or a skillbuilder activity that relates to things like map reading and finding information. The fifth day is used either for assessment or to work through a primary grades history of the United States program we have. There are also assigned worksheets for each lesson, two of them relate directly to the lesson, and two additional ones are for related reading comprehension and new related vocabulary.
Science – 60 minutes
Much like the social science curriculum, the outline for this program is one chapter per week, and there is plenty to build on in the text. We go over the whole chapter on the first day and do the lesson review. The following day and often also the day after we devote to that week’s experiment. This year we are also working with a second text that teaches different concepts from the main text. It’s neat to have a secondary lesson every week, and the homework completion for that one is one review page a week, usually no more than 5 questions, but her responses have to be detailed.
Math / Language Arts Homework – 60 minutes
This block of time is not always necessary. Sometimes, a new math concept will take a little longer to fully grasp and that’s more than understandable, it’s expected and totally normal. Other times, there is just a lot of writing to be done in the language arts program and in order to keep her writing neat she can’t rush though it so it can be time consuming. This period is just used to catch up on any class that had unfinished work after we moved on to the next. Some days there is no unfinished work. In that case we usually just work for an hour on whatever comes next in any subject she wants.
Cursive – 20 minutes
I assign one cursive writing page per day. Most of the time there are two letters on each page, with either a few words or even a phrase to write in cursive. Sometimes we’ll do a review of words we know by handwriting sentences with the letters she has learned.
Art – 55 minutes
We have been working through a really fun 3rd grade art program this year and so far she loves it. She has had to draw the same picture twice once with cool colors and once with warm colors, we’ve made air drying clay and she’s used it to make Native American style bowls and Greek style vases. She has made collages and worked with watercolors. There is so much going on in this program it deserves a post of it’s own! This week coming up she will be working a crayon resist project, create Greek theater masks and make a Romain coin!
Music – 55 minutes
I’m not a big fan of the recorder, but I appreciate that it is an approachable way to get kids to learn the basics of sheet music. Once they have that down we’ll move onto the piano, but for now we’re working through Recorder Karate, which is a program that relates songs for the recorder of increasing difficulty to karate belt levels. So first you learn the sheet music for the notes, then you practice the song and once a week she has to perform that week’s song to reach the next belt level. It’s actually pretty fun and all three of them try!
Free Time – 90 minutes
This is their anything (within reason) goes time between finishing school for the day and going to their physical programs of choice. Our 3rd grader is in dance and she is at the studio 5 days a week, since our other children are also involved in after school activities as well, they’re off to drop off and pick up even if they are not doing anything that afternoon. Since this block of time is right after art, she will often just keep working on whatever she’s working on that day or if she’s finished but still feels like being creative she will continue to paint or sculpt or paper mache it up.
There is always room for tweaking and of course we take a lot of field trips that we sometimes try to work into the programs we’re teaching from but we also just go on field trips to learn things for the sake of learning them. We also do one library day a week and now that she’s learned how to log in and request books from other branches she’s well on her way to reading every Nancy Drew in the County of Los Angeles Pubic Library system.
The 8th grade and kindergarten programs have been in full swing for the last 40 days as well and they are both also a lot of fun and have been working out well for each child and thankfully for me as well!