Reeces Pieces Peanut Butter Cookies

Domestic

Reeces Pieces are one of those things I cannot possibly just have one handful of. I can usually restrain myself if they are in the room, but if I cave and have one, I will likely just keep noming on them until they are totally gone. I know people who are not so into the combining of peanut butter with other already delicious things (like chocolate), and I’ve decided they are totally insane. Peanut butter and chocolate? How does that pose a problem!?

Anyhoo, moving along. I made these a few months ago – actually a little longer ago than that even, but the recipe is good and the pictures make me want to whip up another batch and go hide in the laundry room to eat them. Ahem.

The peanut butter cookie recipe is straight from the much loved (and much falling apart and really super sad looking) Good Housekeeping cookbook I’ve had since just after I got married. For those of you playing along at home, that was approximately eleventy billion years ago. When you’d normally toss in a cup of chocolate chips at the end of the recipe, I tossed in a cup of Reeces Pieces instead. Mmmmm.

Oddly, I was texting with my cousin Jenn while I made them and she had made these cookies the day before, that’s a little weird, yes? Or just proof that we are connected on some weird culinary level? You know because Reeces Pieces chocolate chip cookies are such culinarily advanced treats, dontcha know?!

Reeces Pieces Peanut Butter Cookies

Via Good Housekeeping Cook Book

1 1/14 cups flour
1 teaspoon baking soda
1/4 teaspoon salt
1 cup creamy peanut butter
1/2 cup butter
1/2 cup packed brown sugar
1/4 cup sugar
1 large egg
1/2 teaspoon vanilla extract
1 cup Reeces Pieces

Reeces Pieces Peanut Butter Cookies
It’s the simplest thing in the world. Well, very close to it anyway. Mix sugars with butter, add the egg and vanilla. Mix the rest in a separate bowl and then tip that bowl into the wet ingredients. Voila! When it’s all mixed up and you have peanut butter cookie dough, fold in the Reeces Pieces with a wooden spoon (your mixer paddle may crush them) and spoon them onto a parchment paper lined cookie sheet. About a tablespoon each.
Reeces Pieces Peanut Butter Cookies
Bake them for 15-20 minutes at 350F.

Reeces Pieces Peanut Butter Cookies

No Comments

Super Cute Saturday #2

Pretty

I’ve been wanting to institute Super Cute Saturday around here for so long I was a little surprised I had only actually posted it once before! The HORROR!!

These pictures were taken last year and it’s fair to say that my current makeup looks are inching closer to drag queen territory. This look is really sweet and simple though and it’s a lot more subtle for women who don’t routinely wear fake lashes to their kids school – you don’t do that? What am I supposed to do? Take them off before heading over and put them back on again when I get home?!

The photos themselves are meant for inspiration but I’m including product links as well.

gold brown eye shadow too faced urban decay

First, I swept Urban Decay’s Midnight Cowboy Rides Again shadow all over my lid and almost all the way up to my brow bone.

The crease and part of the lid is Urban Decay’s Half Baked shadow.

The lid itself is Too Faced’s Galaxy Glam shadow in Magenta Moon, blended with the UD half baked.

My cheeks are Tarte’s cheek stain cream blush in dollface, lips are Urban Decay lipstick in Wicked (it’s my fave color and they don’t carry it anymore!), eyeliner and brows are Lorac in brown and the mascara is just Maybelline’s Great Lash .

I honestly think this took maybe 10 minutes. Pretty much anything is possible with a good blending brush!!

gold brown eye shadow too faced urban decay

gold brown eye shadow too faced urban decay
No Comments

Work in Progress Wednesday #7

Crafty, Kids

I’m participating in Work in Progress Wednesday at Freshly Pieced!

I have been very good this week and stuck with the baby legwarmers without touching the Flying Arrows socks at all. I have been spending a lot of my evenings doing research for something that’s sort of a really big deal but that I shouldn’t talk about until I have more details on it. Vague enough for you?!? That’s what has kept me from knitting, that and the very same something has me going on less errands lately so I’m not knitting in the car as much either!

This pattern (Socks for Mary Janes) really is alarmingly cute and would work so well on a little girl in Mary Janes. The little girl I’m making the legwarmer version of these for will look equally adorable running around her house in her little skirts and sneakers.

They are sooooo close to being done, just 4 repeats of 4 rows left and then I will ship them the 800 miles to her house.

This started out as a Work in Progress Wednesday but between that last sentence and this one, I finished them and had Wee One #3 model them for me.

baby legwarmers

These socks were knit in Sirdar Snuggly Baby Bamboo DK in Paintbox Pink, on 3mm DPNs. What a cute name! The band just says #160, with a name that cute they really should make it obvious.

I really, really liked using this yarn. I bought two balls assuming I’d be using most of it on these little cuties, but I still have a few yards left on the first ball! When this little photoshoot was over, Miss Wee One #3 freaked out and didn’t want the socks I had knit her anymore she wanted to keep these legwarmers. When I asked why, she said, in her painfully cute not quite 3 year old voice ‘beeeeecuz they so peddy’. My heart melted, but I cast on for my friend Rachel’s kid, and so Rachel’s kid shall rock these. I’ll make another pair for my own kid this weekend.

baby legwarmers
baby legwarmers
baby legwarmers
baby legwarmers
1 Comment

Peas and Thank You’s Chocolate Almond Cherry Smoothie

Healthy

More love for Mama Pea today. One day I may make something from her cookbook and hate it, but so far everything is amazing. I have made more of her recipes than I’ve blogged about because duh, there’s a heap ton of deliciousness happening around here. Eventually, you’ll see it all and read my words of ass kissing wisdom.

Anyhoo.

You love chocolate, yes? Of course you do. Almonds? Natch. Cherries? Well, unless you’re my sister then you are probably also down with cherries (I swear sometimes her weird I love this I hate that makes it tricky to be an amazing kitchen goddess/sister but I try to work around it). I will not give you the recipe, because as I mentioned before, I am encouraging you to buy the book (and no, no one is asking me to push this book I just think it’s worth pushing). The very title of the recipe gives away the gist of the recipe, but there is more to it than you’d assume. Also, the commentary before each recipe is worth the book alone.

This is my new go-to for a post-workout chocolate craving. Well for any time of the day chocolate craving. Does anyone else work out really excessively and then want to wreck all their hard work with chocolate?! No. You’re a liar. A dirty liar. This smoothie is great for those times because it calms the chocolate beast enough to get on with your day aaaaand they’re mega healthy for you!

peas and thank you chocolate almond cherry smoothie

peas and thank you chocolate almond cherry smoothie
So so so good! I like to make it a little thicker than a smoothie and eat it like ice cream.
1 Comment

Peanut Butter Rice Krispie Balls

Domestic

There are times when you want to come out of the kitchen with a decadent several-layer cake to a room full of friends. Or when you want to serve homemade ice cream on the back deck to your family after a barbecue. Then there are times when you want to make something so simple and yet addicting and amazing that it borderlines on ‘trashy’. I mean, maybe any recipe that includes mini marshmallows can be classified as trashy. I’m not smack talking, I’m a serious fan of trashy food. Dips for fruit that include marshmallows? Yes please. Ice Salad (aka Jello set with ice cream)? Um, totally. Tater Tot Casserole, the king of all trashy food? Give it here! So when I call this trashy, that’s not a bad thing – just honest. More honesty for you? You’ll eat as many as the kids will (if not more) and then you’ll make another batch.

3 tablespoons cup butter
4 cups mini marshmallows
1/2 cup peanut butter
1 tablespoon cinnamon
1 tablespoon honey
6 cups Rice Krispies
chocolate or candy melts to coat (if you want)
peanut butter rice krispie balls
So, just as you would do for usual Rice Krispie squares, melt the butter and marshmallows together. Once the marshmallow is pretty much melted, add the peanut butter.
peanut butter rice krispie ballsl
peanut butter rice krispie balls
Mix! Mix! Mix! Now add the cinnamon and honey, use less if you don’t want them so ‘cinnamony’.
peanut butter rice krispie ballsl
peanut butter rice krispie balls
Now you have a magnificent peanut butter marshmallow mound of goo. Pour that goo over your Rice Krispies!
peanut butter rice krispie ballsl
peanut butter rice krispie balls
Mmmmm, peanut buttery goooooo. Mix it quickly!
peanut butter rice krispie balls
I used my tablespoon to shape these balls. If you have a mini ice cream scoop it works even better. Whatever you use, you’re going for a uniform shape.
peanut butter rice krispie ballsl
peanut butter rice krispie balls
You could stop there – but no. Melt about a cup of semi sweet chocolate (either in the microwave or over a double boiler) with a little vegetable oil and dip the balls in it. If you have small children in the kitchen, they will likely suggest you add candy to the tops.
peanut butter rice krispie balls
peanut butter rice krispie ballsl
peanut butter rice krispie balls
If you’re really feeling it, use candy melts instead of chocolate! You can use whatever color or combo of colors you want! Purple is sort of a big deal around here.
peanut butter rice krispie balls
1 Comment

Homemade Twix Bites

Domestic

Phone calls and notes in the mail can convey love and thoughtfulness over a long distance, but I have found that nothing says ‘we love you’ like homemade treats in the mail. šŸ™‚

These treats were made for the brother of one of my best friends. Her brother and my husband have also become friends over the years and those are the connections that make me happiest to see happen. They’re totally random and stuff like that can’t be forced so when it happens on it’s own, I just love to witness it. He has always been a fan of my cooking, baking, and slightly odder kitchen experiments – so this year I’m sending him a random treat in the mail once a month. January’s treat was Homemade Twix Bites.

This is one of those times when you go all out when you say you’re making something from scratch. If I had said I was making these from scratch and used store bought caramels I wouldn’t be able to sleep at night (I’ll let you decide if I’m kidding or not). Essentially, you make the caramel first, then you measure it out and find that you need to make another batch of caramel because you’re half a cup short. Ahem. Theeeen you make the shortbread base, make the caramel layer (with the scratch caramel of course) and pour it over the base. Once it’s set you cut out bar shapes, dip them in chocolate and you’re done. HOWEVER, that last step sounds a lot simpler and prettier than it really is. When making cake pops, or chocolate covered nuts or berries, it’s a lot easier to handle because you’re dealing with much smaller pieces to dip in chocolate. Also, those things don’t melt when they come into contact with liquid chocolate. The caramel, even chilled in the fridge for hoooours was totally running and falling apart on me when I tried to add the chocolate layer. So I took a moment, made a martini and wished I had bought the chocolate bar molds when I bought the wee chocolate square molds – and then I thought oh yeah those wee chocolate square molds!! I cut my bars into bites and tah dah!! Much, much easier and way prettier looking too.

Caramel (from Food.com):
1/4 cup butter
1/2 cup white sugar
1/2 cup brown sugar
1/2 cup light corn syrup
1/2 cup sweetened condensed milk

Chocolate Layer (from King Arthur Flour):
3 cups chopped dark chocolate, melted
1 tablespoon vegetable shortening

Cookie Base (from King Arthur Flour):
1 cup salted butter, at room temperature
1 cup confectioners’ sugar
2 teaspoons vanilla extract
2 cups flour

Caramel Layer (from King Arthur Flour):
Either double this recipe or make it twice (I made it twice)
2 cups caramel, cut into small chunks
3 tablespoons heavy cream

homemade twix bars with homemade caramel
To make the caramel put all the ingredients in a microwave safe bowl. Just dump it all in.
homemade twix bars with homemade caramel
Mix it up. Microwave it for 6 minutes, taking it out every 2 minutes to stir it.
homemade twix bars with homemade caramel
Let it set. Now start the cookie base! Preheat the oven to 300F, and combine the icing sugar with the butter and the vanilla extract.
homemade twix bars with homemade caramel
Add the flour and mix till incorporated. Mix! Mix! Mix! Spread it in a 9″ x 13″ (ish) pan and bake for about 35 minutes.
homemade twix bars with homemade caramel
Mmmm fresh caramel…. Mmmm fresh shortbread….
homemade twix bars with homemade caramel
While the cookie base is cooling, it’s time to make the caramel layer. Pour 2 cups of caramel into a saucepan. Add 3 tablespoons of heavy cream to the caramel and cook.
homemade twix bars with homemade caramel
This sheet of shortbread is about to be seriously upgraded. Cover it evenly in caramel sauce.
homemade twix bars with homemade caramel
Now it needs to be popped into the fridge for AT LEAST a couple of hours, leaving it overnight will save you much heartache. The chocolate layer is just the standard, melt the chocolate in a double boiler (or in a heat safe bowl over a pan of simmering water) and add the vegetable shortening.
homemade twix bars with homemade caramel
This is where it got tricky. It is near impossible to ‘dip the bars in chocolate’ without the caramel sliding off. So I put down a layer of chocolate for the bottoms. Then I slathered the chocolate over top. My husband ate these ones. They’re good but ugly.
homemade twix bars with homemade caramel
See? Yummy but ugly. So very ugly.
homemade twix bars with homemade caramel
This is when I had that stroke of genius I mentioned earlier. LE DUH. So I filled the mold with chocolate & put a bite sized version on top. I covered those babies with more chocolate and voila!
homemade twix bars with homemade caramel
Just as yummy and now even prettier. I recognize they will not be winning any presentation prizes, but that’s alright.
homemade twix bars with homemade caramel
Since they were mailed, I wanted their little caramel souls to be protected so I wrapped them up in tin foil. Individually!
In case you were wondering, yes he loved them! I’m sure he felt the love that was my husband & I messing around in the kitchen at 3am making these chocolate treats!
2 Comments

Grapefruit Pancakes

Healthy

I figured since my last post involved cheesecake, I’d sway to the healthy side this afternoon. There are people, like my dear friend Gill, who will eat something she isn’t super fond of in the name of health. She’s totally my hero. Then there are other dear friends, like my sister Nikki, who wont eat something unless it’s yummy. She’s my hero for the other side of my brain. The side that wants to eat Oreos for breakfast and then move on to Nutella pancakes for brunch. Mmmmmm. Anyhoo, I fall somewhere in between. Don’t get me wrong, I have been known to fall off the wagon and be found in my pantry mid-sugar coma covered in cinnamon hearts and candy corn. Mmmmm. I’m striving to strike a balance now where I eat as healthy as I can for most of the week and allow myself a balls-out weekend. Yes, I’m calling that balance!

This recipe should defo be classified as a weekday recipe. It’s not bad but I choose to eat it because of the grapefruit and the wheat germ – not because it’s an amazing breakfast treat. Also, instead of just telling you ‘grapefruit and wheat germ are healthy enough for me to force them on myself’, I’ll tell you why and also why I made these vegan. No, I’m not vegan – just to clarify. I wanted to get all specific and call them ‘Low Cal Wheat Germ Grapefruit Vegan Pancakes’, but I think ‘Wheat Germ Grapefruit Pancakes’ will do.

Aside from the obvious serious dose of vitamin C (you probably already know that C is amazing for your immune system and that it can help with inflammatory issues like asthma, osteoarthritis, and rheumatoid arthritis – and of course that it helps you to fight and prevent colds). Grapefruits also contain lycopene (that’s where the pink or red color comes from), and to get all brainy on you, lycopene is a carotenoid phytonutrient which essentially means it helps fight free radicals – and those little bastards are totally evil. Super random facts about grapefruits; ranked among the highest fruits in antioxidant activity, lowers cholesterol, prevents kidney stones, protects against colon cancer, and helps repair DNA.

I didn’t think I had much to say about wheat germ till I got going. Ha! It’s full of thiamin, folate, magnesium, phosphorus, iron and zinc. So what? Well, thiamin helps your body convert carbs to energy and it’s way important for your heart, muscles, and nervous system. Do you love how scientific I am? It’s like, way important, man. Folate helps your body make new cells which is important for everyone but uber important for pregnant women. I had no idea what magnesium was good for until I looked it up for this post. Yeah, I’m a real authority on health people! Kidding! I just read a lot. Anyhoo, so magnesium is actually responsible for the contraction and relaxation of muscles! Interesting! It also controls certain enzymes in the body (that sounds mysterious, doesn’t it?) and the production of protein. Phosphorus I already knew is in every cell of your body! Isn’t that neat?! It’s mostly for your bones and teeth though. Iron as we all pretty well know is important, our bodies need it to make hemoglobin and myoglobin (found in red blood cells and muscles, respectively). They help carry and store oxygen in your body. And zinc well, over time I’ve read dirty things about zinc and your man, but taking my head out of the gutter, zinc actually helps your immune system fight off bacteria and viruses. Not just help your man feel like a porn star. Who said that?!

So why did I made it vegan? The original recipe called for both almond milk and skim milk, but dairy isn’t kind to my tummy and maybe not to yours either so I just went with a little more almond milk instead of both. Also, I replaced the eggs with ground flax seeds and water because even though one or two eggs in a single recipe isn’t going to mess with my cholesterol levels, I try to replace them when I’m not going to notice they’re gone so I can enjoy them with total abandon when the recipe I’m using needs them. So in pancakes I can leave them out, but I’m still going to make a tray of popovers on Sunday morning that call for 3 extra large eggs and happily munch away!

Moving on to the actual recipe. It’s been heavily modified from it’s original source so I’m calling it my own!

wheat germ grapefruit pancakes

2 cups whole wheat flour
2 tablespoons wheat germ
1 teaspoon baking powder
1 1/4 cups almond milk
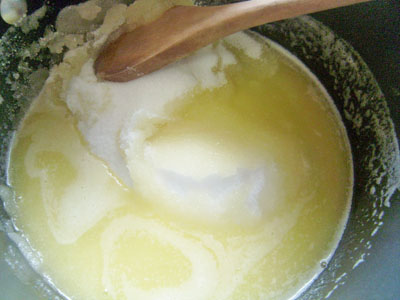
1/4 cup vegan butter (ie Earth Balance)
2 medium grapefruits
2 tablespoons flax meal
6 tablespoons water
1 teaspoon vanilla extract

wheat germ grapefruit pancakes
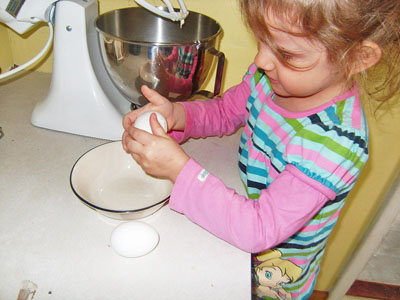
First mix the water and flax meal in a bowl and let it sit to thicken up a bit. 
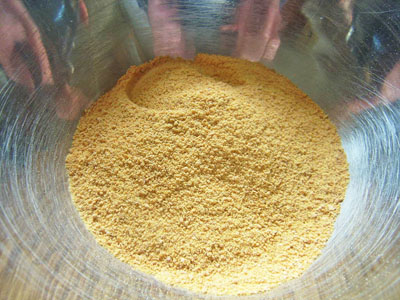
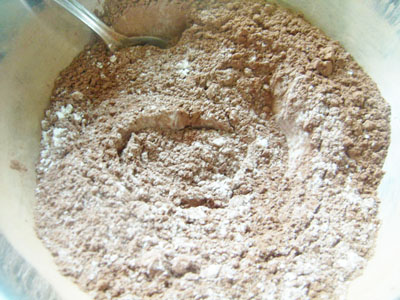
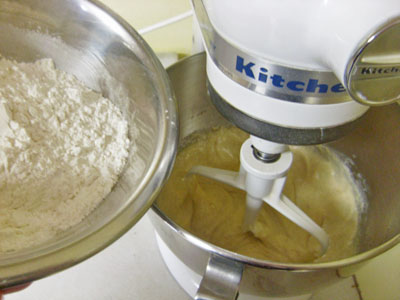
Whisk together the whole wheat flour, wheat germ and baking powder in a big bowl.
wheat germ grapefruit pancakes
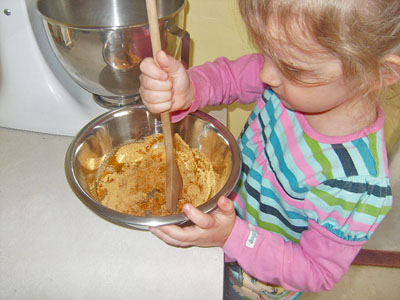
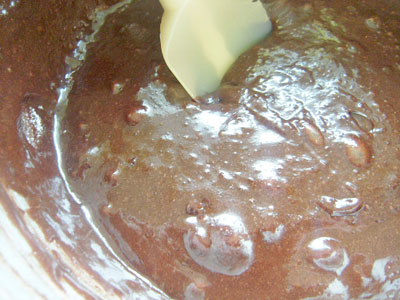
Add the almond milk, vanilla extract and flax meal with water. Mix that up till combined. Now attack your grapefruits. Squeeze about 1/4 cup of juice into the mixing bowl.
wheat germ grapefruit pancakes
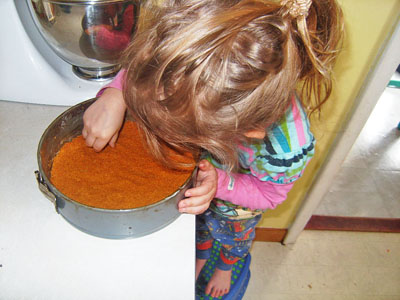
Chop up the grapefruits into wee pieces and add them, along with a bit more of the juice, to the mixing bowl. Whisk! Whisk! Whisk!
wheat germ grapefruit pancakes
Grapefruit aftermath.
wheat germ grapefruit pancakes
First one!!
wheat germ grapefruit pancakes
This recipe made 13 pancakes that were made from 1/4 cup of the batter.
wheat germ grapefruit pancakes
123 calories each!
3 Comments

Baking With Kids – Lemon Ricotta Cheesecake

Domestic, Kids

My most eager baker assisted me with this one. Actually, it’s gotten to the point now where I’m the one assisting her, which I totally adore! She gets really into it and unlike the usual ‘dump, stir, lose interest’ category that most kids fall into (including Wee One #1), she really wants to be involved in every part of it. So sweet!!

The weird thing about cooking and baking your way through cookbooks is there will eventually be a recipe no one wants to try. For some reason the word ‘cheesecake’ doesn’t sit right with the kids, and my husband and I are not huge fans of dairy. Well, correction. Dairy isn’t a fan of either of us. Once it was out of the oven though, and the whole house had this wonderful cheesecakey smell going on, the kids caved and each had a piece. And then another. And then more the next day till it was gone.

This was recipe #11 from Baking With Kids!

Crust:
4 tablespoons butter
4.5 ounces plain wheaten crackers – we used graham crackers
1 tablespoon sugar

Topping:
2 tablespoons slivered almonds

Filling:
1lb tub ricotta cheese (about 2 cups)
1 cup sour cream
2 extra large eggs
3/4 cup icing sugar
2 tablespoons sliced almonds, ground
2 medium unwaxed lemons


The recipe has you crushing crackers, you could just use ground graham (or wheaten) crackers.


Melt the butter and mix it in with the crumbs and the sugar.


Mix it till it’s mostly combined.


Once it’s in the well greased springform pan, press the mixture flat.


Now mix the ricotta and sour cream in a big bowl with your mixer (or a spoon).


Crack the eggs into a separate bowl to avoid shells in your cheesecake!


Tip the egss in!


She likes to watch the kitchen power tools very carefully.


Now add the icing sugar and the ground almonds. This is also when we grated the lemons and added both the zest and the juice from the lemons to the mix.


Sooooo creamy. Pour it over the crust!


Normally I’d say ‘sprinkle the slivered almonds on top and away you go’ but this Wee One is very specific about the placement of each almond sliver.


It’s her work of edible art!

Bake at 300F for 1 1/4 hours, then turn off the oven and leave it inside without opening the door for another 1 1/2 hours till the oven cools off. Then take the cheesecake out of the springform and serve it either as it is or with fresh berries!

No Comments

Chocolate Chip Cookie Brownies

Domestic

When I first read this recipe, courtesy of non other than the most delicious Bakerella, I sat stunned. I was in awe of the amazingness of the overall concept, I was totally paralyzed by the urge to get up and make it right now and I was also a little concerned for my waistline. She even put a warning on the most decadent picture of this extremely sinful treat that says MAY COMPLICATE WEIGHT LOSS. Indeed, Bakerella. Indeed.

I did get up and make them right away though. They were ready for the kids after school treat and dudes – they were extremely happy kids when they walked in and smelled this seriousness. I was declared best mommy ever once they tasted them – duh.

The simplicity of this recipe makes it all the more awesome. If you can make chocolate chip cookies and you can make brownies, you’re golden. The only thing I am ever not keen on with Miss Bakerella is all the boxed stuff used in the recipe. So the original recipe calls for a Betty Crocker brownie mix and a Betty Crocker chocolate chip cookie mix.

I however? Just. Couldn’t. Do. It.

So I made a double batch of Good Housekeeping’s cocoa brownie batter and a double batch of Good Housekeeping’s chocolate chip cookie dough.

Brownie Batter:
1/2 cup flour
1/2 cup unsweetened cocoa
1/4 tsp baking powder
1/4 tsp salt
1/2 cup butter
1 cup sugar
2 large eggs
1 tsp vanilla extract

Chocolate Chip Cookie Dough:
1 1/4 cups all-purpose flour
1/2 teaspoon baking soda
1/2 teaspoon salt
1/2 cup butter
1/2 cup packed brown sugar
1/4 cup granulated sugar
1 egg
1 tsp vanilla extract

Melt the butter in a medium sauce pan.

I doubled the recipe so I’ve got a whopping 2 cups of sugar here!

Mix the flour, cocoa, salt and baking powder.

Melt the sugar in the butter and add the eggs and vanilla.

Then add the dry ingredients and mix till it’s all combined. Brownie batter done!

Start on the cookie dough now by measuring out the sugars and the butter.

Add the dry ingredients to the butter mixture, with the egg and vanilla.

Measure out the chocolate chips and add them in too.

Cookie dough done!

Now comes the magic!

Grease a 13″ x 9″ pan and pour the brownie batter into it. Then dollop the cookie dough over it. Just look at it! YUM!

Bake it for about 35-40 minutes at 350F!


These brownies turned out so well words cannot describe.
1 Comment

Work In Progress Wednesday #6

Crafty

I’m participating in Work in Progress Wednesday at Freshly Pieced!

As you know by now, I’m a pretty monogamous knitter. If I have more than one project on the go, I will forget about other projects and they’ll never get done. Although there is the exception right now of my Beekeeper Quilt, which is more of an in-between projects project than an actual always-on-the-go kind of project. Other than that, I’m an extremely loyal knitter.

However.

I currently have two pairs of socks on the go because after being just a few rows into the Flying Arrows I’m making for the principal of my kid’s school, I was reminded that a wee little person I care about was about to turn one. The connection is weird and totally fueled by the internet. She’s my dear friend’s fiancee’s best friend’s kid. Yeah, I know. She’s way sweet and her mother and I are eerily similar so I set to work on finding the perfect sock pattern right away. The only trouble with socks for little people is it doesn’t take long for them to grow out of them. Sometimes, the kid grows out of the socks faster than it took to knit the damn things. Sooooo, legwarmers it is!! Plus bright pink legwarmers on chubby little legs is so freaking cute it hurts. You know it does.

So here is the one finished Flying Arrow sock. It’s actually a pretty quick knit and I haven’t had to rip it back at all. Score for me.

This is how far into the second sock I was before I tossed it aside to cast on for something wee and pink and cuter.

This basket of deliciousness is what will be taking up my evenings this week. I settled on Socks for Mary Janes, but because of the whole ‘babies grow way too fast to knit them cute stuff’ issue, they are going to be legwarmers. With no heel to turn and no toe to decrease to, I really have no excuse on these taking long to knit up. They really need to be knitted up this week because, yeah I have stuff to do! That stuff may or may not include posting a whole lotta recipes and crafty tutorials burning a hole in my hard drive – and it may or may not include this other basket of deliciousness. My Knit Picks order came in the same week that I finally caved and checked out the yarn store out here in the woods. Well, technically it’s actually in the closest ‘city’ to us (and I use the term city really, really loosely). They have a lot more nice yarn than I thought and I managed to hold back and only pick up 4 balls. Go me!!

No Comments
« Older Posts
Newer Posts »