Browsing the archives for the Domestic category.

Work in Progress Wednesday

Crafty, Domestic, Kids, Small Town

In this post, I’m participating in three WIP Wednesdays; Freshly Pieced, Tami’s Amis and Musings from the Fishbowl.

I am aware that it’s already well into the evening on Wednesday, but I really wanted to check in with my Christmas knitting progress and still blog about some tasty creations in the morning. πŸ™‚

This morning was Wee One #2’s last day of school before Christmas vacation, so I packed up her teacher’s Socks of Kindness, that I blogged about earlier. I also packed up a few of the mini stars and tree cookies I made last weekend for her kids (she has three also), but she wasn’t there today! Bummer!! Hopefully she checks in before the school is officially closed for two weeks (kindergarten is only a few days a week out here). Anyhoo, here’s her little package!

Since my last knitting post a few days ago, I’ve finished a stack of facecloths and one mitten. I posted about the first two facecloths here. They’re all knit from the same pattern, Mock Cable Facecloths, in three colours of Shine Worsted. Clementine is pretty obviously the orange pair, Wisteria is the light purple and Green Apple, of course is the green. I really adore this yarn and will be using it for more facecloths for the fam and for gifts!


I’m on a serious Knit Picks bender lately, this time using Wool of the Andes Worsted in Dune Twist. These mitts are for the kids’ school bus driver. He’s a new addition to our list of gift recipients since we have moved out to the woods! He’s a very nice guy and the kids always say that he’s not a yeller! I’ve never taken the school bus to school personally, but I always heard about mean school bus drivers. Glad to know he isn’t one! Also, wee one #2 tends to move slowly in the snow and he never gives her a hard time about waiting for her so he deserves something special. He’ll get a tin of treats too of course!


I will be baking a whole lotta cakes and cupcakes in the next three weeks to catch up on my self-inflicted cake challenge. Which may prove extra tricky since we’re away for 5 days, but I can do this! I made a little dent tonight with cake #45, Candy Cane Cake. No adult could stomach this. Maybe Andrew. Maybe. Don’t take that as a challenge, I even tried it in milk and the peppermint still knocked me on my butt.

WIP Wednesday at Freshly Pieced
3 Comments

Last Daring Cook Challenge for 2010 – Eggs Benedict

Domestic

In this post, I’m participating in Tempt My Tummy Tuesdays, Tuesdays at the Table, Tuesday Night Supper Club, Hearth ‘n Soul, and of course, The Daring Cooks.

Jenn and Jill have challenged The Daring Cooks to learn to perfect the technique of poaching an egg. They chose Eggs Benedict recipe from Alton Brown, Oeufs en Meurette from Cooking with Wine by Anne Willan, and Homemade Sundried Tomato & Pine Nut Seitan Sausages (poached) courtesy of Trudy of Veggie num num.

I have watched Julie and Julia about 1000 times lately, so I was all over poaching a egg! I really wanted to do it, and since I live in the woods now, it’s not hard to find farm fresh eggs! I decided to go with Eggs Benedict for the whole Julie and Julia butter references.

I have been peaking in at the Daring Kitchen message boards, as I always do, and I found that mostly out of necessity a lot of my fellow Daring Cooks had made their own English muffins. Naturally, I had to jump on this bandwagon! The very first blogger, Audax Artifex, to post their finished creation often comments here – how lucky! He included a recipe for English muffins based on Alton Brown’s recipe.

English Muffins – from Alton Brown
1/2 cup non-fat powdered milk (skim milk powder)
1 cup very hot water (you can use 1 cup of very hot evaporated milk instead of the powdered milk and very hot water) <– that’s what I did

1/2 tablespoon sugar
1 teaspoon salt
1 tablespoon butter, melted
1 teaspoon dry active yeast
1/8 teaspoon sugar
1/3 cup warm water
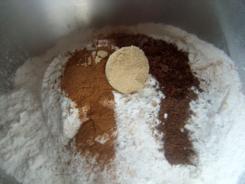
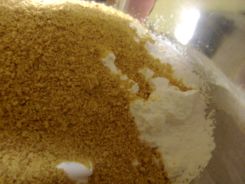
2 cups all-purpose (plain) flour, sifted
Non-stick vegetable spray


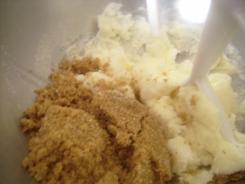
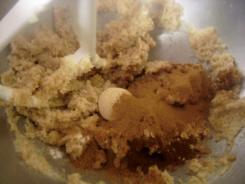
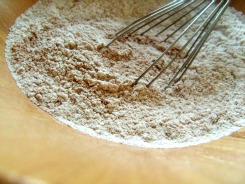
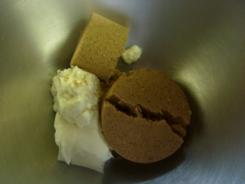
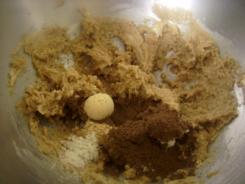
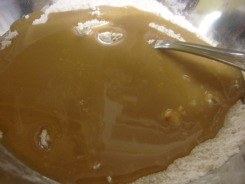
Mix your really hot evaporated milk (or your really hot water and milk powder), with 1 tbsp sugar, 1/2 tsp salt, butter until the sugar and the salt are dissolved. Set aside to cool.

Separately, combine the yeast and 1/8 tbsp sugar in 1/3 cup of warm water. Let it sit until the yeast has dissolved, then add to the milk mixture.

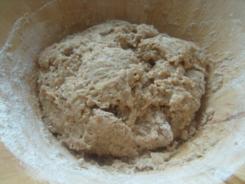
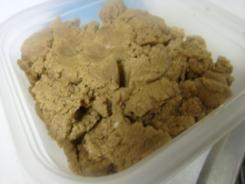
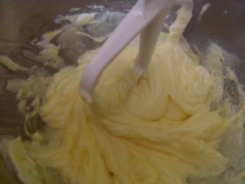
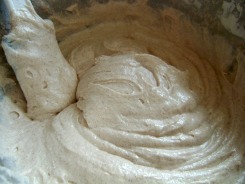
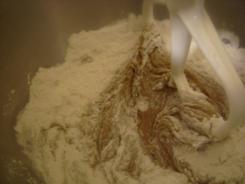
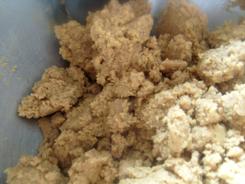
Add the sifted flour and and mix (it says with a wooden spoon), then cover the bowl and let it rest in a warm spot for 15-30 minutes until a few small bubbles form on the top of the batter and it becomes very sticky and thick.


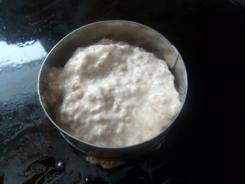
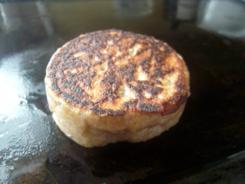
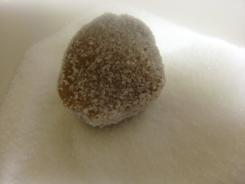
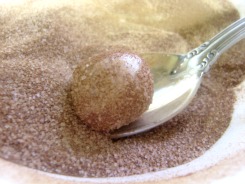
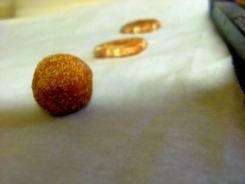
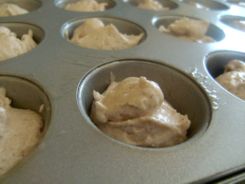
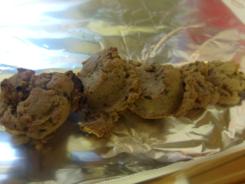
Preheat your griddle to 300, add the leftover 1/2 tsp salt and mix till totally combined. Now the recipe says to put 3″ metal rings onto the griddle and coat them with vegetable spray (4″ for the giant ones). My metal ring is 2.5″, and while I read on Daring Bakers that a tuna can is the perfect size for the huge ones, I went with minis! 1/4 cup of batter per muffin for about 5 minutes each side and they’re so cute!!

Split with a fork to get that nook and cranny goodness!

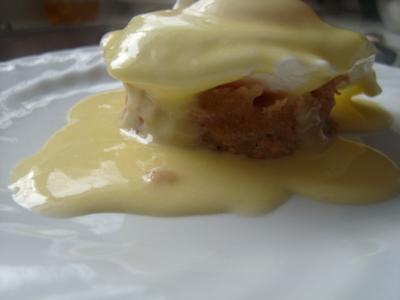
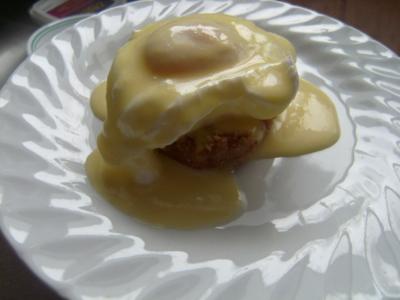
Now that that’s out of the way, it was time for the Hollandaise sauce and poach the eggs! I had never made Hollandaise sauce before, but I’ve wanted to do forever.

Eggs Benedict w/ Hollandaise Sauce – from Alton Brown
4 eggs
2 English muffins
4 slices of Canadian bacon/back bacon
Chives, for garnish
Splash of vinegar (for poaching)
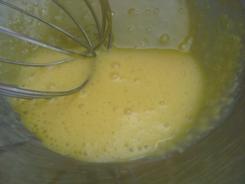
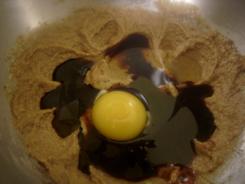
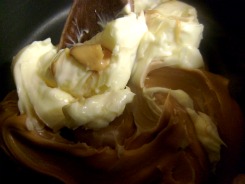
3 large egg yolks
1 tsp water
1/4 tsp sugar
12 tbsp unsalted butter, chilled and cut in small pieces
1/2 tsp kosher salt
2 tsp freshly squeezed lemon juice
Pinch cayenne pepper (optional)

1. Fill a medium saucepan halfway with water and bring to a simmer.

2. Cut the chilled butter into small pieces and set aside.

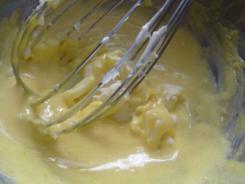
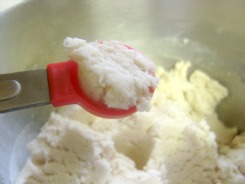
3. Whisk egg yolks and 1 tsp. (5 ml) water in a mixing bowl large enough to sit on the saucepan without touching the water (or in top portion of a double boiler). Whisk for 1–2 minutes, until egg yolks lighten. Add the sugar and whisk 30 seconds more.

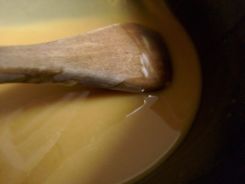
4. Place bowl on saucepan over simmering water and whisk steadily 3–5 minutes (it only took about 3 for me) until the yolks thicken to coat the back of a spoon.


5. Remove from heat (but let the water continue to simmer) and whisk in the butter, 1 piece at a time. Move the bowl to the pan again as needed to melt the butter, making sure to whisk constantly.

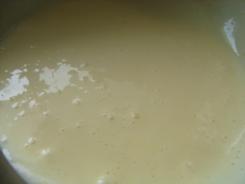
6. Once all the butter is incorporated, remove from heat and whisk in the salt, lemon juice, and cayenne pepper (if using).

7. Keep the hollandaise warm while you poach your eggs in a thermos, carafe, or bowl that you’ve preheated with warm water.


8. If the water simmering in your pan has gotten too low, add enough so that you have 2–3 inches of water and bring back to a simmer.

9. Add salt and a splash of vinegar (any kind will do). I added about a tablespoon of vinegar to my small saucepan (about 3 cups of water/720 ml of water), but you may need more if you’re using a larger pan with more water.

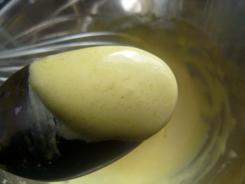
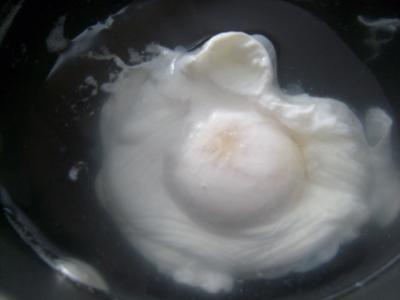
10. Crack eggs directly into the very gently simmering water (or crack first into a bowl and gently drop into the water), making sure they’re separated. Cook for 3 minutes for a viscous but still runny yolk.

11. While waiting for the eggs, quickly fry the Canadian/back bacon and toast your English muffin.

12. Top each half of English muffin with a piece of bacon. Remove the eggs with a slotted spoon, draining well, and place on top of the bacon. Top with hollandaise and chopped chives, and enjoy!

That was so fun. We discovered that wee one #1 loves my homemade English muffins with butter and wee one #2 loves them with jam. Our littlest one was snacking on her plain. πŸ™‚

I am so hyped for this month’s Daring Baker challenge. Stay tuned!

13 Comments

Gingersnaps

Domestic

Oh my goodness more ginger cookies! I know! I can’t help it – it’s December. This is the third ginger-themed cookie this week and I could not possibly be happier. Don’t worry, I’ll let up after Christmas. πŸ˜›

It depends entirely on who you learn the recipe from, or which way you prefer them yourself, but gingersnaps tend to fall into one of two categories; so hard they’re essentially a dunking cookie or so soft they’re totally meant for Santa and a glass of milk. (On that note, can we leave Santa a mug of Starbucks coffee, btw? Is that socially acceptable?) This recipe can be either. That’s less magic and more in baking time and dough placement.

Gingersnaps – from Christmas Cookies Magazine (Better Homes And Gardens, 2009)

1/2 cup butter, softened
1/4 cup shortening*
3/4 cup granulated sugar
1/2 cup packed brown sugar
1 tsp baking soda
2 tsp ground cinnamon
2 tsp ground ginger
1/4 tsp nutmeg
1/4 tsp ground cloves
1/4 tsp salt
1 egg
1/3 cup molasses
2 cups flour
1/4 cup coarse white or coloured sugar

Beat butter and shortening (if you even use both, lol, I just sub Becel for both and it always turns out just fine), till combined. Add both sugars, baking soda, cinnamon, ginger, nutmeg, cloves and salt. Don’t forget to scrape the sides of your bowl!


Beat in the egg and molasses. If you’ve got a stand up mixer you can probably add all of the flour, if not add as much as you can and then move on to mixing the rest by hand with a wooden spoon. Pop this into some tupperware and let it chill in the fridge for a couple of hours.

Use a spoon to scoop out the dough and shape into balls, then roll the balls in sugar. Crisper, dunking-style gingersnaps should be rolled into (heaping) teaspoon sized balls and mashed down with a glass. Softer, chewier gingersnaps should be more like tablespoon, and not squished as much as the small ones. To be on the safe side, put them about 2″ apart on your parchment paper lined baking sheet.


Bake them for about 8 minutes at 350. More for crispier cookies and less for softer ones, naturally.

I love the crackle on the top of these cookies and as you’re so painfully aware this week, I adore the smell too!!

1 Comment

Parade of Frosted Sugar Cookies

Domestic, Kids

In this post, I’m participating in Foodie Friday, Friday Potluck, and Food on Fridays

Sugar cookies are amazing because they have got to be the most versatile treat when it comes to being festive with themes. You can cut them into any shape you can imagine and then decorate them however you want. The only trouble is, unlike tasty drop cookies, you can’t just mix them, bake them and walk away!

I’m repeating this recipe for the eleventy billionth time here, but at least it’s organized, right? Really, this post is all about the dramatic photos.


Basic Sugar Cookies

1/2 cup + 6 tablespoons unsalted butter, at room temperature
3 cups + 3 tablespoons all purpose flour
1 cup caster sugar
1 large egg, lightly beaten
1 tsp vanilla extract

Cream butter, sugar and vanilla. DO NOT OVERMIX. Beat in egg till well combined and not a second longer. πŸ˜›

Add flour and mix till a sticky dough forms. Kneed into a ball and divide into 2 or 3 balls. Roll out each ball between two sheets of parchment paper for about half an hour. Preheat to 350, then take it out, peel off the first layer or parchment paper and slice it into strips like french fries!

Basic Royal Icing
2 tsp lemon juice
2 egg whites
3 cups icing sugar

Beat your lemon juice and egg whites together for a little bit before adding your icing sugar. You’ll want to thin it out a little for spreading (add drops of water till it’s the consistency you’re after), or add a little more icing sugar to make it that seriously thick stuff you typically find on gignerbread people in bakeries. I find this recipe just needs the smallest little touch of water and it’s perfect for spreading. It hardens just right and has a lovely shine.


The fun thing about this icing really is the colours! I used paste food colouring for vibrant colours (and because it’s all I know – I grew up with a cake decorator)!

I first made these trees about a week ago, and tucked them away in tupperware for my massive decorating weekend. That weekend turned into another sugar cookie extravaganza so by Tuesday I had over 200 cookies to frost. Thankfully, frosting the cookies is one of my fave cookie activities!

Grand total sugar cookies to package up with the others; 22 stars, 22 trees, 44 small stars, 33 small trees and 11 mittens. Honestly? I loved every second of them. There were even more, but every time one broke, I had to give the kids the broken one – and the rest of the set lol!


3 Comments

Snickerdoodle Cookies and Cupcakes

Domestic, Kids

I’m backtracking a little here, because while I do have a stash of mini snickerdoodle cupcakes in the freezer for Christmas, I made this for my sister’s birthday party two weeks ago.

I first read about snickerdoodle cookies in Great Cookies: Secrets to Sensational Sweets in 2003 when I picked up the book (amazing book, by the way – full of fun cookies) and I knew I had to try them based on the name! They’re essentially a cinnamon sugar cookie, then rolled in cinnamon and sugar before they’re baked. We all liked them and made themfrom time time to time. Then in 2008, one of my kids discovered A Barbie Christmas Carol, and the main Barbie’s favorite cookies are snickerdoodles! Since then, it’s become a household staple and Martha’s snickerdoodles, are hands down the best.

Martha Stewart’s Snickerdoodles – from Martha Stewart Holiday Magazine 2005, Cookies Special Issue

2 3/4 cups flour
2 tsp cream of tartar
1 tsp baking soda
1/4 tsp salt
8 tbsp unsalted butter
1/2 cup shortening (I used more butter)
1 3/4 cups sugar + more
2 tbsp cinnamon + more
2 large eggs


Sift your flour, cream of tartar, baking soda, and salt. In a separate bowl with your mixer, cream together the butter, shortening and 1 1/2 cups of the sugar. Beat for about 2 minutes, until fluffy. Scrap down the sides of the bowl and mix in your eggs, one at a time. Then slowly add your flour mixture and beat until it’s totally mixed in. I also add about 1 tsp of cinnamon to my dough.


Mix the leftover 1/4 cup of sugar and the 2 tbsp of cinnamon in a small bowl. Use a tablespoon to scoop out regular sized cookies or a teaspoon for mini cookies. Shape them into little balls with (slightly) wet hands and then drop them in the cinnamon sugar. Roll them around so they’re covered and then put them on your parchment paper lined cookie sheet and flatten them with a glass. It helps a little of the glass is dipped in the cinnamon sugar as well.


Bake for 10 minutes at 400. Martha recommends rotating your baking sheets after 10 minutes, but I have found that it really doesn’t change anything. These cookies crack on top, but they do not brown – so don’t wait for them to or they’ll burn.

These cookies are alarmingly good for dunking in either coffee, milk, soy milk or, my biggest weakness, vanilla chai smoothies.

I’ve been trying to keep my posts down to just one recipe at a time to make things easier to find later, but this second recipe really goes with the first! I first saw on Bakerella the teaming of snickerdoodle cookies with snickerdoodle cupcakes. For Valentine’s Day 2009, I made heart shaped cocoa brownies and stacked them on top of chocolate cupcakes with a layer of buttercream, which decedent as it is made perfect sense to me. So the idea of stacking cookies on cupcakes with layers of buttercream is totally logical.

For consistency’s sake, I used Martha Stewart’s snickerdoodle cupcakes.

Martha Stewart’s Snickerdoodle Cupcakes – from Martha Stewart Online

1 1/2 cups flour
1 1/2 cups cake flour
1 tbsp baking powder
1/2 tsp salt
1 tbsp cinnamon + 1/2 tsp for dusting
1 cup butter, room temp
1 3/4 cups sugar + 2 tbsp for dusting
4 large eggs
2 tsp vanilla
1 1/4 cups milk


First, sift together both flours, baking powder, salt and 1 tbsp cinnamon. In another bowl, with your mixer, cream butter and sugar until they’re ‘pale and fluffy’. Then add the eggs one at a time, and beat in the vanilla. Don’t forget to scrape down the sides of your bowl.


Alternate between adding the milk and the flour mixture until it’s all combined. Now pour the batter into lined muffin cups, about 3/4 full. Bake for about 15-20 minutes at 350.

Now, if you need to (I needed to and then we ate them all), whip up a batch of buttercream, pipe a bit on your cupcake, top with a cookie and then top that with another bit of buttercream.

Divine. Snap photos while you can – this pile of treats wont last long!!

2 Comments

More Christmas Cookies – Chocolate Gingerbread Drops

Domestic

So I mentioned yesterday that I’m all about the gingerbread, and I meant it. It just makes the house smell so Christmasy and, at least to me, it takes like Christmas – second only to peppermint. What smells and tastes like Christmas in your house?

After rolling out and cutting about 50 gingerbread men and reindeer and over 150 sugar cookie shapes this weekend (post coming after I’ve decorated them at some point this week) it was a great relief to make some drop cookies. Just mix, drop and bake? Yes please!

Chocolate-Gingerbread Drops – from Christmas Cookies Magazine (Better Homes And Gardens, 2009)

1/2 cup butter
3/4 cup packed brown sugar
3/4 tsp baking soda
1 tsp ground ginger
1 tsp allspice
1/4 tsp salt
1/4 cup molasses
1 egg
2 cups flour
3 oz bittersweet chocolate, chopped


Beat the butter for about 30 seconds, then add the brown sugar, baking soda, ginger, allspice and salt. Mix until this is well combined before adding in the molasses and egg.


Now if you have a serious stand up mixer (thanks Mom!), you can add all of the flour, but if not use your mixer for as much of the flour as you can before you mix the rest of it by hand. Then stir in the chocolate chunks. The original recipe called for 1/2 cup of dried cherries to be added now, but I’m not big on dried fruit in cookies.

Drop the dough by rounded teaspoons onto a parchment paper lined baking sheet and bake for about 8 minutes at 350. Make sure to cool them on a wire rack before you try to move them because the chocolate chunks are going to be melty.


To avoid eating them, I wrap them in tin foil, tuck that in a freezer bag and pop them in the deep freeze till just before Christmas. I only leave enough out for my husband and the kids. πŸ˜›

No Comments

It’s Gingerbread Time!

Domestic, Kids

In this post, I’m participating in Tempt My Tummy Tuesdays, Tuesdays at the Table, Tuesday Night Supper Club, and Hearth ‘n Soul

Christmas in our kitchen means a lot of things, it means sugar cookies and almond crescents, and my mother’s truffles and white chocolate snowmen. Above all else though, it means gingerbread! I love making classic gingerbread, and as you’ll see in recipes over this week, I love making other forms of gingerbread-style cookies and treats because of the way it makes the house smell. I also feel like a serious baker when I use this many spices in a single recipe!

First, mix these ingredients in a big bowl:
2 1/2 cups flour
1 tsp baking powder
1/4 tsp baking soda
1/4 tsp salt
1 tsp ground cinnamon
1 tsp ground ginger
1 tsp ground cloves
1/4 tsp ground allspice
Then mix these separately:
1 egg
1 cup firmly packed dark brown sugar
2/3 cup dark molasses
6 tbsp butter


Add the dry to the wet and voila! The original recipe says to cover the dough and refrigerate it for an hour. I learned from a Daring Baker challenge in September (sugar cookie recipe) to roll out portions of the dough between pieces of parchment paper and refrigerate that – it takes not even a quarter of the time, so by the time you’ve rolled out the last of it, the first is ready to come out.

People are the most traditional shapes to make, but I also adore the reindeer shapes. This batch was made for the kids to decorate and eat, for the next batch I’ll also make some Santa boots and teddy bears. Painfully cute. I’ll post more pics as I bake them.


Royal icing is the best for decorating these, of course! Mix 2 egg whites with 2 teaspoons of lemon juice and 2 1/2 to 3 cups of icing sugar. The more icing sugar you add, the thicker it’ll be, and I have found that to get those childhood memories of the serious gingerbread cookies you’ll want a thick batch of icing. If you find it too thick, just add a touch of water – tiny drops at a time.

More festive recipes this week! Chocolate-Gingerbread Drops, Milk Chocolate Fudge Crinkles, Sugary Citrus Twists, Sugar Cookies and Gingersnaps!

5 Comments

Peace on Earth – December Challenge

Churchy, Domestic, Kids, Marriage

Wow. When I skip a few days or a week of blogging for real life, I tend to totally ignore it and carry on like it never happened, bu I’ve been absent for two whole weeks. It’s not life, it’s Christmas! I’ve been very dedicated to staying on task with my to do this year and it’s been going well, but I’m knitting every night, not blogging. So here I am, on track for my favorite holiday ever and back on track for blogging as well.

When I sat down to write this I was afraid that I was a week behind for Courtney’s December challenge – thankfully, I am right on time for the first in the series! The one thing she mentioned to do last week was light an extra large candle everyday and to make a note on the calendar that says ‘I Peter 5:7 Cast all your anxiety on him because he cares for you.’ This passage has actually helped me quite a bit over the past couple of years so it’s familiar to me! As for the candle, I mentioned a few weeks ago that after the Making Your Home a Haven challenge was over, I kept on lighting my candle. I honestly feel that it has changed my attitude because I’m in the kitchen or in areas off the kitchen so much of the day and night that it catches my eye all the time, and at this point even when it’s not lit I still stop and take a moment.

The challenge for this week is to schedule a bubble bath. I’m not a bath sort of gal, but I will schedule an extra long pamper session for myself. My dear friend Lindsay, who I met in kindergarten and my still fairly new friend Jade who I met in January, always look their best and have really encouraged me to make the time to make that a priority if that’s important to me – and it really, really is. So far, so good. It is time consuming though, especially with my lifestyle (read: changing diapers, doing dishes, scrubbing corners, baking, etc) so time has to be taken every night to fix or change nail polish, take off make up, moisturize like you’d never think is necessary (‘your skin is thirsty May!’) and all that stuff. I have found that forcing myself to make time to ‘get pretty’ as I playfully call it, has helped me center myself too! I’m not really in that bathroom focusing on taking off my eyeliner or sugar scrubbing my knees and elbows – because really, what is there to think about? I’m in there letting my mind wander, thinking about the sort of things I’d never allow myself time to think about otherwise. You all know I’m a pretty thankful person as it is, but as I was changing my nail polish a few days ago, I thought about how amazing it is that I get to wake up everyday here in Canada and not in Haiti or Burma or somewhere I have never heard of that has equally scary situations going on. I think about how amazing it is that we have the cash for me to even have this ridiculous collection of nail polish or that I can somehow get away with wearing plastic jewelry at 30. I think about my babies and how none of them are technically babies at all anymore – about how healthy they all are!! Most of all though, I think about my husband and our marriage and I sigh. Not only are we still friends, but ever since we moved to the woods he’s gone above and beyond to make me fee happy here because he knows how much I miss Toronto.

Anyhoo, the second part of this challenge is to read about the birth of Jesus. You know, the whole reason December is a big deal in the first place? πŸ˜‰ Matthew 1, 2 and Luke 1,2 are on my list to read and re-read this week. I am feeling much more churchy than usual, and I don’t know if it’s because of Christmas or if it’s just that He is using this time of year to make my heart feel three sizes too big for my chest, but it does. It really, really does.

*I just read this post over at Inspired to Action and stopped in my tracks because it’s exactly why I get up so early every morning for alone time. Some days I actually get all the way out of bed and read my Bible with a coffee. Some days I just read in bed, and some days I just lay there and think and steal an extra snuggle with my husband – always thankful for this life.*

1 Comment

Peanut Butter Bon Bons

Domestic, Marriage

I recently mentioned that this year for my Christmas baking, I am only going to use recipes from all the cookbooks and food magazines I’ve collected over the years. All foodies have stacks of Martha Stewart Living books and magazines, piles of Gourmet magazine, Everyday Food, maybe even Bon Appetit, Better Homes and Gardens and Family Circle (and if you live in Ontario you’ve got a collection of Food & Drink magazines as well!)

This recipe is no different, and comes from one of my all time favorite cookbooks – Betty Crocker’s Best Christmas Cookbook, this one is an oldie but goodie. It came out in 1999 and was one of the first gifts my husband gave me. I knew he ‘got’ me when he gave it to me, I have used it all year long for 11 years now, but there are some extra Christmasy recipes in it that I tend to use just at Christmas.

Peanut Butter Bon Bons – from Betty Crocker’s Best Christmas Cookbook (p.262)

1 1/2 cups icing sugar
1 cup graham cracker crumbs
1/2 cup butter
1/2 cup peanut butter
1 cup semisweet chocolate chips

Mix the icing sugar and the graham cracker crumbs together. Then in a small pot, melt the butter with the peanut butter – and pour that onto the crumb mixture!

Rolling them into balls requires wet hands and a little time. I have three kids and a stack of Christmas knitting taller than my third child. Soooooo, I used a deep tablespoon and scooped out perfect little balls without any mess or issue – I saved a whole lot of time too I’d imagine.

Next, naturally, you melt down some chocolate and dip! Easiest and neatest way to do this also makes them look as pro as possible. Put your peanut butter ball on a fork, hold it over your bowl of melted chocolate and use a big spoon to pour the chocolate over it. Give it a second to drip off, slide the excess off the bottom of your fork with a butter knife and then slide the bon bon off the fork.

Then, eat eleventy billion of them because ps, they’re only about 95 calories each!

No Comments

Ooey Gooey Chewy Smore Bars and Wickerware Socks

Crafty, Domestic

Next up on the list of Christmas baking was Ooey Gooey Chewy S’more Bars from the same magazine as the treats I posted about yesterday. There is a batch of these babies in the basement freezer right now, though I think I may take them out before Christmas to see how they froze (the recipe says they’re good in the freezer for 3 months). I had a tiny nibble of a piece that broke off and man these are so good. Essentially, you bake a spongey cake-like loaf with oatmeal and graham crackers. After it’s baked you add the marshmallows and chocolate on top and pop it back in the oven for those to melt!


Ooey, Gooey, Chewy S’more Bars – from Christmas Cookies Magazine (Better Homes And Gardens, 2009)

3/4 cup butter, softened
1 1/2 cups packed brown sugar
2 eggs
2 teaspoons vanilla
1 cup flour
1 1/2 cups quick-cooking rolled oats
1 cup graham cracker crumbs
2 1/2 cups tiny marshmallows
1 1/4 cups semisweet chocolate baking chunks

Preheat to 350, line your pan (13×9 was called for, but I used one more like 12×10) with aluminum foil and lightly grease the foil. I thought I was smart in using a silicone pan and skipped the foil – and my bottoms burned! Use foil, and butter it!

Beat butter on high for 30 seconds, add the brown sugar until combined scraping the sides of the bowl. Beat in eggs and vanilla until combined, then beat in the flour. Now stir in your oats and graham cracker crumbs.

Set aside 1 cup of the mixture, and spread the rest of it in the pan (using the back of a wet spoon makes this eleventy billion times easier). Bake this for about 15 minutes or until lightly browned (mine was more like 10 minutes).

Now for the fun part! When you take it out, sprinkle the marshmallows and chocolate chunks over the top of it! Then take the 1 cup of the mixture you set aside and dot that over top of the marshmallows and chocolate. Now pop it back in the oven for another 15 minutes or so – just till the marshmallows are browned campfire-style.

You’ll have to let them cool completely on a wire rack before you cut them or you’ll have a seriously gooey mess on your hands (ask me how I know lol). According to the recipe store them at room temp for up to 3 days or freeze for up to three months.

I was going to post my list of Christmas baking, but it’s a little insane and full of surprises for other people. I’ll post recipes as I bake them and do a recap as I thaw and package them all.

Switching gears, but keeping with the Christmas to do, are these men’s socks. Men’s socks are tricky because if there’s too much detail in the pattern they end up looking too feminine but if there’s not enough you’re just knitting a plain tube and I literally fall asleep while knitting when I knit patterns like that.


These socks are the cure for that! A very simple 6 row repeat that keeps you focused on the knitting, but lets you carry on a conversation and are clearly GUY socks. πŸ™‚

Back to knitting now, the countdown to Christmas is only 42 days and stay tuned for preparations for my sister’s birthday weekend!

2 Comments
« Older Posts
Newer Posts »