Browsing the archives for the California category.

Week In Review – Sunday June 24 – Saturday June 30

California, Domestic, Kids, Marriage

What a fun week!! It started out sadly though – my most treasured pie plate (and of course the only one I brought with me) smashed to the floor with a beautiful chicken pot pie in it. I am not a crier and I swear I almost shed a tear over this. It was about 40 years old, snagged from a friend who brought it to my house in Toronto about 5 years ago with a peanut butter cup cake in it. The nostalgic part of this story is that the cake she brought was her entry into our annual bake off for my sister’s birthday and she lost but about a year later we found out the entry that beat her was a store bought cheat!. I lifted my spirits with these cinnamon buns though. Then I made my very first Battenberg Cake for Daring Bakers, it was hard but totally worth it!

Also:

-We have a Stone Cold Creamery across the street and it’s become a weekly treat for the kids to get a small bowl and I am uber proud of myself that I haven’t caved in over a month!
-Strawberry cake makes me extremely happy and yes I snack on strawberries while I bake it!
-Nothing is more fun than a random tutu!
-We went to the pool every weekday this week and man were the kids happy about that (I’ve never been so tan in my whole life)
-Butter Tarts for Canada Day
-Canada Day dinner of Peameal Bacon on a Kaiser with Poutine and a Moosehead

No Comments

Week in Review โ€“ Sunday June 17 โ€“ Saturday June 23

California, Crafty, Domestic, Kids

This week brought us the completion of my fourth pair of socks for the year! Happy Birthday Nanny! Her birthday was in April, but she’s sweet enough to totally gloss over that when these cuties arrive in the mail next week. ๐Ÿ™‚ This week was also full of fun homeschooling lessons, I think we all genuinely enjoyed each day! Ok, that’s a dirty lie. Wee One #2 isn’t so keen on French (or cursive writing actually…), and while I’m aware that we are not currently in Canada, I am including it because even though we will be here longer than we originally planned, we’re not going to be here forever and they’ll need to know French eventually.

After whining about having to buy jugs of juice instead of squeezing my own, I found a little hand juicer! It’s perfect for making us each a glass in the morning to go with breakfast. This is probably what I am most hyped about in my kitchen right now.

Our little patio garden is doing well! I was pretty confident the seeds would sprout, but you never know until they do, so the kids were pretty excited when they saw the first little pieces of green poling through the dirt!

Hope you had a great weekend!!

Sunday = pair of socks #4 for 2012 DONE!
Monday = train wreck!
Tuesday = cursive writing practice for Wee One #2
Tuesday = juicer and fresh oranges!
Wednesday = Wee One #1 reading about nomads
Thursday = butterflies and fuchsia crayons
Friday = our seedlings in TP tubes are doing well!
Saturday = cinnamon brown sugar muffins
No Comments

Cupcakes in Cones – Happy Saturday!

California, Domestic, Kids, Marriage

Our days are so different since moving to Los Angeles, which I guess is a redundant thing to say because duh but it’s more than just the geographic differences. The two huge differences to life before and after moving here are school and work because my husband has gone from telecommuting from home to working at the office and my kids went from being at school all day to being homeschooled all day! So, 3 months into this adventure we have found a new normal and it’s not what I would have ever expected, but it’s pretty sweet. My husband has telecommuted from home for years, so while him being at work 5 days a week is totally weird, he likes his job and it gives the kids and I a chance to loudly play board games and bake up a storm. Plus how sweet is it to come home from work and your wife is in a cute little apron finishing dinner?! The kids have really gotten into the swing of homeschooling, faster than I did for sure! If a lesson isn’t working for them, there’s always a way to tailor it a bit so it does work for them. Science should be amazing, reading should be inspiring, gym should take place in the pool whenever possible and art should always be messy.

Anyhooooo, one thing that has remained the same is everyone’s love of the weekend. Sometimes there is still some school or work to do over the weekend, but I celebrate every day that I don’t have to set an alarm before I go to bed at night. <3 I try to bake up something fun on Fridays, especially now that Friday has become homemade pizza day it's fun to have something a little epic to go with it. These were a big hit. I'm going to try out a bunch of different cake/frosting combos! Cupcakes in Cones

1 cup (2 sticks) unsalted butter, room temp
2 1/2 cups all-purpose flour
1/2 teaspoon baking powder
1/2 teaspoon baking soda
1 teaspoon salt
1 1/2 cups sugar
2 large eggs
3 large egg yolks
2 teaspoons pure vanilla extract
1 cup low-fat buttermilk

All I did was whip up a batch of Martha’s Vanilla Cake (recipe originally posted here) and spoon the batter into ice cream cones! I baked them for about 20 minutes at 350 and voila!

The recipe is pretty simple. Just whisk the flour, baking powder, baking soda and salt in one bowl and beat the butter and sugar in another bowl with a paddle mixer till it’s smooth. Slowly add the eggs and yolks with the mixer on low and then beat in the vanilla. Then add a little of the flour mixture and mix, then a little buttermilk and mix and continue until both are all mixed in.

Cupcakes in Cones
Cupcakes in Cones
Cupcakes in Cones
Cupcakes in Cones
Cupcakes in Cones
Cupcakes in Cones
2 Comments

Week in Review…Sunday June 10 – Saturday June 16

California, Crafty, Domestic, Healthy, Kids

I hope everyone is off to have an amazing and memorable Father’s Day! If you are lucky enough to be able to hang out with your Dad today – go hang out with him! My husband and I will have to settle for Skype convos with our Dads tonight, but that’s after we spend the day celebrating here with the wee ones!

For now though, here’s a quick look at our week!

Sunday = my personal cheerleader
Monday = rad new shirt
Tuesday = so ugly it’s cute cookie jar
Wednesday = knitting on the patio
Thursday Morning = these animal crackers are not for sharing
Thursday Afternoon = time to plant some patio garden seedlings
Thursday Afternoon = patio seedlings started off in repurposed toilet paper tubes
Friday = the possibilities in soap making combos are pretty much endless – so exciting
Saturday = making personalized recipe cards
2 Comments

Searching for the Perfect Picnic Basket

California, Domestic, Healthy

Today I’m linking up with Dandelion House, Happy Go Lucky Blog, and Chubby Cheeks Thinks.

I have had a love for all things vintage and slightly chipped and worn and almost matching for as long as I can remember. I used to beg my department store-loving mother to take me downtown to Toronto’s Kensington Market so I could hunt for treasures from my favorite thrift stores. The concept of used clothing totally skeezed her out so most of the time my dad and I would go together – and more often than not, he’d find a treasure himself!

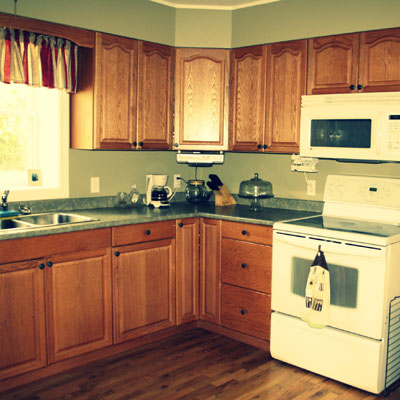
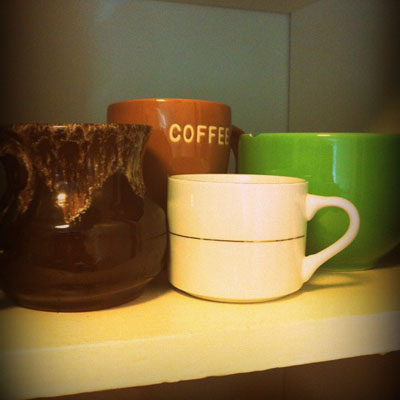
My husband however, is not so down with vintage stuff. I’m not going to get all psychological here, but he’s defo the kind of guy that likes new and shiny things. He likes sets of things that match. He likes new and matchy things even more than I like vintagey things, so a very long time ago (over a decade ago anyway) I stopped bringing random old cups and mismatched plates home and instead started hitting up Ikea and Pier 1 and if I’m totally honest there may have been some Crate & Barrel and even some Pottery Barn going on as well. Last year we bought a very pretty house in the woods of Central Ontario and we were slowly filling it with catalog wish list goodies. Then my husband was offered a situation he couldn’t refuse in Los Angeles – so off we went!

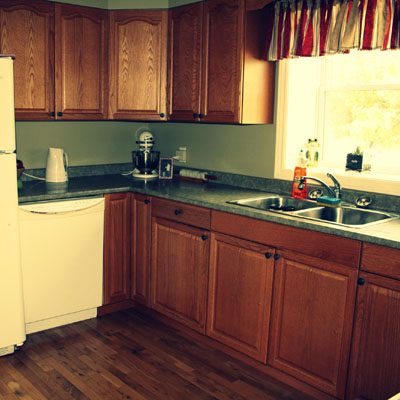
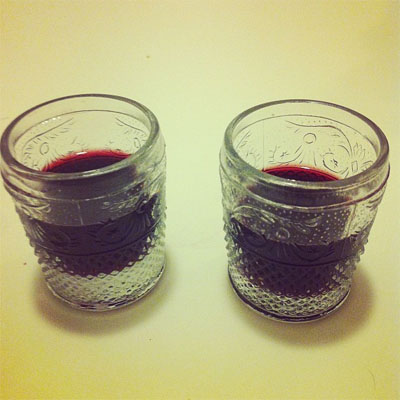
Fast forward to a few months later. We came down here with just a small trailer of absolute necessities. We packed light for two reasons – we didn’t think we’d be here very long and we knew we had to declare every single thing we were bringing aka ‘importing household items’ for CBP. After some bitching about how lacking my LA kitchen is (and truthfully the rest of our apartment is equally lacking), my friend Vanessa brought over some thrifted cups and cutlery for us to use because she’s super sweet like that, and one of those cups is now my husband’s hands down favorite cup of all time. He oddly likes that there isn’t another one of them in our little collection, which of course spawned a conversation about the possibility of creating a vintagey apartment down here and it was like 1000 Christmases rolled into one when he said he was totally down with it. All I’ve thrifted since that convo is a zebra print plate and a Little Miss Chatterbox cup, however last night? Oh last night I spent hours on Etsy looking for just the right picnic basket.

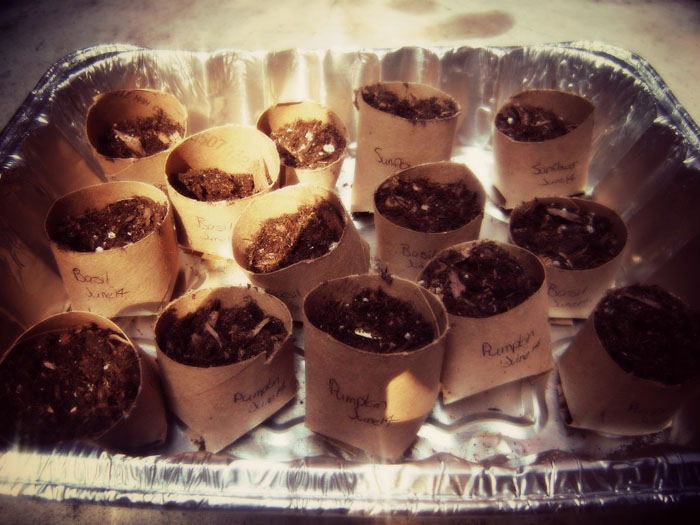
I proudly found this $60 wagon at a streetcorner ‘yard’ sale for $15 a couple of weeks ago and can now pull my two smallest wee ones to the farish park that’s perfect for picnics. Vanessa and I took the kids there for a picnic once already but picnics are always better when you’re rockin a beautiful picnic basket, right? Right?

These baskets are all amazing. I adore them and once I complete my actual shopping list of things I need for our new place I’d love to get a couple more and start a collection. I’m not including the basket that I picked in these pictures, I’m going to wait until it gets here and show it to you on a picnic!

Vintage wicker picnic basket with wood double lid
Retro Picnic Basket
This is one of the first ones I fell in love with. It’s $50 but there’s no domestic shipping on it! The fabric inside it melts my heart and I absolutely adore the double lid.
I crossed this one off my list when I decided that I had to have a double lid, otherwise this was a strong contender because it’s so roomy and I’m always packing a picnic for at least 4!
Vintage Jerywil WOOD PICNIC BASKET Wov-N-Wood Interior Pie Basket Androck Dishes Olive Green Tulips
Vintage bent wood Picnic Basket with wooden pie stand. Wooden Pie Basket
The charm of this basket is that it comes full of goodies (4 each; large plates, saucers, coffee cups, drinking glasses, forks, knives & spoons). I came thisclose to picking this basket and it’s dishes.
Are you kidding me?! A pie basket?! I love this!! I think it might be a bit too small for us though and again, as sweet as this one is the one I picked is even sweeter!

In this Etsy adventure I also found a really adorable little something for my sister – shipping on it to Canada is the same as here, so I could even have it shipped right to her so I’m not paying shipping twice! I also came across a lot of really painfully cute plastic picnic baskets from the 70s for the kids, but I’m not sure I can justify getting one for all of us and then another one! There is one more picnic basket that was in the running that I’m not going to post because it is perfect for patio picnics and I can’t wait to show it to you – on my patio!

Obviously, I’m obsessing over all things picnic (summer has officially hit LA, but of course coming from Canada even their ‘winter’ is official summer to us) and all things vintage (getting the thrifty green light from my husband has me totally over the moon with excitement). I apologize to everyone who reads this blog and loves all things shiny and new because I have a pretty good feeling that all of my Window Shopping Wednesday posts are going to focus on all things slightly worn. ๐Ÿ˜‰

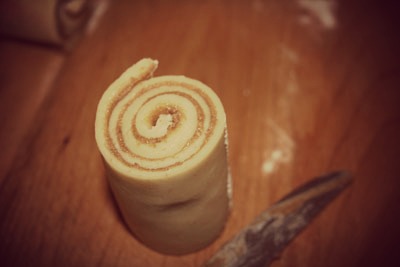
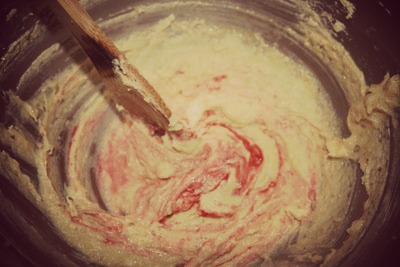
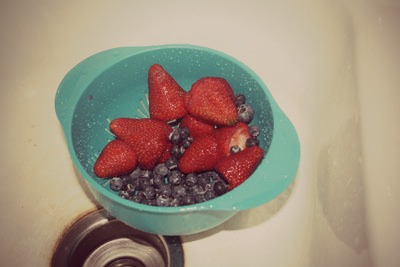
I will leave you today with some vegan picnic inspiration, courtesy of Mama Pea. I haven’t coughed up any recipes from this book yet because I really think it’s worth picking up – but Mama Pea gives you this recipe on her blog.

Peas & Thank You's Picnic Tortilla Pinwheels

Peas & Thank You's Picnic Tortilla Pinwheels

I’m aware that I used a piece of bread and the recipe clearly calls for a tortilla. Since I snapped this photie, I have made them properly and they amazing either way. They’re perfect picnic food too and will absolutely find a place in my new basket. <3

2 Comments

Menu Monday – Without the OCD

California, Healthy, Kids, Marriage

I’m editing the site today so if something is wonky or broken, it wont be for long!

This week, I’m linking up with Organizing Junkie’s Menu Plan Monday and The How To Mommy’s Meal Planning Monday.

For years and years and years now, I have been a planner. Both in the ‘knowing whats for dinner next Tuesday’ kind of way and in the ‘I keep a notebook of running ideas I add to my calendar’ kind of way. This way of thinking and planning had ingrained itself in me pretty deeply. So deeply that not knowing exactly how long we’d be in California was stressing me out before we even left Canada. It bothered me that as I was reading through blog posts of neat home decor projects I didn’t know when or where I’d be able to work on them, or that I didn’t know what my routine would be like with homeschooling so I had no idea when I’d be blogging or how much time I’d have for baking. I’m not kidding, it honestly stressed me out to think about not having the info I needed to make solid plans and even worse that there was no way for me to find out that info because it just didn’t exist yet. So I packed up our most loved and used treasures, helped my husband change the oil and tried not to freak out about it too much.

yarn, my hair dryer, makeup and my cherry apron - all set!
changing the oil before we head out

At first, about a week before we left when we were still looking at apartments in LA online and trying to pack up the last of our ‘must have’ list, I started to let go of the idea that I’d know exactly where we’d be living. I rationalized to myself that it was ok to not know yet since I’d like to see the place in person before deciding to move there anyway. So leaving Canada without having picked a place in LA ushered me into letting go of planning, which made it a lot easier and honestly a lot more fun for all of us to just enjoy our 2700 mile road trip! We totally did too! It was so so so much fun!

crossing over into Michigan
happy happy and relaxed!
Indiana
Kansas
driving through the rockies in Colorado
road trip love in Utah!
Arizona is beautiful
almost in Nevada
after 11 years of talking online and on the phone I finally met my dear friend Nichole in person!
palm trees make me incredibly happy
there was a lot of Starbucks snacking going on

After that, instead of pressuring my husband and rental-unit-finder person (what’s that job called?!) into getting us a place ASAP, we moved into a really cute extended stay suite with a wee (but sweet) kitchen and spent some time finding a great place for us. Ever since then, I’m pretty breezy about plans. I mean yes I still menu plan, but that’s a sanity saver more than anything else – and I rarely actually make these meals in order (plus down here there is a lot more popping out to Chipotle and tossing all plans aside). Of course there is homeschool planning to do, but really I just read ahead in the homeschool books at night so I know what I’m teaching the kids the next day, I don’t obsess over exactly what needs to be taught each school day and exactly what needs to be on each review for each unit. I will roll with it.

So now that I know that we are here for a while, I’m not freaking out about exactly how long or when we’ll upgrade to a bigger place or if we even upgrade to a bigger place and man – this feels so good! So here’s my tentative menu plan for this week – and yes I’m aiming to make these fudgy snowballs twice because they’re uber simple and a serious hit with the whole fam (even Wee One #1 who is not big on dates).

This Week’s Menu
Monday – Spaghetti with Meatballs and Breadsticks for the fam, Spaghetti without Meatballs for me and Cinnamon Buns for dessert

Tuesday – Scratch Hot Pockets for the fam, Mushroom Soup for me and Fudgy Snowballs for dessert

Wednesday – Breaded Sole with Corn and Rice Pilaf for the all of us and Cocoa Brownies for dessert

Thursday – Scratch Chicken Nuggets and Fries for the fam, Tofu Nuggets for me and Vanilla Cupcakes for dessert

Friday – Mini Chicken Pot Pies for the fam, Mini Veggie Pot Pies for me and Fudgy Snowballs for dessert

Saturday – Homemade Calzones for all of us and Chocolate Cupcakes for dessert

Sunday – Beef Stroganoff for the fam, Crack Wrap for me and Chocolate Chip Cookies for dessert

Fudgy Snowballs

Fudgy Snowballs – via Skinny Taste

15 pitted dates
2/3 cup cocoa
1 cup whole roasted unsalted almonds
1 tbsp honey
2 tbsp + water
3 tbsp icing sugar

Fudgy Snowballs
Fudgy Snowballs
Grind up the almonds into almost dust and add the dates. I pre-chop mine a little so they don’t gum up my food processor! Then add the honey, cocoa and water and process till it holds together.
Fudgy Snowballs
Fudgy Snowballs
Now scoop out small balls and roll them tightly. Just like this, these treats are perfect but to make them snowbally, you need to roll them in icing sugar.
Fudgy Snowballs
Voila! Simple and pretty healthy (especially if you leave off the icing sugar).
Fudgy Snowballs
3 Comments

My Poor Kitchen

California

I complain about lament the loss of my kitchen pretty frequently, I know I do. Most of the time when I write or talk about it, it’s the size and beauty of it that I miss. Other times, it’s the pantry. Man, I had a pantry! On a daily basis though, it’s the kitchen things I have collected over the years that I didn’t think to bring with me that I miss the most. Mainly because I wasn’t entirely sure how long we’d be here. I know that the opportunity to live here in Los Angeles is amazing, I am so incredibly thankful for my husband’s job and our cute little apartment in our sweet tourist-free neighborhood. But daaaamn, there’s a whole lot of stuff I just didn’t think to bring. Juicer? Nope. Juice jug, even? Nope. I recognize it’s a ridiculous first world problem to have, that I can’t make my own juice so I have to buy a carton of juice. Oh poor me. How will I ever go on?

Do you hate me? I know, I’m sorry.

My new homie Vanessa lent me a bunch of must-haves from her kitchen (some utensils, a small saucepan, kitchen towels, and the cutest mugs there ever were) – that helped. I was smart enough to bring my pie pan, waffle maker, two best aprons, food processor and Kitchen Aid with me (but dumb enough to bring the sausage packer with me and leave the grater at home uuuugh), so that helps – a bit. Oh and my granny’s rolling pin – but I didn’t bring her cookie cutters with me! My wonderful and handsome husband was kind enough to ignore that my Target shopping list was eerily similar to my ‘things I can live without’ list written in Canada and he picked up knives, kids dishes, serving bowls, oven mitts, a brownie pan, muffin tray, cookie sheet, measuring cups and spoons and some tupperware.

I feel sad for my kitchen that I was so pumped for the long-awaited and heavily wished for bucket list in Los Angeles that I totally underestimated what I’d actually need in my kitchen. I looooove to mess around and whip up treats as much as I love to make a dinner everyone loves, so how I managed to gloss over the importance of my kitchen is beyond me.

Also neglected around here is the living room and our bedrooms. I did pack all my fave hair do dads and bangles and make up – and I did bring all of our favorite clothes! Since none of us really watch tv, we all (even our 3 year old) watch Netflix or stream tv shows from our laptops, so the living room is a big carpeted square where we sit on the floor in front of the flatscreen and play XBOX.

We’re calling it ‘minimalist’ but it’s hilarious.

Some days I can hardly believe we traded a beautiful house that we worked so hard to own for our little patch of Los Angeles, but at the same time I can hardly believe we can sunscreen up and take off to the beach any time we feel like it. So that, combined with the farmer’s markets and new friends makes it a pretty fair trade.

2 Comments

Chocolate Kit Kat Skittles Cake (aka The Willy Wonka Cake)

California, Domestic

This is what you make when you want to usher something out of the kitchen that is as hilarious and exciting to serve as it is to eat. Cutting and serving this cake was no joke but since everyone that ate it fell in love with it, I’m filing it as a win. It’s the prefect cake for someone who loves candy and of course works especially well for someone who has a house full of people who also love candy!

Scroll down for pics of the cutting and serving!!

Chocolate Kit Kat Skittles Cake (aka The Willy Wonka Cake)

Chocolate Kit Kat Skittles Cake – via The Kitchen Magpie

3 ounces semi-sweet chocolate, chopped
1 1/2 cups hot brewed coffee
3 cups sugar
2 1/2 cups flour
1 1/2 cups cocoa powder
2 teaspoons baking soda
3/4 teaspoons baking powder
1 1/4 teaspoons salt
3 large eggs
3/4 cup vegetable oil
1 1/2 cups buttermilk, shaken
3/4 tsp vanilla
Chocolate Kit Kat Skittles Cake (aka The Willy Wonka Cake)
First, preheat your oven to 300 and melt the chopped chocolate in the hot coffee. Just pour the coffee over the chocolate, and in a separate bowl whisk together sugar, flour, cocoa powder, baking soda, baking powder, and salt.
Chocolate Kit Kat Skittles Cake (aka The Willy Wonka Cake)
Theeeeeeen in a smaller bowl (though you’ll probably want to use a bigger bowl than the one I did…), whip the eggs till they’re thick and then combine them with the oil, buttermilk and vanilla. Once that’s mixed well, add it and the melted chocolate to the dry ingredients.
Chocolate Kit Kat Skittles Cake (aka The Willy Wonka Cake)
The batter was runnier than I had expected, but just roll with it – it’s perfect! I poured it into 3 greased 9″ cake pans and baked for almost an hour.
Chocolate Kit Kat Skittles Cake (aka The Willy Wonka Cake)
Then I made the frosting and dyed it blue – use your favorite frosting recipe, or even *shudder* a can if you must. I used a little between each later, mostly just as glue and for the same reason I slathered it all over the outside so the Kit Kats would stick.
Chocolate Kit Kat Skittles Cake (aka The Willy Wonka Cake)
Line up the Kit Kats around the side of the cake and use the ribbon to pull them tight to the cake, but don’t pull so hard you break them! Make a cute bow at the front and voila! Super cute! Then I covered the top with more frosting and dumped two big bags of Skittles on top!
Chocolate Kit Kat Skittles Cake (aka The Willy Wonka Cake)
The cake looked so not like a cake that someone stuck their hand in it, thinking it was an elaborate bowl of candy!
Chocolate Kit Kat Skittles Cake (aka The Willy Wonka Cake)
The blog I first saw this on made no mention of the hilarity that ensues when the cake is eventually cut. The platter I put it on is made of pretty light plastic, so as the Skittles fell from the top of each piece to the platter they made the same plinking noise as the Skittles that hit the floor in the commercials! So so funny. It was messy, but thankfully the hosts are lighthearted and it was all good.
Chocolate Kit Kat Skittles Cake (aka The Willy Wonka Cake)
So obviously this cake looked amazing, but how did it taste? Well, I made this for our new friend Steve’s birthday. I didn’t know anyone at the party other than him and his (amazing & delightful) girlfriend Vanessa. When each guest left and said their goodbyes it went like this ‘Thanks for the invite Vanessa we had fun, happy birthday Steve have a great night, I loved the cake May!’ So ridic, I love it. Someone even loved it enough to draw it’s likeness in chalk on the brick wall in the backyard.
3 Comments

Adventures in Venice Beach โ€“ Part 1

California

Adventures in Venice Beach - Part 1

Venice is definitely one of my new favorite places in LA. It’s weird and crazy and full of tattoo shops and street vendors and smoke shops and about eleventy billion different tshirt spots and rando trinkety places. Beyond that though, you’ll see clean cut tourists posing in front of beautiful graffiti, and seriously buff locals doing chin ups on street poles (there is a small muscle beach-syle outdoor gym there too but it’s full 90% of the time) – and of course there’s the beach!

Adventures in Venice Beach - Part 1

We stopped at Santino’s Panineria for lunch and had pizzas with prosciutto – and Fanta oooof course. All 7 of us liked the pizza and the restaurant itself was pretty cool. It’s small and eccentric (much like Venice itself). I will be going back to this place again for sure. Next time though, I’d like to try the Sangria everyone raves about at this joint.

Adventures in Venice Beach - Part 1 Adventures in Venice Beach - Part 1

Even when it’s windy I can’t resist dipping my feet in the ocean. We’ve been here for almost 2 months now and I absolutely love it. So after lunch we went back to the beach again for a little running around before we rinsed off and headed home. Yes, I’m purple now…

Adventures in Venice Beach - Part 1
No Comments

Homemade Soap – Part 1

California, Crafty

Today I’m linking up with Giggles Glitz and Glam, A Bowl Full of Lemons, My Uncommon Slice of Suburbia, Mommy by Day, Crafter by Night, The Kurtz Corner, and Reasons to Skip the Housework. There is so much inspiration packed into those links it makes my head spin.

There are about eleventy billion ways to make soap yourself. You can go the super simple route and buy a melt and pour kit, or you can use one of several recipes for hot process or cold process soap. We decided to do cold process, and the four of us (my husband, his friend and his friend’s girlfriend) took on this hilarious project. We were in charge of ingredients and they were in charge of gear. It worked out pretty well I think considering we ended up with everything we needed! We actually ended up with unmatched amounts of what we needed (tooootally my fault whoops), but the guys are both good at math so we were ok! A little recipe altering and away we went!

Most cold process soap recipes I’ve seen stop where this post stops, but this is only stage one for us. We are going to shave down and melt these bars of soap and add to them. Oatmeal perhaps? Poppyseeds maybe? Oils, for sure!

Homemade Soap - Part 1

The recipe we used was from an old book our friend found at a second hand store and that we quickly became a little obsessed with. I will leave you to find a soap book or website with a recipe on it because there was a lot of changing of things going on in my kitchen when we did this so I don’t want to lead anyone down the wrong path!

Also, we opted for a vegan soap instead of a traditional soap and that changes the recipe as well. Having said that, we used:

Olive Oil
Coconut Oil
Cocoa Butter
and of course, Lye

You’ll also need safety goggles, gloves, a plastic container to heat the lye in, two tall pots, wooden spoons, a scale to measure it all out on and two candy thermometers.

Homemade Soap - Part 1
Gather your ingredients and gear, cover your table and then do any recipe math you need on your table covers!
Homemade Soap - Part 1
Now following the directions on the lye packaging, add water slowly, pop in the candy thermometer and wait for it to heat up (it’ll do it on it’s own – like magic).
Homemade Soap - Part 1
Now pour the oilve oil and coconut oil into a tall pot and add your cocoa butter, poke at it here and there until it’s all melted and then mix it a bit but you don’t have to really get into it yet.
Homemade Soap - Part 1
Fill a second tall pot about halfway with water and once it gets hot, set the plastic container of warm lye and water in it. You’ll need one candy thermometer with each pot. One IN the soap mixture, touching the melted oils and cocoa butter and one IN the lye and water container (not in the pot it’s sitting in). The necessary temps are different depending on the recipe, so check yours to be sure!
Homemade Soap - Part 1
While we waited for our concoctions to reach their desired temperatures, we gathered and set out all of our soap containers. Remember that we’ll be popping the soaps from these containers and then grating them down and remelting them so we can add to them. Our final containers will be much prettier!
Homemade Soap - Part 1
Once both mixtures reached the right temperatures, we poured the lye into the soapy mixture and mix, mix, mixed! It starts to thicken up a bit but is still runny, and that’s how it’s supposed to look so we’re all relieved!
Homemade Soap - Part 1
It’s a slightly messy process but that’s why we covered the table before we started, right?! We filled almost every container we pulled out for this project and then covered each one with tinfoil and set them on top of our kitchen cabinets to dry for a week! Stay tuned!!
Homemade Soap - Part 1
2 Comments
« Older Posts
Newer Posts »