 |
|
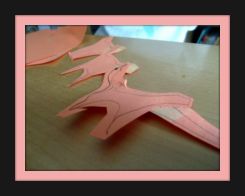
| This house on the right was my first attempt at my first Craftster Craft Challenge of the year. The house pictured above is my shining masterpiece that I submitted last night! I made two pretty epic missteps with the first house. My pieces were not completely cooled off when I started and I used homemade marshmallow fondant for the decoration, which was a little heavier than I anticipated. Duh. I think I also wasn’t as careful as I should have been when I was cutting out the pieces for the house and they didn’t fit together as well as they should have.
So this time around, I carefully measured every piece and made sure it cooled off for a few hours before I started working on it! I used slightly thicker icing glue this time around and I also went with thinned royal icing instead of fondant. I also opted to decorate each piece before I assembled it all, and I think that helped. I went with pastel colors, inspired by our white Christmas tree this year that has a real vintagey feel. |
 |
 |
 |
 |
 |
| Royal Icing 3 egg whites 1 tablespoon cream of tartar 2 lbs icing sugar 1/4 cup cold water (more or less) Beat the egg whites on high for 3-5 minutes, then reduce speed and add the cream of tartar, reduce to low and slowly add the icing sugar. The mixture will be really thick. From here, the less water you add here the strong the icing will be as glue – but the less smooth it will be as ‘paint’. So when making a gingerbread house, set aside some icing while it’s really thick and thin the rest of it out with water before adding colors! |
|
 |
 |
| Gingerbread
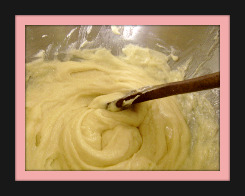
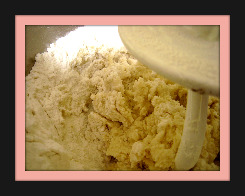
This is the gingerbread recipe I used, I don’t remember where I came across it but I have been using it forever! 1/2 cup butter First, cream the butter and the sugar and add molasses. Then whisk together the cinnamon, ginger, cloves, baking soda and flour. Mix that with the butter mixture and when it gets really chunky add the water slowly. Put the dough in a baggie and chill for about an hour. Then roll out it with plenty of flour and cut out your shapes! |
|
 |
|
 |
|
 |
|
 |
|
Happy Halloween!!!
There is so much going on today for us that I have no idea where to begin. We ended up spending most of the day on Monday dealing with long distance house selling issues. Please note, however stressful irritating maddening ahem troublesome you think selling a house may be, imagine for a moment that you are about 2600 miles away from it and all cleaning, packing, moving and signing of official documents will be done long distance. Yeah, so that was Monday.
Yesterday was a fun meeting with Wee One #2’s teacher, I really like homeschooling this way. Support from the teacher, freedom to accomplish it our own way and most important the time we all get to have together! Amazing, really. So instead of Twinkle Twinkle’s Halloween party on Monday, we are going this afternoon and the kids are really, really hyped for it. I’m not going to lie, I’m super hyped for it too. It’s my favorite place to take the kids for some fun (and too many Caffe Americanos for mommy).
Today, we attack a stack of cookies and turn the kitchen upside down. It seems the best days around here end in a destroyed kitchen that I then spend a good hour after they’re done cleaning – but it’s totally, undoubtedly, absolutely worth it. <3
This recipe is from a book of activities to do with preschoolers, so you know this cookie is sturdy! They are not horribly chewy, which would be a really weird texture for a cut out cookie, but they are not so tough they're really crunchy either - just perfect. Especially perfect for handing over half the batch to an eager 3 year old and 6 year old with royal icing covered aprons, an arsenal of sprinkles and a whole lot of imagination. They didn't break a single cookie! This is officially my new go-to recipe for cut outs. The only thing to note about them really is that they are not as white as a traditional sugar cookie and the cinnamon and ginger give them a spice cookie taste without being overwhelming.

Sturdy Cut Out Cookies – via The Preschooler’s Busy Book
2 1/2 cups flour
1 teaspoon cinnamon
1/2 teaspoon ginger
1/2 teaspoon baking powder
1/4 teaspoon baking soda
1/4 teaspoon salt
3/4 cup butter
1/2 cup liquid honey
1/3 cup sugar
1 egg
 |
 |
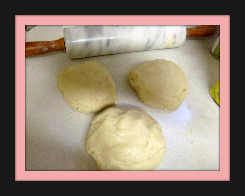
| Super super simple, just mix all the dry, then the wet and then the two together! I found they rolled out and baked best when I followed this method: Divide the dough into four balls and roll each one between two sheets of parchment and pop in the freezer for as long as it takes to roll the rest out between their own sheets of parchment. Then take out the first one you put in and cut out the shapes, pop it back in the freezer and repeat that until all four balls are rolled out and cut into shapes. Follow the same process for lifting the shapes onto a baking sheet lined in parchment and rolling and cutting new shapes. Bake at 375 for about 7 minnutes. | |
 |
 |
 |
|
 |
|
| The beauty of these is you can cut out whatever shapes you want (or whatever shapes your kids want) and then decorate them in any way you (or more likely your kids) choose – or even better, both! Win-win! I chose ghosts, Wee One #2 chose tombstones (the other two were totally uninterested in what shapes we used). I made my standard Royal Icing (2 large egg whites, 3 cups icing sugar and 1 teaspoon lemon juice). I tinted a little bit black, a whole lot gray and left the rest of it white. | |
In this post, I’m participating in Foodie Friday, Friday Potluck, and Food on Fridays
Sugar cookies are amazing because they have got to be the most versatile treat when it comes to being festive with themes. You can cut them into any shape you can imagine and then decorate them however you want. The only trouble is, unlike tasty drop cookies, you can’t just mix them, bake them and walk away!
I’m repeating this recipe for the eleventy billionth time here, but at least it’s organized, right? Really, this post is all about the dramatic photos.

Basic Sugar Cookies
1/2 cup + 6 tablespoons unsalted butter, at room temperature
3 cups + 3 tablespoons all purpose flour
1 cup caster sugar
1 large egg, lightly beaten
1 tsp vanilla extract
Cream butter, sugar and vanilla. DO NOT OVERMIX. Beat in egg till well combined and not a second longer. 😛
Add flour and mix till a sticky dough forms. Kneed into a ball and divide into 2 or 3 balls. Roll out each ball between two sheets of parchment paper for about half an hour. Preheat to 350, then take it out, peel off the first layer or parchment paper and slice it into strips like french fries!
Basic Royal Icing
2 tsp lemon juice
2 egg whites
3 cups icing sugar
Beat your lemon juice and egg whites together for a little bit before adding your icing sugar. You’ll want to thin it out a little for spreading (add drops of water till it’s the consistency you’re after), or add a little more icing sugar to make it that seriously thick stuff you typically find on gignerbread people in bakeries. I find this recipe just needs the smallest little touch of water and it’s perfect for spreading. It hardens just right and has a lovely shine.
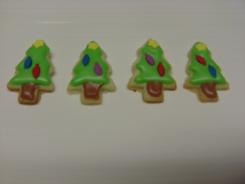
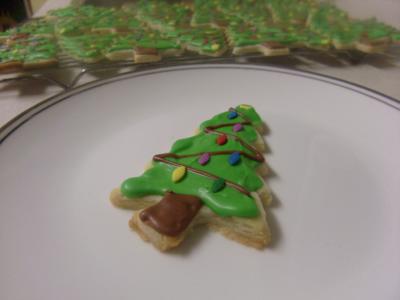
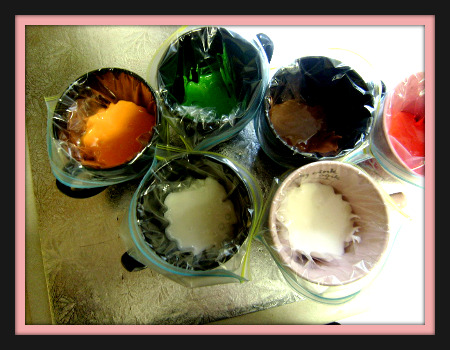
The fun thing about this icing really is the colours! I used paste food colouring for vibrant colours (and because it’s all I know – I grew up with a cake decorator)!
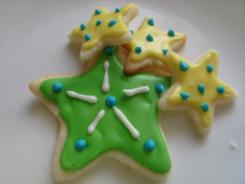
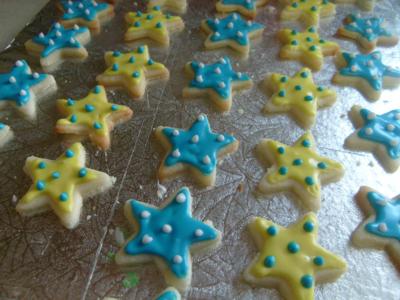
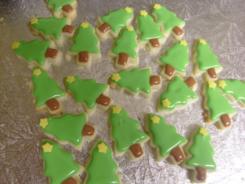
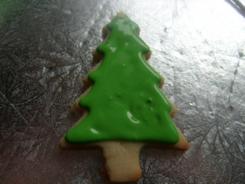
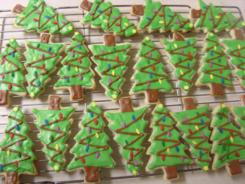
I first made these trees about a week ago, and tucked them away in tupperware for my massive decorating weekend. That weekend turned into another sugar cookie extravaganza so by Tuesday I had over 200 cookies to frost. Thankfully, frosting the cookies is one of my fave cookie activities!

Grand total sugar cookies to package up with the others; 22 stars, 22 trees, 44 small stars, 33 small trees and 11 mittens. Honestly? I loved every second of them. There were even more, but every time one broke, I had to give the kids the broken one – and the rest of the set lol!
Canadian Thanksgiving has already come and gone, but I know that American friends still have about a month to pull together some cute treats! As you are painfully aware by now, I adore cute food. I mean, I like snazzy grown up food as well, but I have a really soft spot for small, cute food (just wait till you see what I made for my birthday party last week)! I had seen these in various forms all over the place. But these ones are my hands down fave and I more or less used these as my guide.
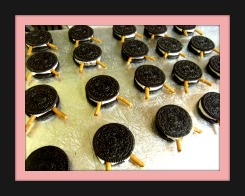
First off, use the Double Stuff Oreos Cookies and Cups pulled apart regular Oreos and mashed them together to create ‘Redneck Double Stuff’ (best name ever), so it’s possible to make them without, but to make enough for a classroom or large group, I’d imagine you’d need twice as many.
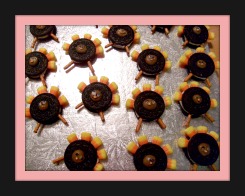
The first few steps are very, very simple. Poke 5 pieces of candy corn in a semi-circle around the top of the Oreo for feathers, then break pretzel sticks in half (technically, you need them to be a little less than half, but you can pawn the middles off on your kids – ha), and poke them in the bottom, like little turkey legs.
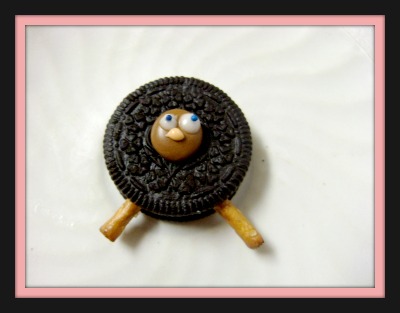
There are about a zillion ways to make the head. I have seen chocolate covered mini marshmallows, mini peanut butter cups, Malteasers, Skor balls (and of those chocolate bar in ball form would work). Me? I used brown royal icing, because I had a bunch left over and hate to waste. Depending on what you used as a head, the eyes and nose can be so many different things as well! I used more royal icing, white for the eyes of course and orange for the beak. I painstakingly put on green and blue sprinkles with tweezers to make the pupils. They added serious personality!
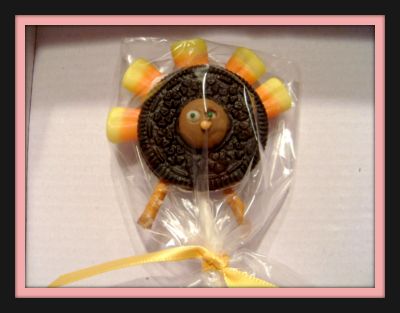
It has been said before, but I’ll say it again – cute food is so much cuter on a stick!
Naturally I had to wrap them for transport to school, and I’m not a part of the whole ‘getting to school’ process now that we live in the woods. So I used candy bags and orange ribbon for the kids to cart them off in shoe boxes on the school bus!
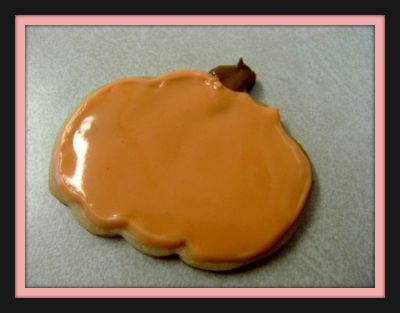
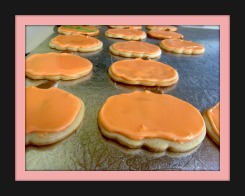
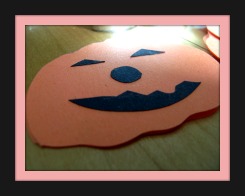
As cute as these Oreo turkeys were, they were not exactly the sort of thing to send for the teachers, but I still wanted their treats to be cute because while everyone knows that I’m doing most of the work, wee one #1 is an excellent measure-er and wee one #2 is a great dumper-inner. So the treats are coming from the kids too! I decided on these pumpkins because they’re festive for Thanksgiving, fall, and October all at once and they’re cute but not so cute they’re clearly meant for children.
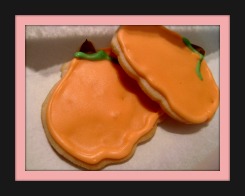
I packed the cookies in parchment paper, tied them with orange curling ribbon and tucked them in the kids shoe boxes with their turkeys.
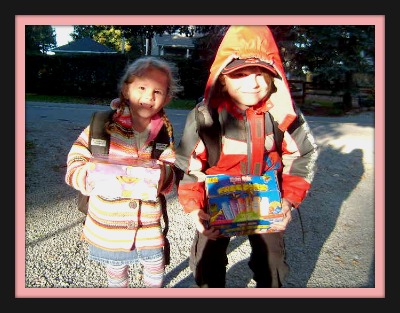
They were very excited to be bringing their treats to school. It’s the first holiday of the school year at a new school so I was a little nervous but everyone loved them!
The kids were feeling the Halloween spirit when they got home from school, and set to work on making little Halloween cards to send to their friends back in Toronto. I jumped on the wagon and made a bunch for my friends too and let the kids decorate them! That’s a whole other post!
In this post, I’m participating in The Daring Kitchen, Tempt My Tummy Tuesday, and Tuesdays at the Table
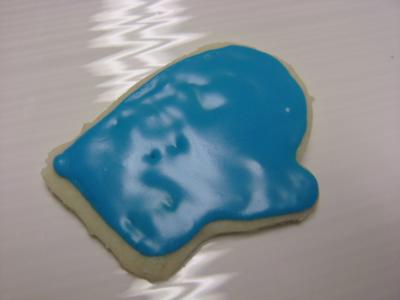
The September 2010 Daring Bakers’ challenge was hosted by Mandy of “What the Fruitcake?!” Mandy challenged everyone to make Decorated Sugar Cookies based on recipes from Peggy Porschen and The Joy of Baking.
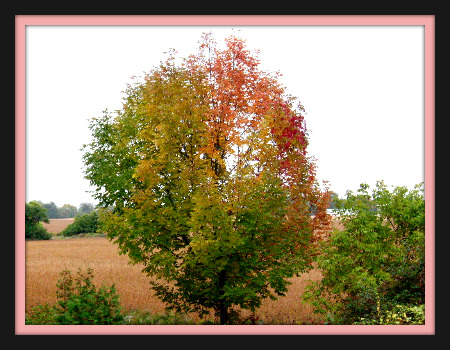
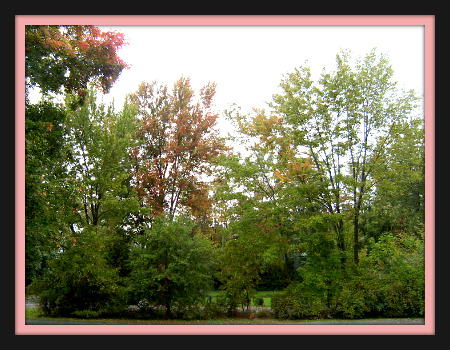
This was my first official Daring Baker challenge and I was so excited to do it, and now I am so excited to show it off!! The theme for this challenge was ‘September’, it was pretty easy for me to figure out which way to go with that when I am surrounded by these beautiful September colours! The first photo was taken in my backyard (it’s part of the view from my kitchen window), the second photo was taken in my front yard. With these colours as daily inspiration, I used brown, green, orange and red on my cookies.
I’m jumping ahead here, I actually baked them on Sunday afternoon and spent wee one #3’s nap on Monday decorating them. I prepared them exactly as Mandy instructed. Sugar cookies are pretty basic, but it’s the most basic recipes that are the easiest to mess up. In this case, whatever you do, DO NOT overmix! As soon as you’re combined, stop.
This recipe was a total winner and was explained so well, I can’t wait to make more. And more and more and more. Amazing. Kneading the dough into three balls and then rolling between parchment paper to reduce both chilling time, and the necessity to re-roll was genius. I have made a zillion sugar cookies, and these are by far the best.
Also, this is just the second time I’ve used my Granny’s rolling pin. It’s so weird and sometimes feels so wrong that I reference her so much more since she’s passed than I did when she was alive. It makes me feel both like a terrible granddaughter, and somehow really connected to her. Ever since we traded city for country I’ve been thinking of her a lot – she was certainty an old fashioned country girl making the city work for her. Anyhoo, her rolling pin is very, very heavy – it’s marble with wooden handles and I love, love, love it. In this case specifically, where I’m rolling out soft dough on parchment paper, it makes the job come together in a snap.

I really think the rolling, chilling, cutting, chilling, baking procedure makes the cookies hold their shape so well and make them so easy to handle. Which doesn’t matter much if you’re just going to eat them plain. However, if you’re, oh I don’t know, about to attack them with a kilo of royal icing, it would be so nice if they were sturdy cookies that didn’t fall apart when handling!
Ahem. Excuse my baggies, I need new piping bags desperately. My birthday is less than a month away and pretty much everyone knows I’d love a refresh of my baking gear. 😉
Decorating these cookies was so much fun! Wee one #1 was at school, wee one #2 was home from school with a cold (as much as she wanted to go the poor thing) so she was in the other room playing Mario Kart and wee one #3 was blissfully napping. A quiet, (mostly) uninterrupted stretch of time?? Really? I took it! LOL
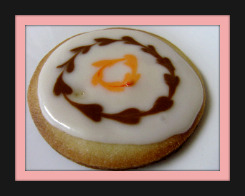
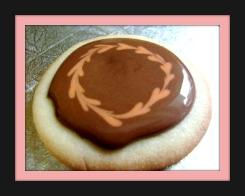
I had intended to also pipe out our initials (we planned when we named everyone to not repeat any initials!) but I got so wrapped up in the magic of dragging a toothpick through the icing, I had attacked all three dozen! Next time I make these, that’s the plan, but in brighter colours I think.
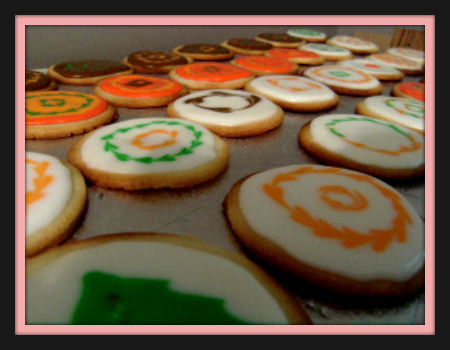
These cookies are destined to be in our neighbour’s tummies tomorrow afternoon. As I mentioned earlier, I have been here for 3 weeks and have only met two neighbours, so I will rectify that situation after wee one #1 gets home from school. Hmm. Maybe we should give some to the school bus driver as well!