Decoupaged Easter Eggs

Crafty, Kids

Decoupaged Easter Eggs

This is a pretty neat idea I bookmarked a couple of years ago on Say Yes to Hoboken. It’s very simple but very cute and can be used in Easter hunts, baskets or the as the original site suggested, as place settings! I made them for an Easter potluck my mommy group put on. I’ll post pictures of all of that insanity fun tonight!

Decoupaged Easter Eggs
First tap the top off your eggs and empty them, (refrigerate for baking or scrambling later). Then rinse them and let dry overnight (or longer).
Decoupaged Easter Eggs
Once they’re dry, fill them with whatever treats you want! I filled half with jellybeans for the kids and half with stickers for the toddlers.
Decoupaged Easter Eggs
Using a paintbrush, tissue paper and a whole lotta glue, attack these little guys until they are covered. Then let them dry for about a day! Voila!
2 Comments

Greek Easter Bread aka Tsoureki

Domestic

I love, love, love Greek Easter bread (technically it’s called Tsoureki). My mother is Greek so any time we celebrated something a second time because of the Eastern Orthodox calendar we just called it Greek Christmas or Greek Easter or whatever food we were eating that was slightly different because of the Mediterranean influence we’d toss the word Greek in front of it and my sister and I would happily partake in whatever it was. Now that I’m older and have been ribbed by my friends for years that it’s actually Eastern Orthodox Christmas and Eastern Orthodox Easter we were celebrating two weeks after the western version and that it’s more like Mediterranean chicken and pilaf – not just for Greeks – but I don’t care. I still use ‘Greek’ instead of ‘Eastern Orthodox’ and I can’t help it. πŸ˜‰

This year, Greek Easter falls an entire month after western Easter but I’m baking up some Tsoureki anyway – because why not? I made this before we left Canada and one of my (painfully honest) Greek aunts said it was good, which is the equivalent of angels singing and clouds parting after two days in the kitchen trying to get it right. All it takes is the right recipe – and a little patience.

Greek Easter Bread aka Tsoureki

Tsoureki via Thea Rika

8 cups all purpose flour (plus more for counter)
1/2 teaspoon salt
1 1/2 cups warm milk
3 envelopes dry yeast
1 2/3 cup unsalted butter
1 2/3 cup sugar
zest of one orange
zest of one lemon
1 tablespoon mahlab
5 eggs, lightly beaten

1 egg, beaten with a splash of water
sesame seeds or chopped almonds for sprinkling
1 red egg (optional)

It’s not that far from making sweet rolls, really.

Sift the flour and the salt, dissolve the yeast in the warm milk (not too hot or it’ll kill the yeast), after a few minutes add 1/2 cup flour and 1 tablespoon of sugar. Now let it sit till it foams up. I usually cover it too.

Melt the butter in a large saucepan, stir in the rest of the sugar, the orange zest, lemon zest and mahlab. Remove from heat and stir in the beaten eggs.

Using a large bowl, combine your yeast mixture with your warmish egg and butter mixture and very slowly add in the flour. Cover it and let it rise for two hours.

Now is the fun part! Sprinkle your counter with flour, punch down the dough and knead it. Separate it into four balls and let them rest for 10 minutes. Roll the pieces into long strips, about 12″ long. Braid the dough, tuck it into a loaf pan and place your eggs in the braid. Let it rise again, this time for about an hour. Preheat your oven to 350.

Before you pop it in the oven, brush an egg wash over it (just water and an egg whisked together) and sprinkle with sesame seeds or almonds (or not). Bake for about 30 minutes until the top is golden brown.

Greek Easter Bread aka Tsoureki

Greek Easter Bread aka Tsoureki

No Comments

Guinness Chocolate Cupcakes and Baileys Cream Cheese Frosting

Domestic

I know that normally when booze is equated with St Patrick’s Day much chaos ensues. I’m not saying my weekend was free from self-induced late night chaos, but these cupcakes were not responsible! The minimal amount of beer in the cupcakes cooks off in the oven, I swear. The booze in the frosting though? That’s all there! If you’re sharing with littles, make a second batch of Bailey’s-free frosting!

The smell of Guinness and cocoa together reminds me of the year a whole gang of us got together in Toronto to celebrate and I ended up making a different version of this recipe. It was just ok, nothing to blog about. This version though? Amazing. I held out a night and a day before I caved and had one of these cupcakes. So glad I did too! It was crazy, crazy, crazy good!

Good for you though, not so much. In the words of my friend Jillian when she first saw this recipe ‘I gained six pounds just looking at that.’ Considering the alarming amount of sugar in this recipe that’s entirely possible so make sure you share it!! Cupcakes are handy for sharing and if you keep them in the tray like this with a lid, it’s obvious if you nicked one and the social outcasting alone may cause you to hold back. It worked for me! Haha. I brought them to my homie Vanessa’s place and I’m pretty sure her boyfriend ate them all. <3 Guinness Chocolate Cupcakes and Baileys Cream Cheese Frosting

Guinness Chocolate Cupcakes via Closet Cooking

Cupcakes
1 cup unsalted butter
1 cup Guinness
3/4 cup unsweetened cocoa powder
2 cups all purpose flour
2 cups sugar
1 1/2 teaspoons baking soda
3/4 teaspoon salt
2 large eggs
2/3 cup sour cream
Frosting
4 ounces cream cheese, room temperature
1 cup confectioners sugar
3 tablespoons of Bailey’s Irish cream

*This can be made ahead of time. Just beat the cream cheese till it’s smooth and slowly add the confectioner’s sugar until it’s a little lumpy and almost looks like frosting, then slowly add the Bailey’s. It’s pretty much the same as normal cream cheese frosting but with Bailey’s instead of milk!*

It’s a fairly simple and quick recipe! First melt the butter in a pan and set it aside to cool.

Guinness Chocolate Cupcakes and Baileys Cream Cheese Frosting
Now mix the Guinness with the chocolate in a medium bowl.
Guinness Chocolate Cupcakes and Baileys Cream Cheese Frosting

In two more bowls mix first the flour, sugar, baking soda and salt and then the eggs and sour cream separately.

Guinness Chocolate Cupcakes and Baileys Cream Cheese Frosting

Now add the Guinness mixture to the egg mixture and stir that into the dry ingredients.

Guinness Chocolate Cupcakes and Baileys Cream Cheese Frosting
Bake at 350 for about 35-45 minutes, let them cool and frost them! I made 24 cupcakes with this recipe.
Guinness Chocolate Cupcakes and Baileys Cream Cheese Frosting
1 Comment

St Pats 2013 Rewind

Kids

I had a lot of grand plans for St Patrick’s Day this year and then Wee One #3 got sick with some horrible laundry-inducing illness. Yuck. Then just as she recovered enough for me to leave her side, I got some kind of sinus attack. Sinuses are tricky buggers, I am discovering. So by Sunday I was not really feeling the rainbow cookies and pot of gold brownies (here’s hoping I can make that happen next year).,

However, I did manage to pull together some very moist and delish Guinness Chocolate Cupcakes with a batch of Bailey’s Cream Cheese Frosting for a little Saturday night celebrating with my homie Vanessa. We had too much fun for photies, unless you count all the pictures we took of the kitten and tiny dogs we put in costumes…but I digress. The recipe for these little gems will be posted tomorrow, for now you get a little peek at what a leprechaun did while we were all sleeping!

First he made bright green pancake balls in my cake pop maker – and didn’t clean up after himself! He did leave some chocolate coins though!

Then made little messes with the kid’s stuff and left them chocolate coins too! He took Wee One #3’s play food from her kitchen and made a little food rainbow with it, and a pile of chocolate coins at the end! The took all of Wee One #2’s library books from this week and made a little book rainbow with them – complete with the chocolate coins at the end.

Naturally, Wee One #1 was not spared just because he happens to be not so wee anymore. His XBox games were made into an XBox rainbow with, you guessed it, chocolate coins!

St Pats 2013 Rewind
St Pats 2013 Rewind
St Pats 2013 Rewind
St Pats 2013 Rewind
St Pats 2013 Rewind
St Pats 2013 Rewind
No Comments

Knitted Bunnies

Crafty, Kids

Knitted Bunnies

I found these little cuties over at Mollie Makes and I’m set on making one for each wee person coming to our Easter potluck! The bigger kids will get bunnies with button eyes and the babies will get bunnies with embroidered eyes. I’m still working on them and some other little treats for the baskets, I’ll post the finished product when it’s ready but I had to share this pattern! Even if you don’t feel that you knit very well you can pull these little guys together.

Their construction is pretty simple. You knit one ear and place it on a safety pin to keep the stitches live. Then knit the second ear and just knit the first ear onto the same needle as the second. Then the base of the bunny is knitted after that so it’s all one piece, no seaming! Hooray, I totally hate seaming (and you probably do too)!

These bunnies are deliciously wonky and I adore them this way. There are so many patterns for less wonky creatures but I think there’s something about the silliness of this pattern that makes me happier than it probably should.

Knitted Bunnies
Knitted Bunnies
Knitted Bunnies
No Comments

Peep Tree

Crafty, Kids

This is for sure one of the more random holiday crafts I’ve tried my hand at, but when I saw one I knew I had to see it for myself. I decided to try it now because Peeps were on sale at Big Lots and this is not an edible craft once it’s been put together!

I have seen so many different versions of this project online I think we all gather our supplies, sit down with a tutorial and then we each attack it differently! That’s what happened at our house anyway and it worked out pretty well I think.

Peep Tree

Peep Tree
-lots and lots and lots of peeps in different colors (chicks or bunnies, your choice)
-small flower pot
-styrofoam ball
-florist’s brick
-dowels
-eleventy billion toothpicks
-at least one bag of jellybeans
-spray adhesive helped me a whole lot

The only rules to follow really are to cut your florists’ block to fit your flower pot, poke your dowels in there and poke the styrofoam ball on top. Fill the flower pot with jellybeans to cover the florists’ block and away you go with the peeps! I found it helpful to spray a little spray adhesive on the back of each peep and on the toothpick so the toothpick would stick to the peep and the peep would stick to the styrofoam ball (and later to other peeps). I know the marshmallow holds on to the toothpicks anyway, but after a while gravity takes hold and really pulls those suckers down.

This tree is not really the kind of deco that kicks around from year to year. Since the jellybeans are loose it’s not really storage friendly, and since it takes some serious black magic for this thing to stay together without glue on it, it’s not like you can eat it when Easter hits.

I do however have a fun Easter morning deco that is edible but you’ll have to wait till we are a whole lot closer to Easter for that little gem. πŸ˜‰

Peep Tree
Peep Tree
Peep Tree
1 Comment

Easter Bunny Cake Pops

Domestic, Kids

I. Love. Easter.

I know, I know. I love Valentine’s Day and Halloween and Christmas too. So what? I love to bake for my littles and their buddies and craft like a kid and any excuse for a party of small people makes me incredibly happy. My goal this year is to find the time to blog about it all!

My husband found some pastel candy corn while out running errands and knew I’d be able to use them for ‘something cute’. He was right, naturally!

Technically, cake pops are made by mashing frosting into cake and shaping into balls before poking sticks in the ends and dipping in melted chocolate. Lately, I have been using my Babycakes Cake Pop Maker and then poking a stick in and dipping in chocolate. This time around though, I felt that it called for ‘traditional’ cake pops and I went with mashing frosting into cake for the right texture.

The pastel candy corn of course ended up being used as their cute little ears. I used individual sprinkles and my serious kitchen tweezers for the eyes and little butterfly sprinkles for their noses. You can really use whatever you want as decoration for the bunnies as long as you get a basic bunny shape. If you’re feeling especially adventurous you can always make some cake pops and invite the kids to decorate them with you!

We were passing them out to school friends so we wrapped them up. I think I will make another batch to spread some Easter joy in our neighborhood!

2 Comments

A Little Birthday Celebration

California, Kids

Little Miss Wee One #3 is officially 4, officially not so much a little person anymore. I mean, don’t get me wrong, I know that 4 year olds are still tiny and sweet and mispronounce words in the most delicious ways, but 4 is a pretty big deal. We’re homeschooling right now, but it’s technically ‘school age’ and she’ll be enrolled in the same independent study program as our other two this fall. It’s really neat to see the little person she is becoming – so exciting!!

We had a wonderful weekend plan in place for her birthday until a totally unforeseeable kink was thrown in and our plans had to be moved around so much they hardly looked like our plans in the end! Not to be deterred, Mr So Very Domestic and I cooked up a new plan and I think it ended up even better than the original one.

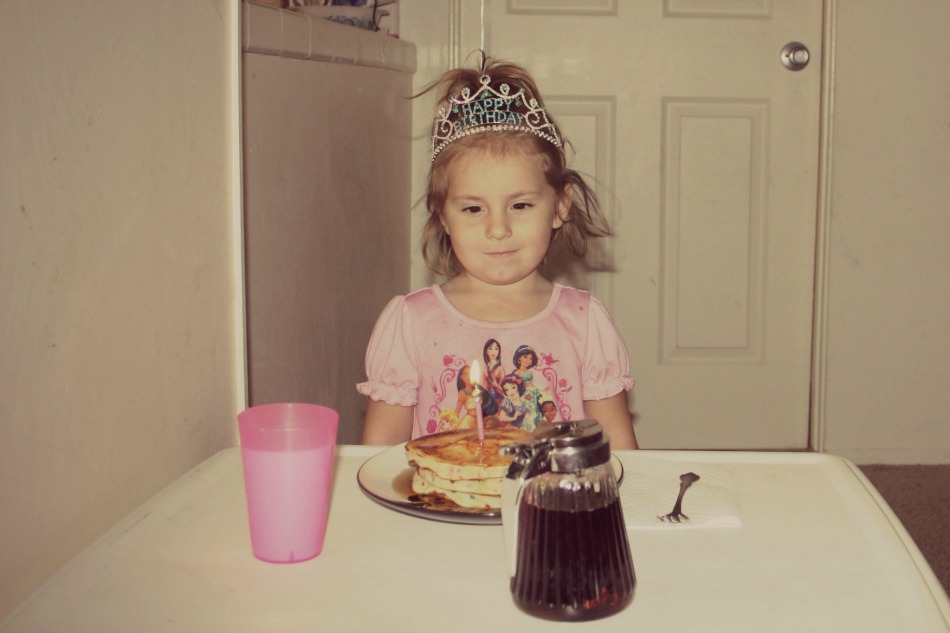
Festivities kicked off on the morning of her actual birthday. Just like with everyone’s birthday, my husband and I blew up 20 balloons, tied curling ribbon to them and hung them from the ceiling in the living room. So cute to wake up to! Wee One #3 is our only earlier riser (but not as early as us so by the time she got up, Daddy was already at work) so we had a tiny little early morning celebration just the two of us. I confess this so much it hardly feels like a confession at this point but the only thing I ever miss from before homeschooling is not having the alone time with the littlest that I had with our older two. Stealing all the little pieces we get makes up for it. πŸ˜‰

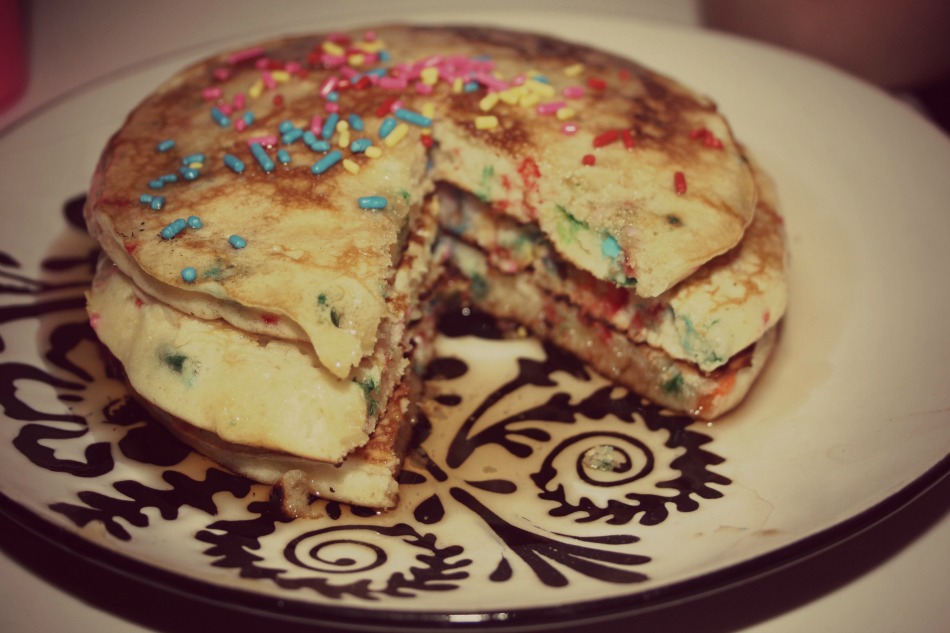
I whipped her up some birthday pancakes, which are really just normal pancakes with a hit of cake mix and sprinkles. I have seen this recipe all over the place (and of course by that I mean Pinterest) and it’s a thinned out icing that’s sprinkled on top. I’m not above sprinkles in pancakes but I draw the line before the thinned out icing sugar, man. I went with pure maple syrup.

Cake Batter Pancakes via Betty Crocker

1 cup Bisquick mix (or any pancake mix)
1 cup yellow cake mix
3 tablespoons candy sprinkles
1 cup milk
1 teaspoon vanilla
2 eggs

The recipe included the thinned out icing sugar recipe I mentioned. I didn’t use it, but I’ll include it in case you want to!

2 1/2 cup powdered sugar
3 tablespoons plus 2 teaspoons milk
1 teaspoon vanilla
more candy sprinkles <-- I do recommend adding more sprinkles on top though!

I’m not going to tell you how to make pancakes. Even if you just dumped it all in a bowl at once and attacked it with your whisk it would work, so have at it. Just make sure you stick a candle on top of the stack and cut into triangles!

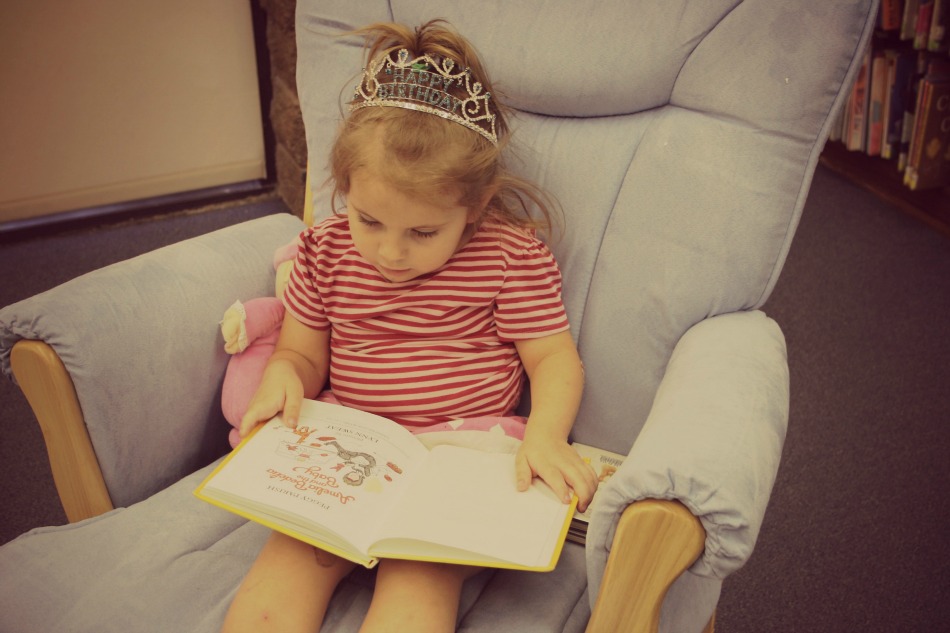
It was a busy day around here aside from it being a birthday! We had JiuJitsu, we had ballet and we hit the library between the two. On our library visit this morning, they were celebrating Dr Seuss’ birthday as well! So we hung out for a bit, took out a few Dr Seuss books to add to our bedtime haul for the week and headed back home.

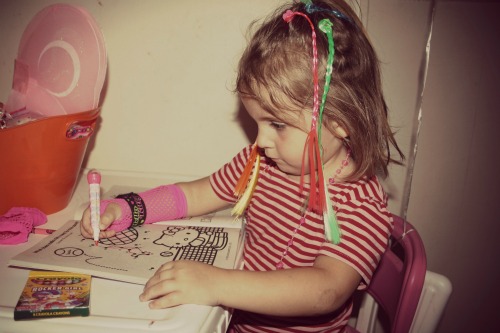
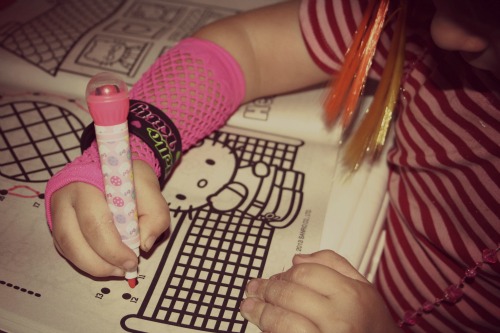
We spent the rest of the afternoon singing songs and playing games and coloring in all her coloring books because coloring is her second favorite thing. Dare I admit publicly what her favorite thing of the moment is? Sigh, my littlest little really, really, really loves to play Minecraft. My husband and our two older littles play together on a private server. They build these epic villages together and laugh and joke and I watch and knit. On her birthday, Wee One #2 had a long dance rehearsal and when I left to drop her off my husband and our oldest started playing Minecraft with Wee One #3. They played all afternoon and long past bedtime. They built a huge mansion, complete with a library and a massive kitchen. Wee One #2 built a barn to house all of Wee One #3’s farm animals after she got back from the studio. There was even a pirate ship! We interrupted the festivities to sing happy birthday and blow out some candles and open a few gifts. Then it was back to Minecraft! Hahah one track mind!

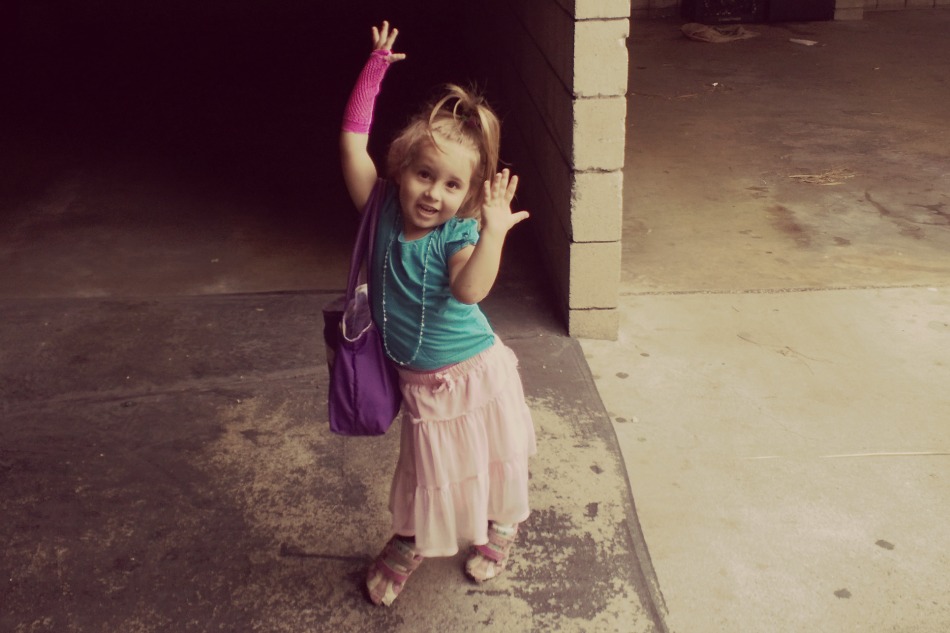
My friend Katie, (or maybe I should say Wee One #3’s friend’s mother), dropped off a really sweet package filled with so many of her favorite kinds of things. After she opened that gift she played with it’s contents for an incredibly long time for a newly 4 year old. Then the following day she wore a hilarious assortment of accessories from it when we ventured out for more celebrating.

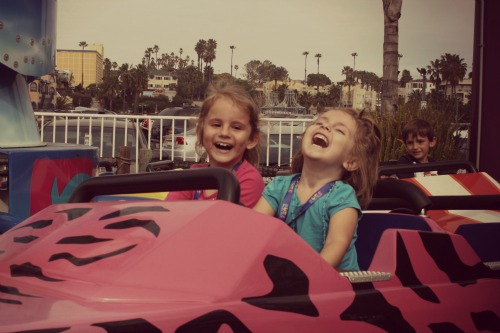
The second part of her birthday was spent at the Santa Monica Pier! We divided our time between Pacific Park (always a great time) and the Santa Monica Aquarium!

The Santa Monica Pier has become one of our favorite places because it combines my love of the ocean and palm trees with the kids’ love of rides and fast food. It’s also a nice drive so my husband likes it, that and all the great photies we get of the kids there! The girls have passes so they were hopping all over kiddie land while I snapped these pics and my husband and our oldest wandered around the pier.

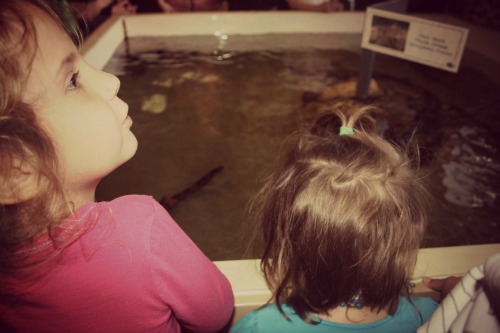
The Santa Monica Aquarium was celebrating it’s birthday this weekend too! They had face painting and balloons and cute little candles in the tanks. Adorable! We even managed to stay on time and make it to the shark feeding! Wee One #2 was one of the kids who got to toss a piece of squid to the little sharks and Wee One #3 got splashed by an excited shark and decided she’d rather go to the touch tanks and poke starfish instead (apparently she only wanted to touch the rocks in the tanks hahaha).

*There are so many fun projects to post about and so many fun projects coming up! The kids have been so busy and then by proxy (and shuttling) so have I. All for good causes, of course just extremely time consuming!

3 Comments

Baking Soda and Tinted Vinegar – Preschooler Activity

Homeschooling, Kids

Baking Soda and Tinted Vinegar - Preschooler Activity

I mentioned last month that I’d post some things I do for my preschooler while I’m busy working with my older two and this one is a big hit. The first time I did this I used squirt bottles instead of eyedroppers and I’ll tell you right now, just get some eyedroppers. It makes the activity more fun and you will find countless other uses for them.

Pour out a box or two of baking soda into a medium/large container. Pour plain white vinegar into small containers and use food coloring to tint each one a different color. When Wee One #3 saw the baking soda fizz and poof up, she was sold. She played around with this for almond an hour. Then, she found another way to play with it! She asked for a tiny spoon, so I gave her my 1/4 teaspoon and she started scooping the baking soda out of the tupperware and plunking it into the vinegar. Check out the blue vinegar in the last row of photos for an action shot of that. Much bigger fizz! Of course dumping baking soda into vinegar isn’t as much of a time sink as the other way around, but it rounded out another half hour and I was able to start to finish a grammar lesson for my 2nd grader and a math lesson for my 7th grader and my preschooler happily experimented alongside us.

She has asked to do this activity over and over again also, so it’s definitely a repeatable activity!

Baking Soda and Tinted Vinegar - Preschooler Activity
No Comments

Coconut Banana Granola Bars

Healthy

Early in 2011 my husband and I watched way too many documentaries on food and health in general. The three that affected us the most were Food Matters, then Food Inc, and then Forks Over Knives a few months later. Ouch. It was hard to watch as a meat / dairy / processed foods eating couple. Since then we eat a lot less meat and dairy, and the meat and dairy we do eat now is organic. I have always been really big on making as much as possible from scratch, but my concept of ‘as much as possible’ is a lot different now – even though with homeschooling and adventuring around LA we have less spare time than ever, it’s totally worth it to find the time. (it’s a good busy)!

Last year, I posted a recipe for homemade granola bars that I still use on the regular for the kids. They’re pretty good and only have one questionable ingredient – marshmallows and as I said in the original post, if you make them yourself they’re not all that questionable anymore! These granola bars are for anyone who likes banana and coconut. None of my littles like coconut – crazy right?! My husband and I looooove coconut so these babies are the grown up granola bar around here now. πŸ˜‰

Coconut Banana Granola Bars with Chocolate Chips via Undressed Skeleton

1 cup organic flaked coconut
1 large (extra ripe) banana
1 cup whole grain oats
1 tbsp vanilla extract
1/2 cup ground flax
1/4 cup almond milk
1 packet truvia (or whatever you use for sweetening)
*the original recipe used 2 tbsp vegan chocolate chips but I skipped them

Super simple and so good aaaaand no flour, no eggs, no dairy, no added sugar, no butter, no oils!

Mash the banana and add to a bowl with the coconut, flax, vanilla, oats and truvia. Slowly add the almond milk until it holds it’s shape and then just pat into a pan. If you’re using chocolate chips, now is the time to add them. It’s not runny so you can get away with using the middle of a pan (like I did) or you can use an 8 x 8 pan. Bake at 350 for 12 minutes and let cool before cutting.
2 Comments
« Older Posts
Newer Posts »