In this post, I’m participating in The Daring Kitchen!
The January 2011 Daring Bakers’ challenge was hosted by Astheroshe of the blog accro. She chose to challenge everyone to make a Biscuit Joconde Imprime to wrap around an Entremets dessert.
Here we go, another French dish from the Daring Kitchen. However, unlike the Cassoulet I made a few weeks ago that didn’t look too complicated once served but actually took 3 days to make, this little treat looks like I slaved over it forever but really it came together super quick. I did hit a totally unrelated-to-the-hard-part snag when I ran out of chocolate pudding ingredients. I just could not bare to use plain instant pudding in this lovely creation, and chocolate pudding is what the wee ones requested inside it. Anyhoo, it’s done now. Two days late.
So the challenge was to make what I think is best described as a cake-like wrap for a mousse or pudding or something like that. I know I’m dumbing it down horribly, but that’s essentially what it is. The fancy part, and of course there is a fancy part this is a Daring Kitchen challenge after all, is that there is a layer of decorations baked right into the cake. I have seen them in bakeries, but I have never tried one. Turns out, it is very similar to the jelly-roll type cake we used last summer when the Daring Bakers made swirly ice cream cake. Oh. My. Goodness. I went to find the link for you to see what I was talking about and I didn’t post it!! In my defense this challenge came on the heels of my Granny’s passing and I didn’t really do much of anything but bake and eat and bake and bake and cry and eat. Ahem.
Moving on. First you need to make the batter for the ‘sponge’, as the recipe calls it.
Joconde Sponge – via Daring Kitchen
3/4 cup almond meal
1/2 cup plus 2 tablespoons icing sugar
1/4 cup cake flour
3 large eggs
3 large egg whites
2 1/2 teaspoons sugar
2 tbsp butter, melted
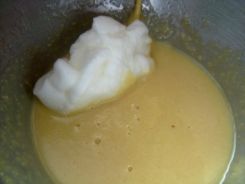
So first you whip your egg whites and sugar until they’re meringuey, set aside.

Now sift the almond meal, icing sugar and cake flour (original recipe notes that you can do this in your dirty meringue bowl, so I did). With the mixer on medium, add the eggs individually, then mix until smooth. Fold in a third of the meringuey mixture, then fold in the rest. Finally, fold in the melted butter.
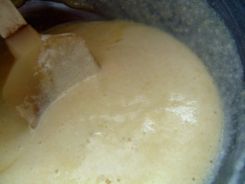
Done! Set this aside. You’ll need it soon enough!
Now, you need to make the decorative part.
Patterned Joconde-Décor Paste – via Daring Kitchen
14 tbsp butter, softened
1 1/2 cups plus 1 1/2 tablespoons icing sugar
7 large egg whites
1 3/4 cake flour
Food coloring gel, paste or liquid
Oh boy. That’s right people! 14 tablespoons of butter (of course I used Becel, but still) and 7 egg whites! 7. Sigh. You know I only went through with this to make Julia Child proud. Duh.
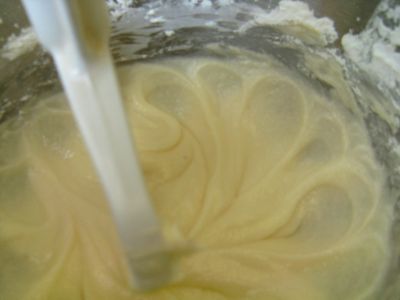
Ok, so first cream the butter and the sugar till nice and fluffy. Then add your gigantic pile of egg whites. Mix. Fold in the flour and voila. You’re ready to tint it. I went with three colours. I asked Wee One #2 for her opinion on colours and just as I expected, she suggested Pink, Purple and Blue. Away we go!
So I divided the paste into three cups, tinted them and filled my pastry bags (I used 2 #2 tips and 1 #3). Line a baking sheet with parchment paper and pipe on decorations to your heart’s content.


Then, pop the baking sheet in the freezer for about 20 minutes. I’m not entirely sure why the recipe has us making the joconde sponge batter first when it could easily be done at this point in the game – but I did as I was told!


Once your piped decorations are frozen, pour the sponge on top of it! I know, it’s weird. Just do it.

Bake at 475. Yup. 475 for 15 minutes. Or a little less. My edges burnt horribly!


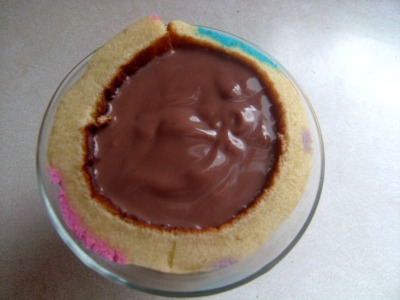
So now, you’ve got this spongey cake with beautiful decorations baked right into it – now what?
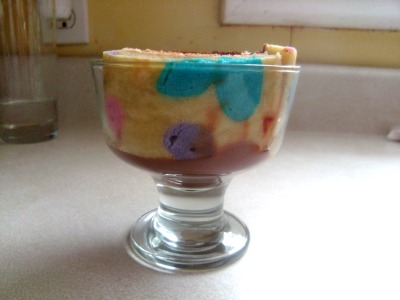
This is where I strayed from the instructions because there was talk of using a PVC pipe (really, there was) or a springform pan with the base removed. So what did I do? I used clear glass dessert dishes! That way I could show off my adorable little hearts and polka dots while holding the chocolate pudding I intended to put inside!
I didn’t even get to taste one because the wee ones gobbled them up – which totally works for me!