In this post, I’m participating in Tempt My Tummy Tuesday, and Tuesdays at the Table
Wee one #1 turned 10 this summer, and he wanted a serious birthday bash to celebrate. I’m always up for throwing birthday parties, as I’m sure you’re well aware at this point, so once he figured out his guest list and theme, I started playing in the kitchen!
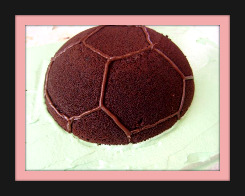
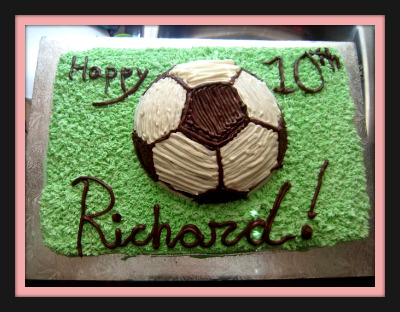
He’s very big on soccer, so a soccer theme was an obvious choice, and naturally he asked for a 3D soccer cake. I have watched my mother make countless 3D cakes, mostly of the soccer ball and teddy bear variety but I have never made one on my own and I was a little nervous about it. However, I never back down from a kitchen challenge, so I called my mother for some tips (and to borrow her soccer ball cake pan).
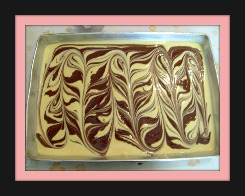
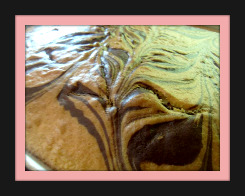
First I made a marble slab cake to go under it, and then I made a chocolate cake for the soccer ball. I made a double batch of green buttercream icing for the grass, then I made a half batch of plain buttercream for the whites in the soccer ball and another half batch of chocolate buttercream for the black in the soccer ball and the wording. In hindsight I really should have picked up some black gel colouring (hmm, and if I had, I’d have some on hand now at Halloweeny time). Anyhoo, once I made a crumb coat of green on the slab, I evened it out and went to work outlining the soccer ball.
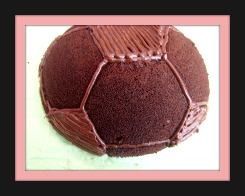
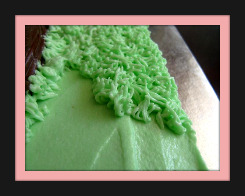
Once that was done, I piped on the grass with a wilton grass tip, which really makes you look like you are an accomplished cake decorator, when really you’re just the kid of an accomplished cake decorator. I wont tell if you don’t. 😉
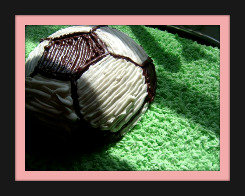
I used a wilton #2 tip for filling in the soccer ball, though my mother always uses a 16 or 18 star tip and pipes on about a million little stars. Moving on…I filled in the grass to make it nice and full and then I used the #2 to pipe on the words. He and his friends loved it, so that’s all that really mattered to me anyway. I thought it was pretty cute too.
I seem to be incapable of baking just one thing for any occasion. Incapable. So, once the cake was finished, I very carefully carried it to the basement kitchen where no one would see it or touch it and set off to bake more treats!
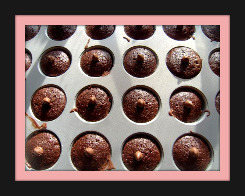
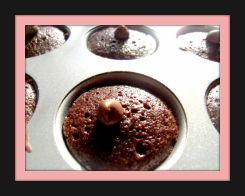
| First up was chocolate chip brownies. They were as good as they look!
Chocolate Chip Cocoa Brownies Preheat oven to 350. Grease a mini cupcake pan. Sift flour, cocoa, baking soda and salt together. Set aside. Melt the butter in a saucepan over medium heat. Take off the stove and mix in the sugar. Add the eggs, one at a time, then vanilla. It’ll be runny and ‘gloopy’. Add the flour mixture, and stir, stir, stir. It’ll be a little tricky at first but it’s worth it. |
|
| Now, add in about half a cup of chocolate chips. I say ‘about’ because when a recipe tells me to add chocolate chips, I always put in more.
Fill each mini muffin cup about 3/4 full, and bake for about 10 – 15 minutes. Check your oven! As soon as they come out – when they’re still horribly hot, put a single chocolate chip on each one. Give them 10 minutes or so to cool off before putting them on a wire rack to cool completely. |
|
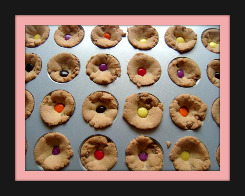
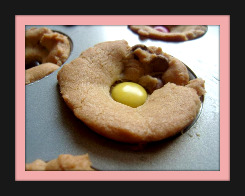

Next up was chocolate chip cookie cups. I made a very standard chocolate chip cookie recipe, and baked them int the same mini muffin pan as the chocolate chip brownies. I used the back of a rounded tablespoon to give them a bit of a dip and just like the brownies, I put the Smartie on top after they came out of the oven.
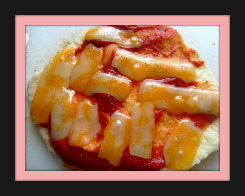
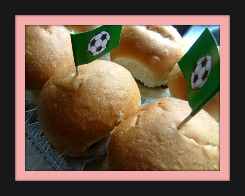
The kids wanted to make their own snacks for lunch, and all kids have a natural affinity to burgers and pizza right? And everything is more fun when it’s small, right? Enter mini pizzas and mini burgers – and even with all the veggies available to them, they ALL made identical pizzas (tomato sauce and cheese). I sort of saw this coming, so I made the dough from scratch (whole wheat) and I made the tomato sauce too (as many veggies as I could reasonably cram in with a generous helping of oregano to make it ‘pizza-y’). Ha! Mom win!
This ended up being a bit of a Smell You Later party for the kids in addition to being wee one #1’s 10th birthday because we moved two weeks later! It was a fun send off for him and all the kids were happy – we had a pinata of course they were happy!!