Vegan Chocolate Bites

Healthy

Sometimes I come across a recipe that’s very vegany and it tastes like rocks and sticks and dirt. Usually, I’ll eat it anyway because I know it’s good for me and really, vegan kitchen fails can be pretty pricey!

This one though, it’s not at all like rocks or sticks or dirt! It’s actually sweet and sort of chocolatey! It’s also not pricey if you have most of these ingredients on hand and there are plenty of subs if you don’t. They’re also really, really, really easy to make. Just mix some stuff, then toss some stuff in the food processor, the combine both mixtures and shape into balls (or whatever).

Vegan Chocolate Bites
2 ripe bananas
4 tablespoons almond butter (any kind of nut butter will work really)
4 tablespoons agave (or sugar is fine too)
2 tablespoons wheat germ (or flax if you want)
1/2 cup raw oats
1 cup dates
1/2 cup walnuts
1/2 cup almonds
1/4 cup shredded coconut
1/4 cup raw cocoa

Vegan Chocolate Bites
Mash the bananas and mix with the almond butter, agave, wheat germ and oats.
Vegan Chocolate Bites
In the food processor, mix the rest of the ingredients until they’re all mashed together.

Vegan Chocolate Bites

Now just shape into balls and leave in the fridge for a few hours to set up. Voila!

Vegan Chocolate Bites
No Comments

Super Easy Apple Dumplings

Domestic

Generally, when I come across a recipe that uses something premade in it, I shy away from it. Mostly because I’m a full blown bit of a kitchen snob. However, I’m madly in love with Miss Ree Drummond and she uses a very popular refrigerated dough in these dumplings so I went with it and honestly? They’re so so good, it doesn’t even matter. Also? This recipe is totally weird but I trusted it and my neighbors loved them too! In her description about these dumplings, The Pioneer Woman says she had to toss the rest of the tray after trying one (and then another and another). That’s pretty much what happened to me as well, but since we don’t live in the woods anymore I just packed up the rest and took them to my neighbors.

Ok so I classified this recipe as ‘totally weird’ because it involves two sticks of butter, refrigerator crescent roll dough AND a can of Mountain Dew. I know, right?! It feels so wrong, but it’s crazy amazing.

Super Easy Apple Dumplings

via The Pioneer Woman

2 Granny Smith Apples
2 8oz cans refrigerated crescent roll dough
2 sticks butter
1 1/2 cup sugar
1 teaspoon vanilla
cinnamon (enough to cover)
1 12oz can Mountain Dew

Super Easy Apple Dumplings

So first, butter up your baking pan and cut your apples into equal slices and wrap each one in a crescent roll segment. Arrange the wrapped apple slices in the buttered pan.

Super Easy Apple Dumplings

Make the first part of the sauce by melting the butter and adding the sugar and vanilla but don’t stir it much, you want it to have some sugar chunks. Now, pour the butter mixture all over the prepared apple crescents. Theeeeeen, put the Mountain Dew on it. I know, I know. Just just do it, I swear. It looks very, very wrong at this point. I was a little iffy about putting it in the oven, but I did. So glad I did. Sprinkle with cinnamon and bake at 350 for about 30 – 45 minutes. Your house will smell alarmingly good.


Super Easy Apple Dumplings

Just look at this thing!! It’s runnier than you probably think it should be, but don’t worry about it. Lift them out one at a time and spoon some of the sauce over top.

Super Easy Apple Dumplings

The butter and the soda make the bottom of each dumpling soft and mushy in the best possible way. They are not crescent roll-esque at all – butter and soda and heat magically transformed them into dumplings. You can add some ice cream if you must, but the built in sauce is awesome enough!

Super Easy Apple Dumplings
1 Comment

Alphabet Tree for Kindergarten Sight Words

Homeschooling, Kids

When we kicked off our 2013/2014 year of homeschooling, we went with the kinder program for our 4 year old, and I’m really excited about it. Having the alphabet on the wall in the kitchen helped her to learn all the letters, so having the words we are working on up on the wall should help her to learn those, too. I have seen other, smaller alphabet tree activities like this one, this one, and this one. When I was a kid, I had a small collection of Leo Lionni books and The Alphabet Tree was my favorite. Clearly, I was inspired by this book!

The tree itself is just construction paper blue tacked to the wall, and I used these adhesive foam letters for the words. I have random letters here and there and also the words cute, candy, play, helpful, funny and sunshine. I made this to have a fun place to display the words we are working on so she can see them everyday. I didn’t want o ruin the construction paper and constantly having to repair it, so I laminated five pages of construction paper – four for the tree part and one on the trunk. Each new word that she works on will go up in the tree and once she learns them we’ll put them in a basket and add new ones.

Alphabet Tree for Kindergarten Sight Words
No Comments

Galavanting Around Los Angeles

California, Kids

My husband’s parent’s visited for almost two weeks, it was their second visit since we moved to LA and we had such a wonderful time! Last year we took them to Disneyland, some of our favorite parks, Hollywood and a few of our favorite local places. After another year of homeschooling (and another year of living here) we took them to a totally different set of places. We went to Santa Monica because it’s the kid’s favorite place and we showed off the Heal the Bay Aquarium, Venice Beach, Aquarium of the Pacific, Crafted at the Port of LA, The California Science Center, The La Brea Tar Pits and The LA Zoo. We touched moon jellyfish, starfish, anemones, urchins, hammerhead sharks, and sting rays! The kids used a pulley system to lift a truck and we all saw the space shuttle Endevour! We also of course watched Wee One #1 do his jiujitsu classes and Wee One #2 do her dance lessons and Wee One #3 was more than happy to show them around one of her favorite places, the Aquarium of the Pacific. I’m still recovering from it all, but it was so great. There was a lot of barbecuing together, late nights full of laughter and lazy mornings full of sleeping in. My husband and I even managed to get out one night with our friends to a fair. We fit school in around all the adventuring and the kids got to bring their grandparents to homeschool check in day!

Megan, over at Brassy Apple mentioned on Facebook last week that there are 15 Saturdays until Christmas. I? Exploded. I’m just starting to get hyped about Halloween! It does remind me that there is a lot of knitting and cross stitching to be done so maybe I should stop drooling over patterns on Ravelry and get knitting!

Learning about seahorses at Heal the Bay Aquarium
Venice boardwalk
Touching moon jellyfish at The Aquarium of the Pacific
Starfish and a sea cucumber at The Aquarium of the Pacific
Touching sting rays at The Aquarium of the Pacific
Crafted at the Port of LA
Lomita fair
LA Zoo
Jiujitsu
Dance

Learning about seahorses at Heal the Bay Aquarium, Venice Beach, Touching moon jellyfish, starfish, a sea cucumber and a sting ray at Aquarium of the Pacific, 2 Market Street cookie cutter shop at Crafted at the Port of LA, the LA Zoo, Lomita fair, (not so) Wee One #1 training at jiujitsu, and Wee One #2 mastering her middle splits!

No Comments

Strawberry Ninjas

California, Healthy, Kids

This is not a recipe, it’s just a cute idea. It takes less than 10 minutes and it’s really adorable. All day in the sun was super fun and calls for some strawberry ninjas.

Strawberry Ninjas
fresh strawberries (hulled)
fresh whipped cream
mini chocolate chips

All you do is place the hulled strawberries upside down and cut enough of the point off so you can fill it from the top. Remove the point, fill the strawberry with whipped cream and put the point back on. Pop mini chocolate chips in as eyes and voila. Super cute snack for pretty much anytime.

Strawberry Ninjas

I spent the day at Seaside Lagoon with all the littles. With the load of work we have for homeschool this year, I’m not really a fan of taking a day for the beach, but I made an exception today because this is their favorite spot and it’s seasonal so it closes for the off seasons this weekend. Our last time for 2013 was super fun and I’m looking forward to going back again next year.

Strawberry Ninjas
Strawberry Ninjas
Strawberry Ninjas
Strawberry Ninjas
No Comments

Mozzarella Sticks

Domestic

Mozzarella Sticks are standard pub fare and often accompany pizza on family game night with garlic bread, because when are you ever going to have time to make them yourself – and why would you? They must take hours right? And you can’t just make it with stuff you probably already have in your pantry RIGHT NOW, can you? I swear, these little snacks go from passing thought to burning your greedy fingers in less than 30 minutes. No, honest. I have seen versions of them kicking around online but I didn’t trust that any recipe I could make myself would come close to the glorious fried gooeyness Mr So Very Domestic adores so much. And you know, given that I clearly refer to myself as ‘so very domestic’, I take kitchen fails as crushing blows to my womanhood a little harsher than most others. Ahem.

Then my husband got me The Pioneer Woman’s cookbook and this little gem was in there! I adore Miss Ree so much I’d never reprint a recipe from her book – however, she first posted this on her recipe site Tasty Kitchen over 3 years ago, so I think it’s ok. 😉

I am all over any excuse for my husband and I to play around in the kitchen (no, not like that). He especially likes to offer up help with frying, shaping and any cutting that looks the least bit complicated or fun (hello scalloped potatoes and my mandolin). When we make these, we save even more time by working together so we can get back to the movie watching / Chinese checker playing / whatever silly thing we are doing at 1am while making food we shouldn’t. We have been known to even make these for the kids, but since only 1/3 of them likes them it’s still a pretty self indulgent endeavour. I set up the bowls of flour / egg / crust and he opens and cuts up the cheese.

I bread a few while the oil heats up and then he fries as I finish breading. Match made in heaven, really.

Here are the deets!

Mozzarella Sticks

Mozzarella Sticks via The Pioneer Woman
16 pieces string cheese, (removed from wrappers)*
½ cups flour
2 eggs
3 tablespoons milk
1 tablespoon dried parsley flakes
canola oil (for frying)
2 cups panko bread crumbs

*you’ll get two mozzarella sticks per string cheese, so just use as many as you need

First, unwrap all the string cheese you need and cut each piece in half. We’ve also experimented with making the sticks smaller by cutting each string cheese in three pieces. It works better that way for a crowd so you have more pieces but if there are just two or three people, halves is fine. Then prep the bowls. You’ll need one with the flour, one with the egg and milk and one with the panko and parsley. Just like when you’re making fish and chips, roll the cheese first in the flour, then the egg and then the breadcrumbs. Make sure each piece is well coated each time so it all sticks!
Mozzarella Sticks
Mozzarella Sticks
PW flash freezes these before she fries them but really ain’t nobody got time fo’ that!, so we just jump on in. Fry as many at a time as you feel comfortable with. We usually do about 6 or 8 at a time, but we have been known to be snacky and impatient (a dangerous combo really) and make them all in two batches. It doesn’t take long to cook these babies! The entire operation in the pan is under two minutes for sure. Just marvel as they turn a lovely golden brown about 45 second after you drop them in the oil, poke them a bit to turn them over around the one minute mark and take them out before the two minute mark.
Mozzarella Sticks
Mozzarella Sticks
I know right?!
Mozzarella Sticks
My husband eats them with nothing at all, I love them in marinara sauce or a sweet and sour sauce. Our one, lone mozzarella stick loving child (how are the rest even related to us?!) looooves them with ketchup. She’s 4, so ketchup is still socially acceptable on pretty much everything, right? No matter what you eat them with, they’re crazy amazing and so much better than they are at restaurants or from frozen.
Mozzarella Sticks
Mozzarella Sticks
No Comments

Alphabet and Number Matching Wheels

Homeschooling, Kids

This year, Wee One #3 would be starting kindergarten if we were still in Canada. We’re all happy to be homeschooling, and we’re all happy to be down here but it feels really weird to not be registering our four year old for kindergarten. So while I can’t officially enroll her in the same homeschooling program our other two are in, I can start formally homeschooling her. I will drone on about that more next week. 🙂

Right now, I’m excited about some of the supplemental activities I’ve pulled together for her. There are a lot of great finds over at Confessions of a Homeschooler, and these wheels are two of them. I find that after kids learn something new, it’s important to make sure they practice it enough that it sticks but not so they are bored with it. These matching wheels are awesome for reaffirming what kids already know, but are not so boring that they’re over them if they know the material already.

Our kindergartener is still working on matching up some of the uppercase / lowercase letters and having the alphabet wheel in my (admittedly huge) purse has been really helpful for her learning some of the lowercase letters in small doses and it has the very pleasant side effect of keeping her engaged and happy while waiting at doctor offices and the like. She uses them at home sometimes too when I am busy with the other kid’s lessons and so far, so good! We have alphabet and number flash cards and worksheets in folders that she will dig out just so she can clip the matching clothespin to them!

If you’ve been homeschooling for any length of time, I’m sure I don’t have to tell you to invest in a good laminating machine! I only mention it because I try to buy things based on recommendations from others who get heavy use out of items I know I’m going to get heavy use out of, and I love my Scotch Laminator!

Alphabet and Number Matching Wheels

Huge thank yous go out to Confessions of a Homeschooler for making these printables and making them available free for personal use! All you need is a printer, a laminating machine, wooden clothespins and a marker! I keep each set in gallon-size Ziploc bags.

The number wheel has dots from 1-10 and clothespins with the matching numbers on them. Since there are no dots on the clothespins and no numbers on the wheel, this wheel is wonderful to drive home a lesson on numbers or review the same concepts a few days later. This wheel has helped our kindergartener to have a solid understanding of numbers up to 10. There is another wheel available for the numbers 11-20.

Alphabet and Number Matching Wheels

The alphabet wheel follows the same basic idea as the number wheel with the uppercase letters on the wheel and the lowercase letters printed on clothespins. This is a little trickier of course, since there is so much more to remember. Trying to teach a pre schooler or even a kindergartener the entire alphabet at once is overwhelming, but a few letters at a time breaks it down into manageable pieces and teaching aids like this one are perfect for both reviewing and introducing new letters!

Alphabet and Number Matching Wheels
No Comments

Baking With Kids – Sticky Toffee Pudding

Domestic, Kids

This is a hit or miss when it comes to the kids actually eating it at the end, but Miss Wee One #3 really liked making it. Some of our friends in the 10 and over crowd liked it, all the adults who tried it loved it, but none of the littlest ones liked it very much. Except for the syrup. Oh my. It so good, I made extra to give to a friend that loves caramel because it has that caramel taste to it (it’s only one ingredient away from the Amish caramel I make). I haven’t tried yet, but I’d imagine it would be perfect on everything from ice cream to apple slices.

I think the syrup is the main attraction here and it really takes the date cake over the top, but the cake itself is pretty good. It is a spice cake dotted with dates which really make or brake loving this or not. If you’re into them, it’s a win. If you’re not, just leave them out!

Baking With Kids - Sticky Toffee Pudding

Sticky Toffee Pudding via Baking with Kids

Cake:
1 cup pitted, chopped dates
1 1/4 cups boiling water
1 teaspoon baking soda
4 tablespoons unsalted butter, softened
3/4 cup granulated sugar
1/2 teaspoon vanilla extract
2 extra large eggs
1 2/3 cups flour
1 teaspoon baking powder
Syrup:
2/3 cup brown sugar
4 tablespoons butter
1 cup light cream

Preheat to 350, and pour the boiling water over the chopped dates. Add the baking soda and let it sit for a while.

Mix the sugar, butter and vanilla until well combined. Whisk the eggs on their own to break them up and then add them to the sugar/butter mixture one at a time. Make sure it’s well mixed each time.

Baking With Kids - Sticky Toffee Pudding
Here’s the water/dates/baking soda ready to roll.
Baking With Kids - Sticky Toffee Pudding
Sift the baking powder with the flour and add to the egg/butter/sugar mixture, then add the water and date mixture and mix it up!
Bake for about 45 minutes.
Baking With Kids - Sticky Toffee Pudding
Make the syrup while the cake is baking by heating brown sugar, butter and cream until it starts to bubble and crystallize at the edges.

Baking With Kids - Sticky Toffee Pudding
Once the cake is ready, chop it up however you like and then drown it in the syrup. Voila!

Baking With Kids - Sticky Toffee Pudding
No Comments

First Day Teacher Gifts

Crafty, Kids

Today is the first day of school across the LAUSD – for the homeschoolers as well! In our case, we check in with one elementary school teacher and one middle school teacher so we have the same teachers as last year! Fun! I pulled together a couple of sweet ideas I had pinned a while ago to usher in the new school year right.

A lot of homeschoolers don’t like working with their school boards, and I’m not really sure why. I love having teachers to go to with questions about the kid’s work and also being able to work closely with them in an independent study program is wonderful because we can tailor projects and activities to fit them while at the same time working in a school situation that comes with report cards and transcripts!

One of our daughters, Wee One #2 has been working hard over the last year to fast track through second and third grade. She has just a couple of months left in 3rd grade and then she’ll be able to start on 4th. Thankfully, we have the same teacher until 5th grad to help us get through the process! She’s a really sweet person and a great teacher!

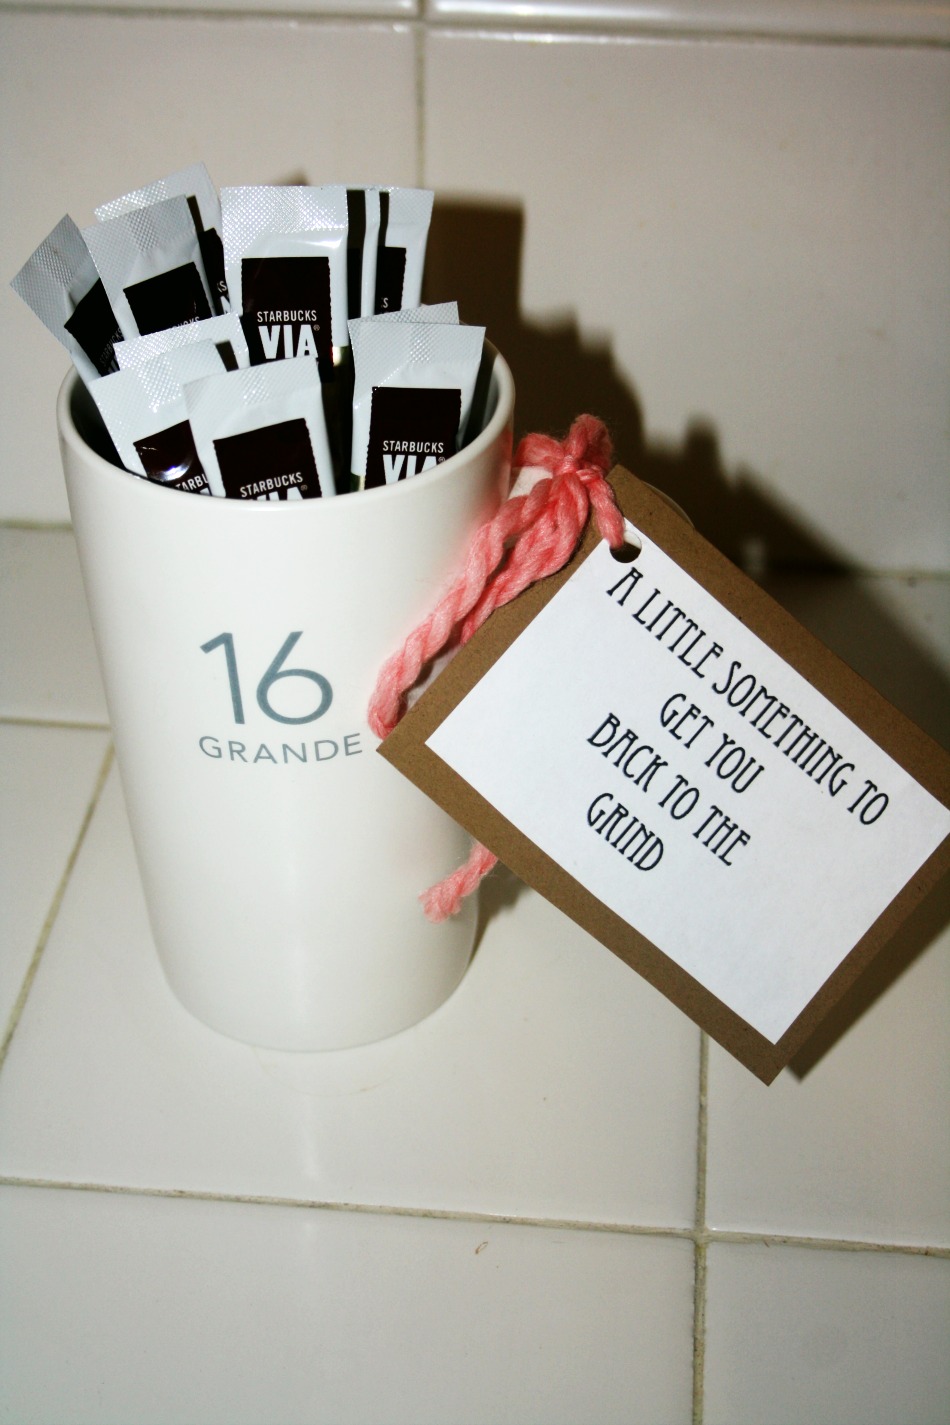
She drinks coffee and we have a similar sense of humor so I thought she’d both find this gift funny and useful. It a 16oz Starbucks mug filled with Starbucks instant French Roast coffee packets. The little note is a reproduction I’ve seen all over Pinterest – a little something to get you back to the grind. That’s delicious cheese, amirite?!

The VIA packets are shorter than the cup and didn’t look very pretty at first so I turned a paper Starbucks espresso cup upside down in it and put the packets on top of that so they stuck out more. I have yet to knit with this yarn, but I used a little Biggo yarn in Dogwood Heather from Knit Picks to attach the note (which is just cut out and backed onto brown card stock).

First Day Teacher Gifts

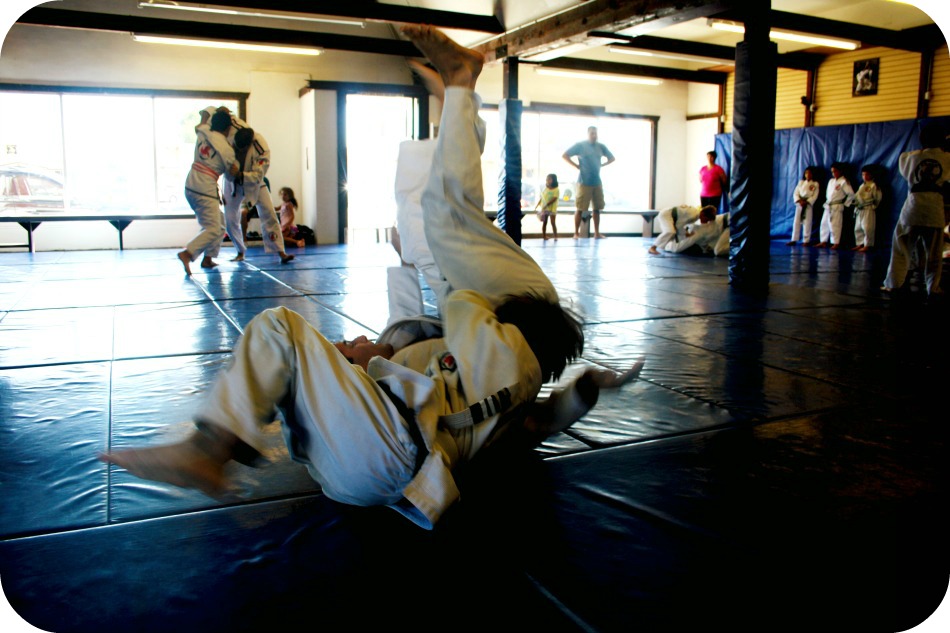
Our oldest’s teacher has been amazing in helping us with the transition to homeschooling a middle schooler, which is an entirely different beast than homeschoooling an elementary aged child! He has the same passion for art that our son has so they hit it off right away. So much in fact, that he’s comfortable calling him if he has questions about an assignment or if he just wants to clarify something. Such a great benefit to independent study!

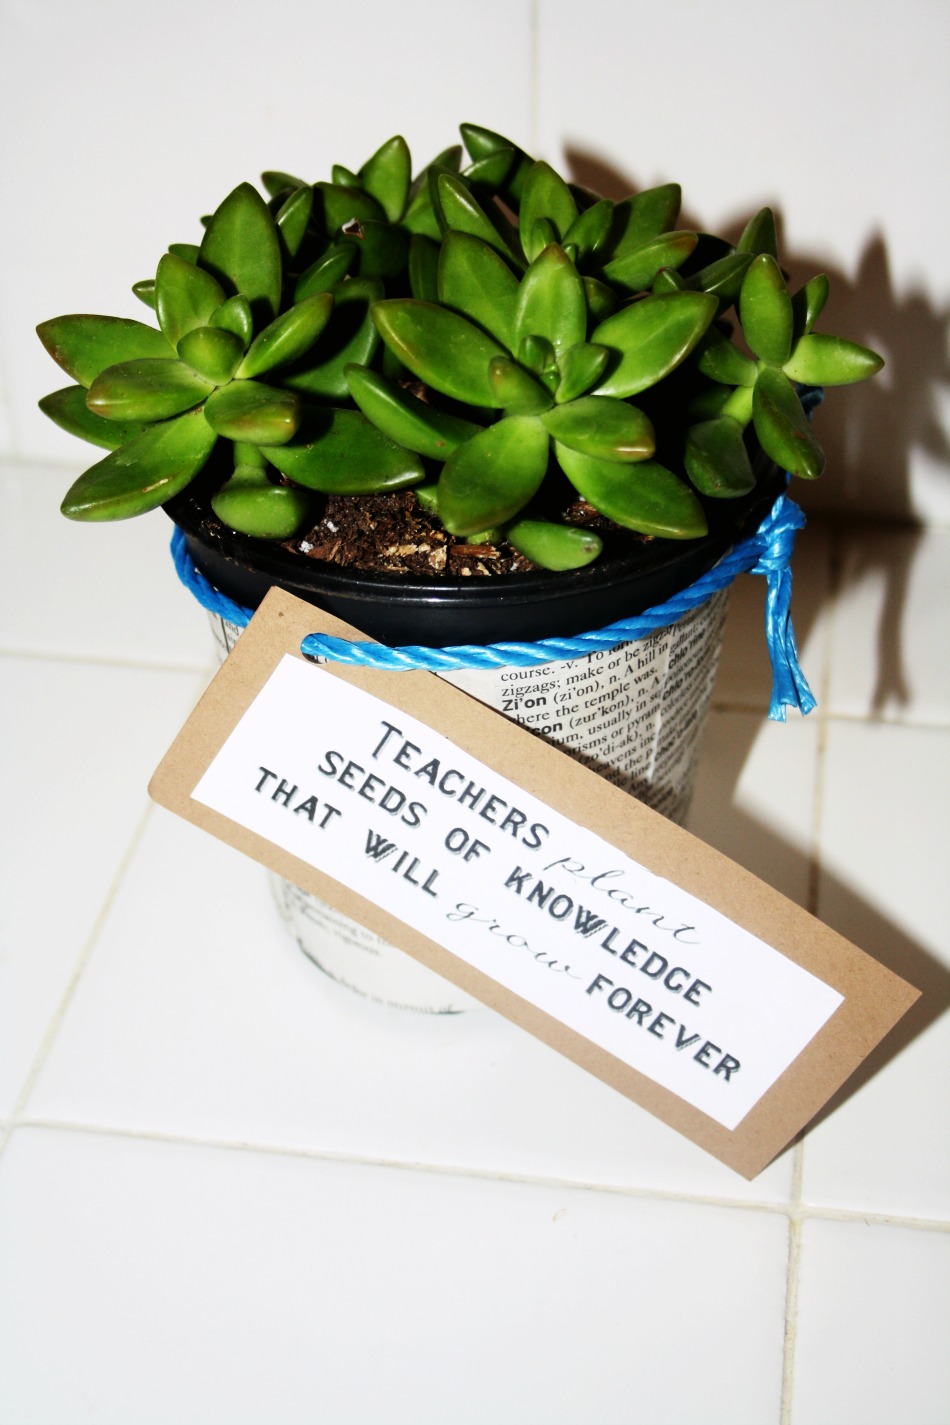
I hope he likes this little something, I know he likes plants and since he’s working with older kids whose attention can be even harder to hold than small children, hopefully his note will speak to him. 🙂 Teachers plant seeds of knowledge that will grow forever. I went with a cactus since it’s pretty hard to kill them and it went with the whole ‘forever’ theme!

To decorate the pot the cactus came in, I glued pages from the world’s most pathetic dictionary* (the word teach isn’t even in it) to the sides and attached his card stock-backed note with some backyard rope.

First Day Teacher Gifts

I mention that it was a terrible dictionary because the idea of ripping pages from a dictionary (or any book really) totally horrifies me. It had no words between tea and team, for example. It also had a ‘computer terminology’ page at the very back with terms like ‘USB’ and ‘internet’. My husband insisted I laminate it so he could take it to work with him because he is a hilariously ironic dude when he wants to be.

No Comments

Baking with Kids – Banana Loaf

Domestic, Kids

We have made this recipe so many times, I’ve lost count. These pictures are from the first time we made it and they make me nostalgic for our old house, though I quickly remember the snow raging outside so much of the time and then I’m thankful for the beach. 😉

Where ever we are, there is always a lot of baking going on, and this recipe has been one of the ones that has moved around with us. The only down side to non stop summer is there are no cold winter nights that it makes sense to bake something like this on, but of course we bake it anyway!

Baking with Kids - Banana Loaf

Banana Loaf via Baking with Kids

2 cups flour
1 teaspoon baking soda
pinch salt
1/2 cup packed light brown sugar
1/2 cup granulated sugar
7 tablespoons butter
2 eggs
2 large bananas, mashed
1/2 cup chocolate chips or chunks

It’s a pretty standard banana bread recipe, but it’s so so good!

Preheat the oven to 350, and grease a loaf pan.

Sift the flour, baking soda and salt into a mixing bowl and stir in both sugars. Make a little well in the middle of the mixture. Melt the butter either in a small pot on the stove or in the microwave and pour that and the eggs into the well. Mix it all up and add the bananas. Mix again and then add the chocolate chips or chunks.

Pour into the loaf pan, pop in the oven and bake for about an hour.

Baking with Kids - Banana Loaf

The best thing about this recipe is the kids can so it almost all themselves, especially if you have an older one to help with melting the butter and pouring the batter into the loaf pan. The satisfaction they get from cracking eggs, mixing, stirring and baking is one of those unmatched things. Making something the rest of the family loves is pretty special too! It helps that this loaf is so moist and just sweet enough. It’s not overpowering with the banana flavor either, just perfect – which is probably why we’ve made it so many times!

No Comments
« Older Posts
Newer Posts »