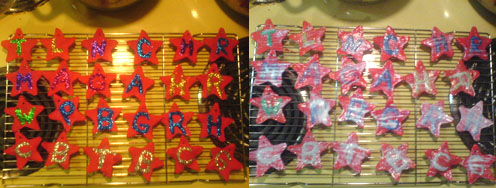
Salt dough is great for making super cute personalized gift tags or you can make ornaments and decorate them however you want! I have made this recipe into so many different shapes for both gift tags and ornaments. Our girls made really elaborate, sparkley, seriously blinged out ornaments to send to their grandparents and aunties back home and I will post those later this month. I made some bright red gift tags a couple of years ago for the kid’s friends at school. There were a lot of steps to it, but most of the time was in waiting for the paint or mod podge to dry. I made the dough, cut out a zillion stars and painted one side red. Waited for them to dry. Then painted the other side red. Waited for that to dry. Then I used a paintbrush to paint on the initial of the recipient in glue and covered it in glitter. Waited for the glue to dry. Covered that side in mod podge. Waited for that to dry. Then I mod podged the back and once that finally dried I tied some red yarn through the hole to hang them from. So cute! Seeing them again makes me want to make more!

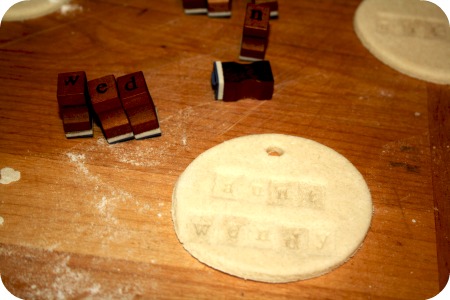
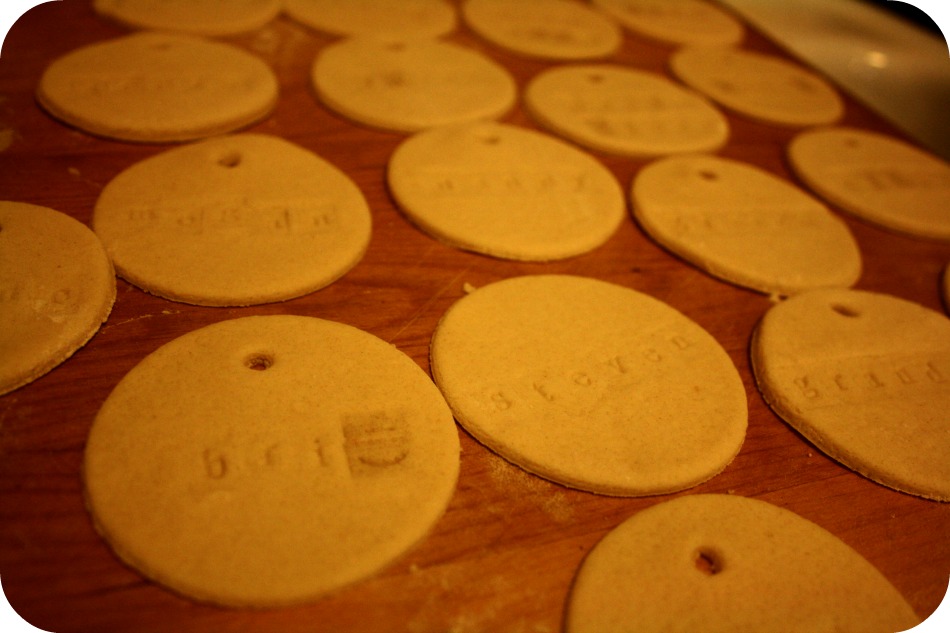
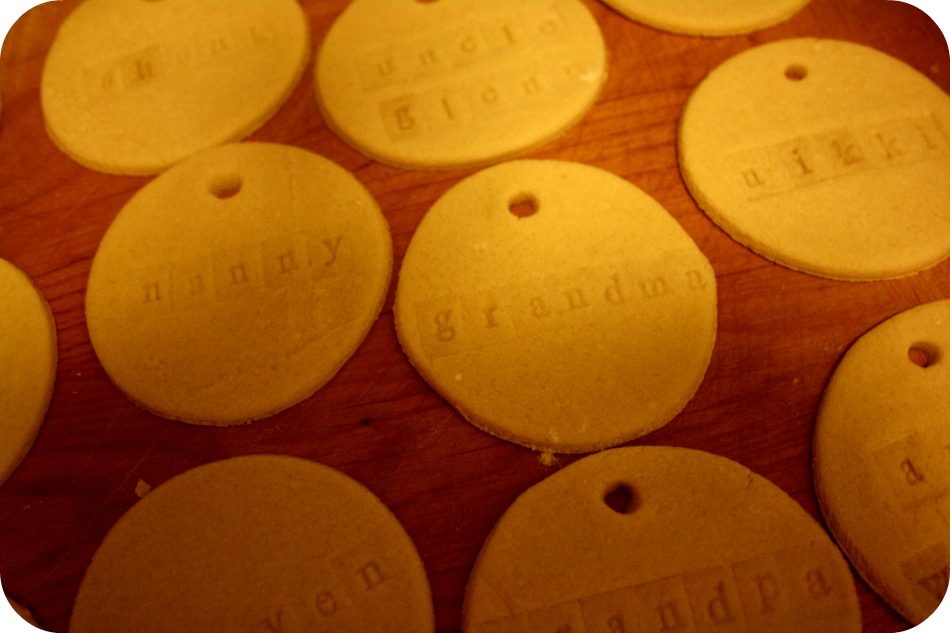
This year for gift tags I’m going more rustic because of a really cute alphabet stamp set I found on Etsy. I bought them specifically to use with food so while these gift tags don’t really count as food, they have never had any ink on them so there is no residue. If you choose to use stamps for letters try to wash off any ink that may be stuck inside them first.
1 cup flour
1/2 cup salt
1/2 cup water
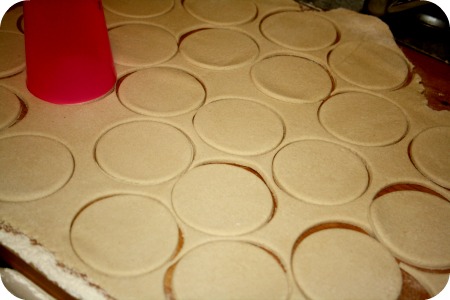
This is incredibly easy and while I always start with this general recipe, I also always add more flour. Preheat the oven first, to 250. Just mix the flour, salt and water with the hook attachment on your mixer or by hand for a few minutes and then turn it out onto a floured surface and keep kneading it until it’s elasticy. You will likely need to add more flour to make it smooth. It will be sticky, don’t panic, just keep kneading in more flour until it’s almost like play doh. Now you can roll it out and cut out whatever shapes you like. If you’re going to use stamps or something to make indentations in the dough, do it before you bake. Don’t bake glitter or other embellishments because they will end up melty and gross, not at all cute. Also, make sure you poke a hole in the tops of these babies before you bake them! A plastic straw is the perfect size.
Bake for about 2 hours and then let them cook before you paint, glitter, mod podge or whatever.
There are so many ways to dress these up and so many other kinds of dough you can make for different kinds of ornaments. We are going to do some crafty kitchen experiments this weekend to see what kinds of dough work the best.