Browsing the archives for the strawberry rhubarb pie tag.

Pies, Socks and Scones (in that order)

Crafty, Domestic

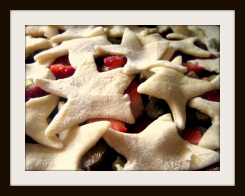
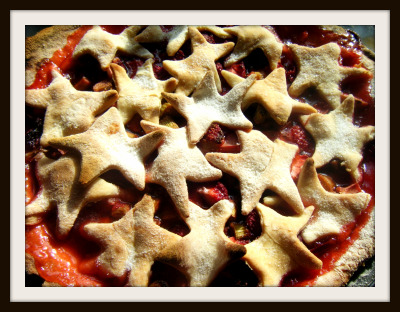
At the end of 2008, I declared 2009 ‘Pie Year’, for a dear friend who would choose pie over cake or ice cream or brownies – every time. Most of the pies I’ve made this year have been adored by everyone who ate them, with a few exceptions but generally if one person didn’t like a certain pie someone else did. This held true until I attempted Shoo Fly Pie aka Maple Syrup Pie. Either I can’t read a recipe (and 6 months of successful pies would say otherwise) or this pie just isn’t very good. I wont even post photos of it. Once a slice was cut and you looked away, it would all sort of fall back into itself and you’d never even know a slice was removed. Scary. So the following week I had to redeem myself by baking two of the easiest pies known to man – Pumpkin Pie and Cherry Pie.

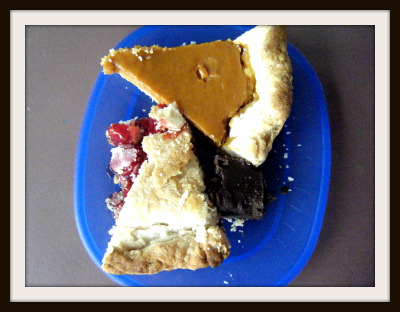
These two are not the only pies in this post, but they are both fantastically simple and worth mentioning. Generally, when I make Cherry Pie, I use Martha’s Sour Cherry Pie recipe. This week however, I was asked to use a can (the horror!) because one of my knitting group ladies loves cherry pie filling from a can. For the Pumpkin Pie, I often use my Grandmother’s recipe but this time I used a Paula Deen recipe and it was fantastic! Cream cheese and half and half isn’t exactly the best for the waistline, but really if you go healthy with the pumpkin pie it’s just not the same. This recipe had the added treat of a bit of fresh ginger, too!

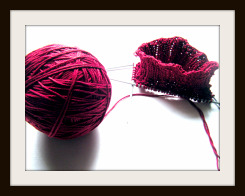
These socks were painstakingly made for my wonderful Mother in Law, and of course, they’re too small. I have to block them. I have wanted to make her socks for a while, but she’s allergic to the fun sock yarns I always have on hand and can only wear cotton socks. I didn’t want to just make her some boring socks so I searched for some nice cotton sock yarn and found this beautiful crimson cotton yarn from Butterfly 10! It’s a bonus that happens to be Greek yarn too! I used the Menehune Cobblestones Socks pattern from Straw. There is a whole gallery of free sock patterns on their site, the toddler socks are so cute and are going in my cue!

I’m sort of bummed that I have to block these because I don’t want to hurt them – but I really, really love the way they knit up.

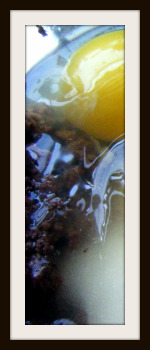
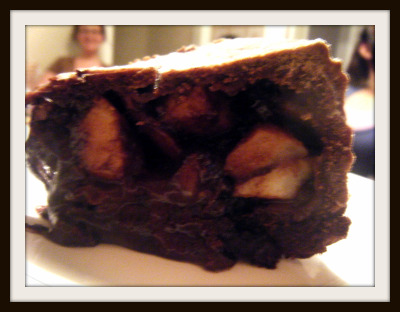
This next pie is my 31st of the year (yes, I’m slacking a little in updating them here), it’s called Satan’s Choice, my sister found it in a book our Grandmother gave me called Pies and Tarts with Schmecks Appeal by a very sweet little lady, Edna Staebler.

#31 – Satan’s Choice

Crumb Crust:
1-1/2 cups cookie crumbs
1/3 to 1/2 cup melted butter
1/3 to 1/2 cup sugar
Filling:
15 large marshmallows
4 almond chocolate bars
1/2 cup milk
1 cup whipping cream
reserved crumbs from crust

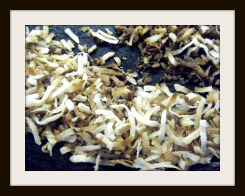
This pie was fairly easy to make, if a little alarming after reading the ingredients. The crumb is a standard crumb and Becel combo, with some sugar as well. Just mix the cookie crumbs with the sugar, add the butter/marg/Becel and pat into your pie pan.

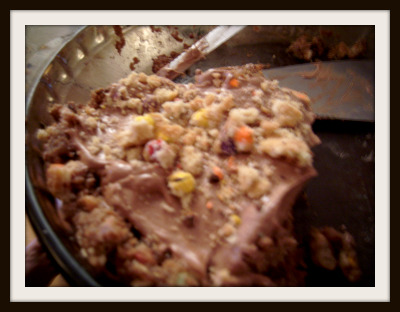
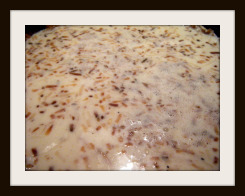
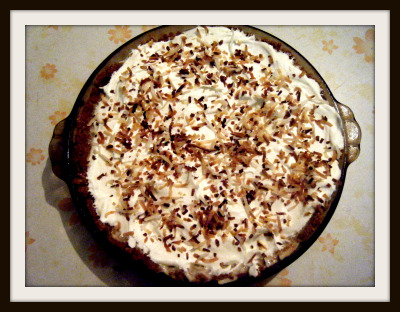
Then melt the marshmallows and chocolate bars with the milk in a double boiler. Cool it in the fridge for half an hour or so, then whip the cream and fold that into the chilled chocolate mixture before pouring the whole thing into the crumb crust. Top it with the rest of the cookie crumbs and chill it again before you cut into it. This was one of my sister’s favorite pies this year and she’s asked me to make it again for her birthday!

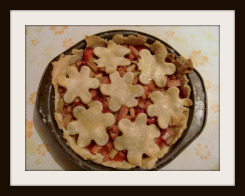
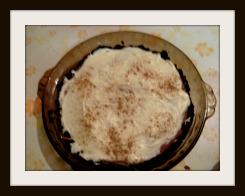
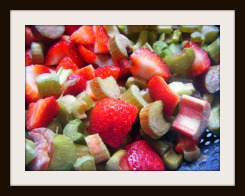
This Strawberry Rhubarb Pie doesn’t count toward my ‘pie a week’ challenge because I already made this one as my 22nd pie this year. The Mud Pie beside (#32) it does though! This recipe came from the Kraft Kitchens. A lot of people have an issue with the big box sites like theirs, but I find it very useful and helpful and I’m sure due to their test kitchens their recipes always work! This pie was a hit and is one of those pies I’ve made this year that I will be recreating again I’m sure.

I’ve recently fallen head over heels for scones. All kinds of scones! I’ve been making apple scones the most often because we always have apples on hand. I have had this recipe for years and no longer know where I got it from. I hadn’t used it much before recently and now I’ve used it 5 or 6 times this month!

Apple Cinnamon Scones

2 cups flour
1/4 cup + 2tbsp sugar
2 tsp baking powder
1/2 tsp baking soda
1/2 tsp salt
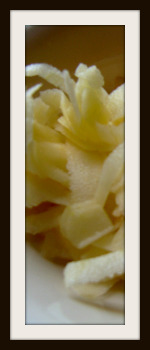
1/4 cup cold butter
1 shredded apple
1/2 cup + 2 tbsp cup milk
1 + 1 tsp ground cinnamon

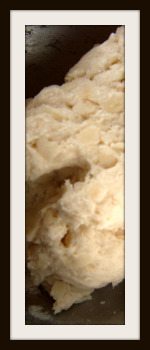
These scones are so easy (and quick) to make, especially with the mixer it’s a 10 minute operation. Mix flour, the 1/4 cup sugar, baking powder, baking soda and salt. In a separate bowl, mix the shredded apple, 1/2 cup milk and cinnamon. Cut the cold butter into the flour mixture and (using the hook attachment) add the milk mixture to it. It forms a dough fairly quickly.

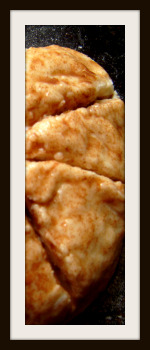
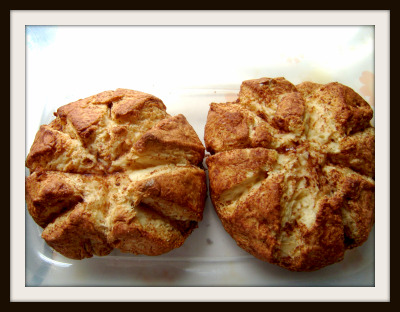
Roll the dough, with the assistance of a handful of flour, into two equal balls. Squish them down a little, and using a sharp knife score slice wedges into them. Whisk the reserved milk, sugar and cinnamon together and brush the dough with it. Bake for 10 minutes at 375, take out to brush with the milk mixture again, and bake for an additional 10 minutes. Ready! This recipe made these.

Next up is more pie, naturally, and weekly pie on vacation!

1 Comment

Three Pies and Piri Piri

Domestic

So much has happened this summer, I can’t post about it all at once, so I’ll break it into multiple posts.

We’ll start with this incredible Coconut Cream Pie I put together. The inspiration came from this Martha Stewart version, but I didn’t want to use meringue on top, and the cream of coconut (while delish) is way too fattening for me to serve it to my friends with a clear conscious! So instead I put together something still fairly fattening, but not over the top – what was over the top was the taste! Amazing. This is pie number 21 in my self-inflicted Pie a Week Challenge!

#21 – Coconut Cream Pie
3 cups of half and half (yeah, I know)
2 eggs
3/4 cup sugar
1/2 cup flour
1/4 tsp salt
1 cup flaked coconut
1 tsp vanilla extract
1 9″ pie shell (baked)
1 cup whipped cream

Before you start, make your pie crust and toast your coconut. I used my standard pie crust and I just toasted the coconut in a frying pan for about 10 minutes on med-high.

In your favorite saucepan, mix half and half, eggs, sugar, flour and salt. Bring this to a boil on low heat and don’t walk away from it! Keep stirring or it will start to scorch. Once it thickens up a little, take it off the stove, and stir in 3/4 of your coconut flakes and the vanilla. Pour the mix into your pie shell, spread the whipped cream on top and sprinkle with the rest of your toasted coconut, then freeze for at least 3 hours.


Voila! Refreshing and creamy Coconut Cream Pie! I served this on a day when my girlfriends and I were planting a vegetable garden in my backyard.

The following week, I made two pies. I had planned to bake a Strawberry Rhubarb Pie for a dear friend who visits every weekend and has a serious soft spot for rhubarb, so that came first. Getting my hands on fresh rhubarb was proving to be harder than I had thought so when I finally had some, there was no question what this week’s pie would be! Presenting pie number 22 of 2009!

#22 – Strawberry Rhubarb Pie:
1 cup + 2 tbsp sugar
1/2 cup flour
1 lb fresh rhubarb
2 pints fresh strawberries
9″ pie crust
2 tbsp butter
1 egg yolk

Preheat your oven to 400 and wash and chop your strawberries and rhubarb. Mix flour and sugar, add strawberries and rhubarb and toss it all around until the fruit is nicely coated. Set this aside for about 20 minutes to set.


Pour the filling into the pie crust, top with a dollop of butter and cover with the top crust. I got a little silly and cut out about 20 stars from the crust and arranged them instead of making a flat top with one star cut out of it as I usually do.

Mix up the yolk and brush it over the pastry, then sprinkle with sugar and pop in the oven for about 30 minutes.

Like a lot of the weirder creations that come out of my kitchen, this started with a proper recipe from a really fun foodie site, Dutch Girl Cooking, emailed to me by a sweet friend who knew I’d love this. I read over the recipe and got so excited! She has made a wonderful step by step on her blog to follow along with. I made the recipe as she posted, but just before I popped it in the oven, one of my Stitch n Bitch ladies came over and suggested I put my cocoa brownies on top – instantly I knew this was a great idea! In the end, I inverted it so the brownie is actually under the pie. So delish, I can’t even explain.

#23 – Brownie Bottomed Chocolate Apple Pie:
Dough
1 1/2 cups flour
3 tbsp cocoa powder
2/3 cup butter
5 tbsp sugar
1/2 tsp vanilla extract
1 tbsp cold water
Filling
7 apples (mix them up!)
2 tbsp butter
1 tsp cinnamon
2 oz (1/4 cup) dark chocolate
sugar
Brownie
1/2 cup flour
1/2 cup cocoa powder
1/4 tsp salt
1/2 cup butter
1 cup sugar
2 large eggs
1 tsp vanilla extract


Instructions for the dough and filling are outlined on Dutch Girl Cooking, but essentially I mixed all the dough ingredients in the Kitchen Aid with the hook attachment and rolled it out. I totally agree that there is no other pan to make this in than a spring-form. I popped the dough in, and smoothed it out and left the edges of the dough hanging off the side of the pan.

I did the apples almost the same as Dutch Girl, except I didn’t cook it as long because I don’t like it as mushy. 🙂 After I poured in the chocolate-apple mix, and folded over the edge of the crust and added the top, we decided to whip up some brownies and put them on top because I had a bigger pan than I thought and had almost 3″ to the top!

For the brownies, melt the butter in a saucepan, then take it off the stove to add the sugar and eggs (one at a time). In a separate bowl, whisk the flour, cocoa, baking powder and salt before slowly adding that mix to the warm sugar mix. Pour that out on top of the pie and pop the whole thing in the (preheated to 350) oven for about 35 minutes. Once it cooled off, I opened the spring-form and flipped it upside down to put the brownies on the bottom. Next time I make this (and there will certainly be a next time) I’ll put wee cutouts on the bottom of the pan so they’re on top when I turn it out!

Years ago, my husband machine had an office job outside of the house (the horror!), and he went to a little Portuguese place for lunch all the time. He raved about this not-too-hot sauce that came with a chicken/rice/mini potato lunch. He’s been working at home for two years now and hasn’t had this sauce at all, until wee one #3’s baptism in May. The place we got our chicken from this time around included this sauce and I set out to recreate it! He said I came pretty close!

Maytina’s Piri Piri Sauce – Take One
1-1/4 cups olive oil
4 jalapeno peppers
2 sprigs fresh oregano
1 tbsp paprika
3 cloves garlic
2 green onions


Chop the peppers, if you like it really hot include the seeds. If you like it ‘pinchy’ but not too hot, leave them out. I left them out. Chop your oregano, green onions and garlic as well, and add all but the garlic to a saucepan with the olive oil.

Stir till the peppers get mushy, then add the paprika and chopped garlic. Cook for a few more minutes, until garlic is soft. Then pour the entire mixture through a sieve over your jar and let the liquid sit, sealed, at the back of the fridge for a week before you use it. Goes great over lemon chicken, potatoes or rice.


3 Comments